Air Fryer Honey Garlic Chicken Breast with Crispy Edges and Sticky Glaze
Juicy air fryer chicken breasts with deliberately crispy edges and a glossy honey-garlic glaze. This quick recipe yields a sticky, savory-sweet finish perfect for weeknights, with tips to maximize edge crispiness in the air fryer.
About This Recipe
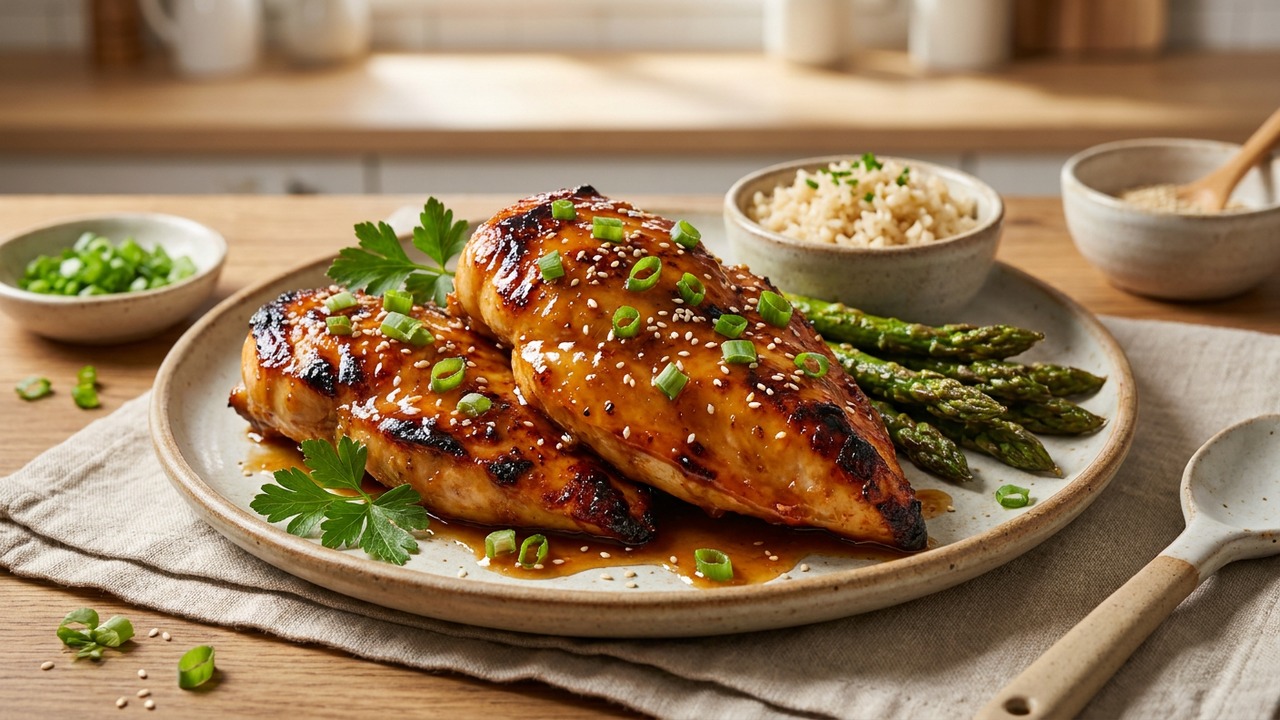
This honey-garlic air fryer chicken is built around a simple, deliberate contrast: a juicy, just-cooked interior and deliberately crispy, lacy edges that catch the sticky-sweet glaze. The combination of honey, soy, garlic, and a touch of rice vinegar gives you a bright but rich glaze that clings to the chicken without becoming cloying, while the cornstarch-plus-oil coating creates a golden, almost seared rim without any heavy breading. It’s the kind of weeknight main that feels special without requiring a long marinade or complicated technique.
What makes this version work is the workflow: dry the meat, even its thickness, give the cornstarch a moment to adhere, and use a two-stage cook so the glaze only sees high heat briefly. That short return to the air fryer caramelizes the sugars into a glossy finish but avoids burning. This recipe suits busy cooks who want restaurant-style texture from an air fryer, people cooking for small families, or anyone who appreciates a high-contrast bite where sticky-sweet meets crunchy edge.
Ingredients for Air Fryer Honey Garlic Chicken Breast with Crispy Edges and Sticky Glaze
- 4 breasts Boneless skinless chicken breasts
- 1 tsp Kosher salt
- 1/2 tsp Freshly ground black pepper
- 3 tbsp Cornstarch
- 1 tbsp Olive oil
- 3 tbsp Honey
- 2 tbsp Low-sodium soy sauce
- 3 cloves Garlic, minced (about 3 medium cloves)
- 1 tbsp Rice vinegar
- 2 stalks Green onions, thinly sliced (for garnish)
How to Make Air Fryer Honey Garlic Chicken Breast with Crispy Edges and Sticky Glaze
Step 1: Prepare and season the chicken
Trim any excess fat and, if breasts are very thick, butterfly or pound them to an even thickness (about 3/4 inch) so they cook evenly and develop crisp edges. Pat the chicken very dry with paper towels, then season both sides with kosher salt and black pepper. Drying is critical — moisture prevents crisping, so spend time here.For this step
- 4 breastsBoneless skinless chicken breasts
- 1 tspKosher salt
- 1/2 tspFreshly ground black pepper
Step 2: Lightly coat to encourage crisp edges
In a shallow bowl combine the cornstarch with the olive oil to make a loose paste, then rub or brush this mixture evenly over both sides and the edges of each breast. The thin cornstarch coating plus oil helps form a crisp exterior in the air fryer without breading. Let the coated breasts rest 2–3 minutes to adhere.For this step
- 3 tbspCornstarch
- 1 tbspOlive oil
Step 3: Air fry until edges are crisp and chicken is nearly cooked
Preheat the air fryer to 400°F (200°C). Place the breasts in a single layer in the basket with space between them and air fry for 7 minutes, flip, then air fry for another 5–7 minutes until the exterior is golden at the edges and the internal temperature reads 160°F (71°C). Timing varies by thickness—remove when nearly 160°F because glaze will finish cooking them.Step 4: Make the honey-garlic glaze
While the chicken cooks, whisk together the honey, soy sauce, minced garlic, and rice vinegar in a small bowl until smooth. Warm the mixture briefly in a small saucepan over low heat or microwave 20–30 seconds to meld flavors and loosen the honey so it will coat the chicken easily. Taste and adjust balance — add a splash more vinegar for brightness if desired.For this step
- 3 tbspHoney
- 2 tbspLow-sodium soy sauce
- 3 clovesGarlic, minced (about 3 medium cloves)
- 1 tbspRice vinegar
Step 5: Glaze and finish with a quick crisp
Brush the hot chicken generously with the honey-garlic glaze, then return the glazed breasts to the air fryer for 1–2 minutes at 400°F to set and slightly caramelize the glaze. Remove, brush a second light layer if desired, and let rest 3 minutes; garnish with sliced green onions before serving for a fresh finish. The short return to high heat concentrates the glaze into a sticky, glossy coating without burning.For this step
- 2 stalksGreen onions, thinly sliced (for garnish)


- Trim any excess fat and, if breasts are very thick, butterfly or pound them to an even thickness (about 3/4 inch) so they cook evenly and develop crisp edges. Pat the chicken very dry with paper towels, then season both sides with kosher salt and black pepper. Drying is critical — moisture prevents crisping, so spend time here.
- In a shallow bowl combine the cornstarch with the olive oil to make a loose paste, then rub or brush this mixture evenly over both sides and the edges of each breast. The thin cornstarch coating plus oil helps form a crisp exterior in the air fryer without breading. Let the coated breasts rest 2–3 minutes to adhere.
- Preheat the air fryer to 400°F (200°C). Place the breasts in a single layer in the basket with space between them and air fry for 7 minutes, flip, then air fry for another 5–7 minutes until the exterior is golden at the edges and the internal temperature reads 160°F (71°C). Timing varies by thickness—remove when nearly 160°F because glaze will finish cooking them.
- While the chicken cooks, whisk together the honey, soy sauce, minced garlic, and rice vinegar in a small bowl until smooth. Warm the mixture briefly in a small saucepan over low heat or microwave 20–30 seconds to meld flavors and loosen the honey so it will coat the chicken easily. Taste and adjust balance — add a splash more vinegar for brightness if desired.
- Brush the hot chicken generously with the honey-garlic glaze, then return the glazed breasts to the air fryer for 1–2 minutes at 400°F to set and slightly caramelize the glaze. Remove, brush a second light layer if desired, and let rest 3 minutes; garnish with sliced green onions before serving for a fresh finish. The short return to high heat concentrates the glaze into a sticky, glossy coating without burning.
Air Fryer Honey Garlic Chicken Breast with Crispy Edges and Sticky Glaze Tips
Pat Dry Thoroughly
Spend extra time blotting the breasts with paper towels; removing surface moisture is the single biggest factor in achieving crisp edges in the air fryer.
Even Thickness Matters
Pound or butterfly to about 3/4 inch so the chicken cooks evenly and the edges have time to brown before the center overcooks.
Cornstarch-Oil Technique
Mixing cornstarch with a little oil creates a thin film that crisps like a light crust without breading—rub it into the sides and edges for maximum effect.
Watch Internal Temp
Remove the chicken when it reaches about 160°F (71°C) because the glaze and short return to the air fryer will bring it to the safe final temperature without drying it out.
Glaze Last, Then Rest
Apply the glaze and give a 1–2 minute blast to set it, then rest the chicken for 3 minutes to let juices redistribute and the glaze tack up.
Air Fryer Honey Garlic Chicken Breast with Crispy Edges and Sticky Glaze Variations and Substitutions
Make It Spicy
Add 1/2–1 teaspoon of Sriracha or chili garlic sauce to the glaze, or sprinkle red pepper flakes over the breasts before the final air-fry to bring a warm heat that balances the honey.
Gluten-Free Swap
Use tamari or coconut aminos in place of soy sauce for a gluten-free glaze; the cornstarch coating is already gluten-free so no other changes are needed.
Maple-Soy Twist
Swap honey for pure maple syrup and add a teaspoon of Dijon mustard to the glaze for a deeper, slightly tangy flavor that caramelizes beautifully.
Bone-In Option
For bone-in chicken breasts, increase initial air-fry time and lower the rack if needed; use a probe thermometer aimed for 160°F before glazing and expect 8–12 extra minutes depending on size.
How to Store and Make Air Fryer Honey Garlic Chicken Breast with Crispy Edges and Sticky Glaze Ahead
Store leftovers in an airtight container in the refrigerator for up to 3–4 days; keep any extra glaze separate if you can. To reheat, refresh in the air fryer at 325–350°F for 4–6 minutes until warmed through to preserve the crisp edges, or reheat in a 350°F oven for 8–10 minutes. If frozen, wrap tightly and freeze for up to 2 months; thaw overnight in the fridge before reheating.
What to Serve With Air Fryer Honey Garlic Chicken Breast with Crispy Edges and Sticky Glaze
Serve over steamed jasmine or brown rice to catch the sticky glaze and add a side of quickly steamed broccoli or sautéed green beans for textural contrast. A bright cucumber salad with rice vinegar and sesame seeds cuts through the sweetness, and a crisp, citrusy white wine or a light lager pairs nicely with the honey-garlic notes. For plating, slice the breasts on the bias to show the juicy interior and spoon any extra glaze over the slices, finishing with sliced green onions and a sprinkle of toasted sesame if desired.
Air Fryer Honey Garlic Chicken Breast with Crispy Edges and Sticky Glaze FAQs
Can I use chicken thighs instead of breasts?
Yes—boneless thighs work well and are more forgiving, but they may need a couple extra minutes and a slightly lower finish temperature; aim for 165°F final and check for doneness in the thickest part.
Why use cornstarch instead of flour or breadcrumbs?
Cornstarch creates a very thin, crisp coating that browns quickly in circulating air and doesn’t insulate the meat like breadcrumbs; it also keeps the exterior light and lets the glaze adhere directly to the chicken.
My glaze burned in the air fryer — how can I prevent that?
Sugars in honey burn quickly at high heat, so brush the glaze on only once the chicken is nearly cooked and limit the final glaze blast to 1–2 minutes at 400°F while watching closely; you can also lower the finish temp to 375°F for a gentler set.
How do I know the chicken is done without a thermometer?
Cut into the thickest part—juices should run clear and the meat should no longer be pink—but a probe thermometer is the most reliable tool; remove at about 160°F because carryover and the glaze will bring it to 165°F while resting.
Can I make the glaze ahead of time?
Yes, store the cooled glaze in the refrigerator for up to 5 days and warm gently before using; if it thickens, loosen it with a teaspoon of water or a quick 10–15 second microwave burst before brushing.
About the author
Jake WoodsHello, I'm Jake. I started this recipe site with the idea that I hated recipe websites that overwhelm you with long stories and ads just to see plain content that's not helpful. My goal is to provide you with quality recipes, simple ideas and a fun cooking experience. There's lots of fun things to cook, and I think as you browse the site you'll find that TopShelf.Recipes is the place for quality recipes on the web.
See all recipes by Jake Woods →Ratings & Reviews
Did you make this recipe?
Be the first to share your experience.
Nutrition Facts
Per serving: 1 serving
Nutrition values are estimated from USDA ingredient data and may vary based on preparation, brands, and portion sizes. Values are provided for informational purposes only.
Keep Reading
Guides & articles for this recipe
Equipment
Air Fryer Trends 2026: 15 Viral Recipes — Birria Tacos, Honey Toast & Beyond
Air fryers continue to dominate search trends in 2026. This roundup pulls together 15 viral air fryer recipes — from quesabirria to Japanese honey toast — with practical temps, times, and equipment tips to help you recreate them at home.

Healthy Eating
Gluten-Free Weeknight Grilling Plan
A 7-day gluten-free weeknight grilling plan with quick, family-friendly recipes, prep-ahead timelines, and a printable shopping list that spotlights late-summer produce and pantry staples. Includes clear cross-contamination safety tips and simple swaps to keep dinners fast and crowd-pleasing.

Healthy Eating
Low-Fat Grill Swaps for Big Flavor
A practical guide to trimming fat from grilled meals without losing juiciness or char. Learn yogurt- and citrus-based marinades, lean protein picks, searing and indirect-heat tricks, plus 5 quick low-fat marinades and a simple weeknight plan.
More from Air Fryer
View all Air Fryer recipes →
Air Fryer Miso-Glazed Salmon Bites with Sesame Rice

How to Make Frozen French Fries Extra Crispy in the Air Fryer

Corn Ribs Cajun Lime Crema

Keto Chicken Nuggets

Air Fryer Banana Muffins

Snake River Farms Beef Tallow Crispy Air Fryer Chicken Wings

Air Fryer Fish Tacos Crispy

Crispy Gluten-Free Cornmeal Fish Tacos with Avocado Lime Crema

Crispy Air Fryer Bratwurst with Quick Mustard Sauce
Ask me anything about this recipe — substitutions, scaling, techniques, timing.
Powered by AI · 6 questions per 5 minutes, 30 per day