Canning Peaches Light Syrup
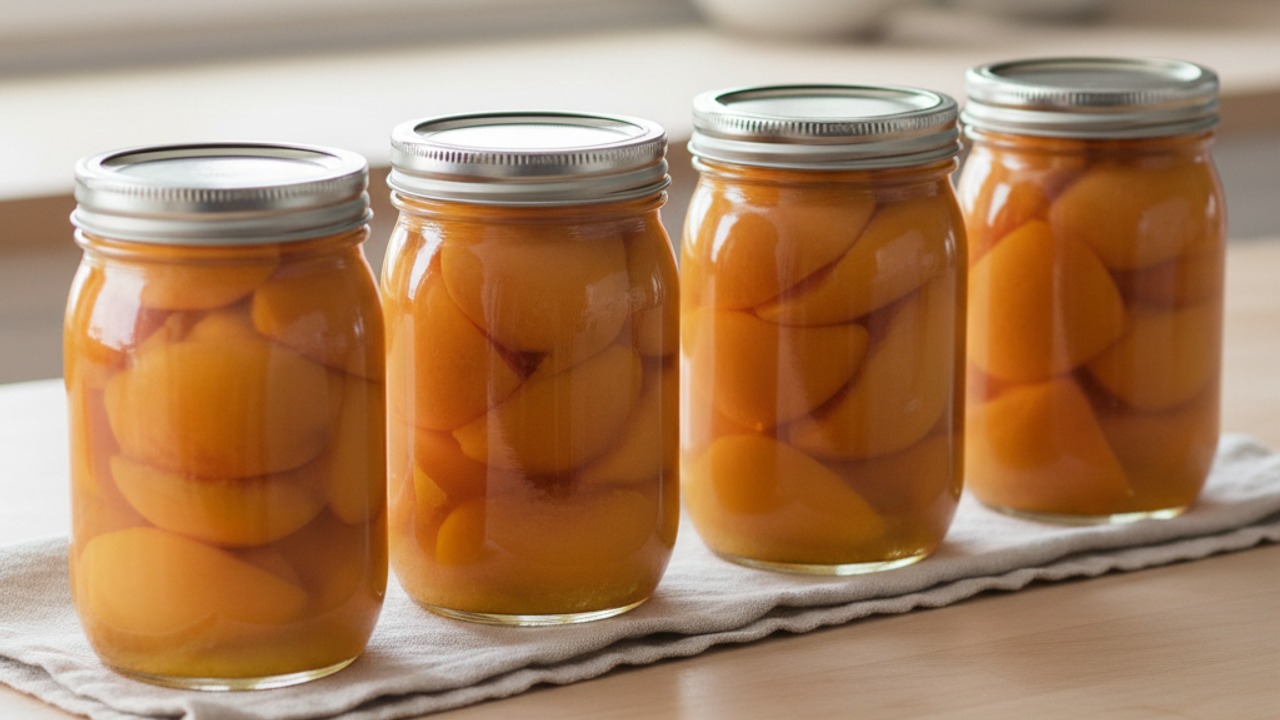
Tender peach halves preserved in a lower-sugar light syrup that highlights fresh fruit flavor while protecting texture. This hot-pack canning method uses a reduced sugar syrup and simple tips to minimize mushiness so peaches stay firm and bright for desserts, breakfast toppings, and snacks.
Jake Woods's note
"This lower-sugar approach keeps peaches tasting like summer — not candy — while using the hot-pack technique to preserve color and texture. It’s perfect for stocking the pantry for desserts, yogurt toppings, or warming over pancakes."
About This Recipe
This recipe is for people who want their summer peaches to taste like summer — bright, aromatic and just sweet enough — without the syrup obliterating the fruit’s flavor. By using a hot-pack method and a reduced 20% sugar syrup, the peaches retain firm, forkable texture while the syrup supports, rather than dominates, their honeyed, floral notes. Blanching and plunging the fruit keeps the flesh intact and makes peeling effortless, and a tablespoon of bottled lemon juice per pint gives the consistent acidity needed for safe, long-term shelf storage.
It’s also a practical pantry project: four pints of gently sweetened peaches dress up breakfast yogurt, roast into a simple galette, or sit prettily on a cheese board. The trickiest moments are timing and temperature — heat the syrup enough to warm the fruit so it settles in the jar and process the pints properly in a boiling-water canner. Follow those details and you’ll have jars that open with a clean pop and peaches that taste almost like biting into a late-July harvest.
Ingredients for Canning Peaches Light Syrup
- 8 medium peaches Firm-ripe peaches
- 6 cups Water (for syrup and blanching)
- 1 1/2 cups Granulated sugar
- 1/2 teaspoon Kosher salt (optional, to enhance flavor)
- 4 tablespoons Bottled lemon juice (for acidification)
- 4 pint jars (16-oz) Clean pint (16-oz) jars, lids and bands
How to Make Canning Peaches Light Syrup
Step 1: Select and prepare peaches
Choose firm-ripe peaches (ripe but not overly soft) for best texture. Bring a large pot of water to a rolling boil; working in batches, blanch whole peaches 30–60 seconds until skins split, then plunge into an ice bath. Slip skins off, halve and remove pits, and keep the cut fruit chilled while you make the syrup — keeping them cool and moving quickly reduces mushiness.For this step
- 8 medium peachesFirm-ripe peaches
- 6 cupsWater (for syrup and blanching)
Step 2: Make the lower-sugar light syrup
Combine the listed 6 cups water, 1½ cups sugar and ½ teaspoon salt in a saucepan and heat until the sugar dissolves and the syrup reaches a gentle simmer. This reduced-sugar syrup (about 20% sugar) preserves flavor without the cloying sweetness; keep it hot but not at a rolling boil while you pack jars.For this step
- 1 1/2 cupsGranulated sugar
- 1/2 teaspoonKosher salt (optional, to enhance flavor)
Step 3: Prepare jars and acidify
Warm or sterilize 4 clean pint jars and place lids in hot (not boiling) water to soften seals. Put 1 tablespoon bottled lemon juice into each pint jar (4 tablespoons total for 4 pints) — using bottled lemon juice ensures a consistent acidity necessary for safe canning. Have your lids, bands, and a jar lifter ready.For this step
- 4 tablespoonsBottled lemon juice (for acidification)
- 4 pint jars (16-oz)Clean pint (16-oz) jars, lids and bands
Step 4: Hot-pack peaches into jars
Briefly heat the peeled peach halves in the hot syrup for 1–2 minutes to warm the fruit (this helps prevent floating and preserves texture). Pack hot peaches tightly into warm jars, leaving 1/2 inch headspace; ladle hot syrup over the fruit to that 1/2 inch, remove air bubbles with a nonmetallic utensil, wipe rims, and apply lids and bands finger-tight.Step 5: Process in a boiling-water canner
Place jars in a boiling-water canner with at least 1–2 inches of water over the tops of jars. Bring to a full boil and process pints for 20 minutes (quarts would be 25 minutes). Adjust processing time for altitude: add 5 minutes for 1,001–3,000 ft, 10 minutes for 3,001–6,000 ft, 15 minutes for 6,001–8,000 ft, and 20 minutes for 8,001–10,000 ft. After processing, turn off heat and let jars sit 5 minutes before removing.Step 6: Cool, check seals and store
Transfer jars to a towel-lined surface and cool undisturbed 12–24 hours. Check seals (lids should not flex), remove bands, label with contents and date, and store in a cool, dark place for up to 12–18 months. Refrigerate after opening and use within a week. This recipe yields about four pint jars and makes a nicely balanced, lower-sugar pantry supply.


- Choose firm-ripe peaches (ripe but not overly soft) for best texture. Bring a large pot of water to a rolling boil; working in batches, blanch whole peaches 30–60 seconds until skins split, then plunge into an ice bath. Slip skins off, halve and remove pits, and keep the cut fruit chilled while you make the syrup — keeping them cool and moving quickly reduces mushiness.
- Combine the listed 6 cups water, 1½ cups sugar and ½ teaspoon salt in a saucepan and heat until the sugar dissolves and the syrup reaches a gentle simmer. This reduced-sugar syrup (about 20% sugar) preserves flavor without the cloying sweetness; keep it hot but not at a rolling boil while you pack jars.
- Warm or sterilize 4 clean pint jars and place lids in hot (not boiling) water to soften seals. Put 1 tablespoon bottled lemon juice into each pint jar (4 tablespoons total for 4 pints) — using bottled lemon juice ensures a consistent acidity necessary for safe canning. Have your lids, bands, and a jar lifter ready.
- Briefly heat the peeled peach halves in the hot syrup for 1–2 minutes to warm the fruit (this helps prevent floating and preserves texture). Pack hot peaches tightly into warm jars, leaving 1/2 inch headspace; ladle hot syrup over the fruit to that 1/2 inch, remove air bubbles with a nonmetallic utensil, wipe rims, and apply lids and bands finger-tight.
- Place jars in a boiling-water canner with at least 1–2 inches of water over the tops of jars. Bring to a full boil and process pints for 20 minutes (quarts would be 25 minutes). Adjust processing time for altitude: add 5 minutes for 1,001–3,000 ft, 10 minutes for 3,001–6,000 ft, 15 minutes for 6,001–8,000 ft, and 20 minutes for 8,001–10,000 ft. After processing, turn off heat and let jars sit 5 minutes before removing.
- Transfer jars to a towel-lined surface and cool undisturbed 12–24 hours. Check seals (lids should not flex), remove bands, label with contents and date, and store in a cool, dark place for up to 12–18 months. Refrigerate after opening and use within a week. This recipe yields about four pint jars and makes a nicely balanced, lower-sugar pantry supply.
Canning Peaches Light Syrup Tips
Choose firm-ripe peaches
Select fruit that yields slightly to pressure but isn’t soft; overripe peaches will turn to mush during processing.
Control blanching time
Blanch 30–60 seconds until the skin just splits, then immediately ice-bath to stop cooking — over-blanching softens flesh and makes peeling harder to do cleanly.
Keep syrup hot
Maintain the syrup at a gentle simmer while packing so the fruit is warmed and less likely to float or shock to mushiness.
Prevent trapped air
Remove air bubbles with a nonmetallic spatula after adding syrup and ensure 1/2 inch headspace for safe seals.
Mind altitude adjustments
Increase processing time according to your elevation; under-processing is the most common safety mistake in home canning.
Canning Peaches Light Syrup Variations and Substitutions
Nectarine swap
Use firm-ripe nectarines in place of peaches for a slightly firmer texture and a tangier skinless finish; follow the same blanch-and-hot-pack steps.
Vanilla and cinnamon
Split a vanilla bean and add it plus a 1-inch cinnamon stick to the syrup while heating for warm, baking-spice notes; remove before packing if desired.
Lighter lemon lift
Add a strip of lemon zest to each jar in addition to the bottled lemon juice for a brighter citrus aroma without changing acidity.
Use light brown sugar
Swap half the granulated sugar for light brown sugar to add caramel depth while keeping the same syrup volume and processing times.
How to Store and Make Canning Peaches Light Syrup Ahead
Store sealed jars in a cool, dark place for best quality, using within 12–18 months for peak flavor; glass jars may darken slightly over time but contents remain usable if the seal is intact. After opening, refrigerate and use within a week, keeping the peaches submerged in their syrup to minimize browning and drying. To reheat, gently warm peaches and syrup on the stovetop over low heat or microwave in short bursts to preserve texture.
What to Serve With Canning Peaches Light Syrup
Spoon chilled peaches over Greek yogurt and granola for breakfast, or warm them slightly and serve with vanilla ice cream and toasted almonds for dessert. They also pair beautifully with ricotta on grilled bread or sliced into salads alongside arugula, toasted walnuts, and a drizzle of aged balsamic. For cocktails, muddle a peach half into a bourbon smash or add a spoonful to sparkling wine.
Canning Peaches Light Syrup FAQs
Can I use frozen peaches instead of fresh?
Fresh is best for texture, but if using frozen peaches thaw and drain them thoroughly, then heat briefly in the syrup before packing; note that frozen fruit is often softer and may yield a mushier finished texture.
Why use bottled lemon juice instead of fresh?
Bottled lemon juice provides a consistent, known acidity level required for safe acidification in home canning, whereas fresh lemon juice varies and could compromise safety.
My syrup is cloudy after processing — is it safe?
Cloudiness is usually harmless and can come from natural fruit solids or the sugar crystallizing; however, if you detect off-odors, bubbling, or bulging lids, discard the jar rather than tasting.
How do I know a jar has sealed properly?
A properly sealed jar will have a concave lid that doesn't flex when pressed, and you should hear a clear 'pop' as it cools; if a lid fails to seal, refrigerate and use within a week or reprocess with a new lid.
Can I reduce the sugar further or make a sugar-free version?
Reducing sugar is fine for flavor because safety comes from proper acidification and processing, but sugar affects texture and color; completely sugar-free syrups are not recommended without following tested recipes because they can alter preservation qualities and final texture.
About the author
Jake WoodsHello, I'm Jake. I started this recipe site with the idea that I hated recipe websites that overwhelm you with long stories and ads just to see plain content that's not helpful. My goal is to provide you with quality recipes, simple ideas and a fun cooking experience. There's lots of fun things to cook, and I think as you browse the site you'll find that TopShelf.Recipes is the place for quality recipes on the web.
See all recipes by Jake Woods →Ratings & Reviews
Did you make this recipe?
Be the first to share your experience.
Nutrition Facts
Per serving: about ¾ cup
Nutrition values are estimated from USDA ingredient data and may vary based on preparation, brands, and portion sizes. Values are provided for informational purposes only.
Keep Reading
Guides & articles for this recipe
Guides
Grilled & Campfire Seasonal Sweets: 12 Crowd‑Favorite Desserts and How to Make Them Year‑Round
A season-by-season guide to 12 grill- and campfire-friendly desserts with flame-safe techniques, make-ahead strategies, vegetarian and gluten-free swaps, plus serving and storage tips so your outdoor sweets shine any time of year.

Guides
Summer Weeknight Grilling Playbook: 4-Week Rotating Meal Plan with Quick Seasonal Recipes, Make‑Ahead Sides & Grill‑First Desserts
A practical, four-week summer grilling playbook built for busy weeknights: 12 fast mains, 8 make‑ahead sides, 4 grill-forward desserts, weekly shopping lists, prep timelines, and smart tips for backyard, tailgate, or campsite cooking. Get the rhythm of easy, seasonal grilling that keeps dinner fresh and fast.

Healthy Eating
Gluten-Free Weeknight Grilling Plan
A 7-day gluten-free weeknight grilling plan with quick, family-friendly recipes, prep-ahead timelines, and a printable shopping list that spotlights late-summer produce and pantry staples. Includes clear cross-contamination safety tips and simple swaps to keep dinners fast and crowd-pleasing.
More from Desserts
View all Desserts recipes →
Easy Peanut Butter Bars

Chocolate Peanut Butter Chex Mix

No-Churn Fresh Berry Ice Cream (No Machine, 5 Ingredients)

Molten Lemon Cake

Boozy Red White Blue Popsicles (Vodka Ice Pops for Adults)

Salted Caramel Stuffed Brownies with Crispy Edges and Sea Salt

Poached Pears with Pistachio

Affogato with Caramel

Cottage Cheese Cookie Dough (High Protein)
Ask me anything about this recipe — substitutions, scaling, techniques, timing.
Powered by AI · 6 questions per 5 minutes, 30 per day