Easy Peanut Butter Bars
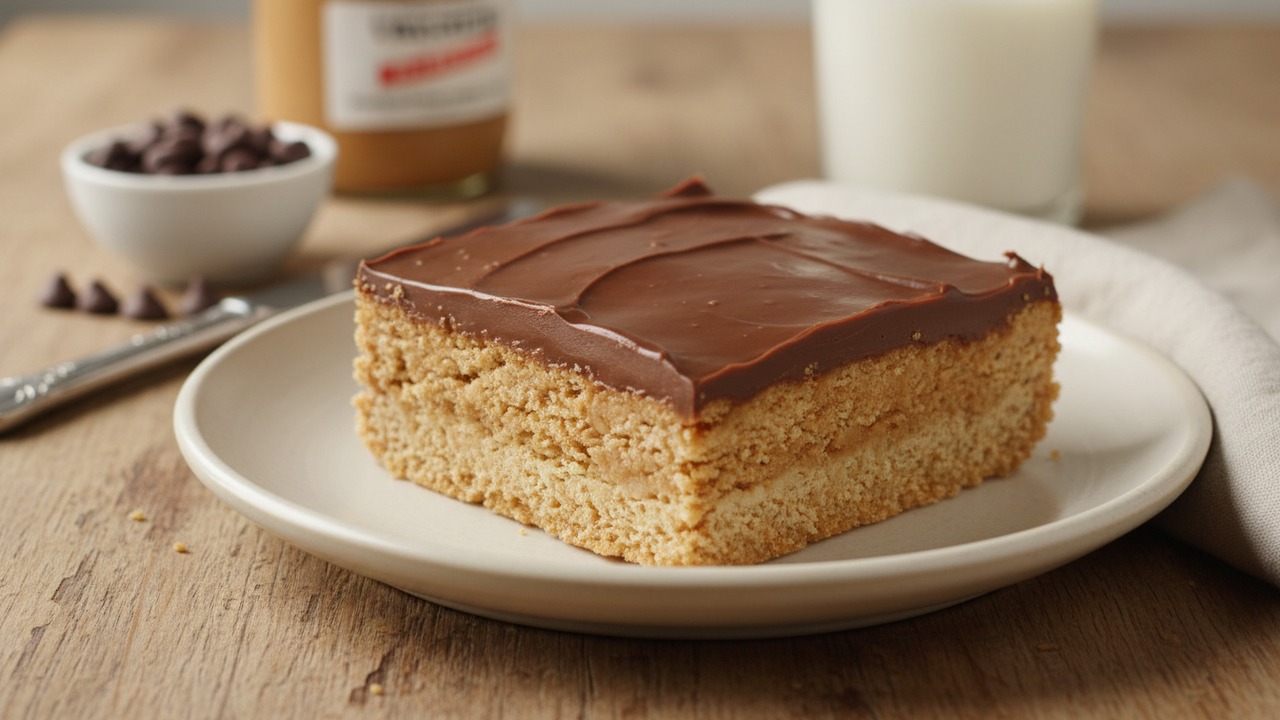
Rich, no-bake peanut butter bars with a crunchy graham base and a glossy chocolate-peanut topping. Ready in about 90–105 minutes (mostly chilling), they’re an effortless treat for potlucks, lunchboxes, or an easy dessert.
Jake Woods's note
"These bars are a great quick crowd-pleaser — no oven required and they hold up well in the fridge for several days. Home cooks will love how little hands-on time is needed to get a decadent, chocolatey finish."
About This Recipe
These easy peanut butter bars are built on deliberate, simple balances: a crunchy graham-cracker and powdered-sugar base that holds together without baking, a silky warm peanut-butter layer that sets firm after chilling, and a glossy chocolate-peanut topping that gives a clean snap and just enough sweetness. What makes this version work is the ratio — enough powdered sugar and crumbs for structure, a touch of butter to keep the base tender, and reserving two tablespoons of peanut butter for the chocolate so the glaze stays glossy and unmistakably peanut-forward. The result is dense, slightly chewy bites with a focused peanut flavor and a polished chocolate finish.
Because the bars are entirely no-bake and forgiving, they’re perfect for potlucks, lunchboxes, or a last-minute dessert tray. They suit cooks who love candy-bar textures but want minimal fuss: no oven preheating, no tempering, and very little active time. Make these a day ahead for cleaner slices, and feel free to tweak the base-to-topping ratio if you prefer more crunch or a thicker chocolate cap.
Plan your timing
Ingredients for Easy Peanut Butter Bars
- 1/2 cup unsalted butter
- 1 5/8 cups creamy peanut butter (total)
- 2 cups graham cracker crumbs
- 1 1/2 cups powdered (confectioners') sugar
- 1 tsp vanilla extract
- 1/4 tsp salt
- 1 cup semisweet chocolate chips
How to Make Easy Peanut Butter Bars
Step 1: Combine dry ingredients
Active 8 min
Line an 8x8-inch (20x20 cm) pan with parchment, leaving an overhang for easy removal. In a medium bowl, stir together 2 cups (about 200 g) graham cracker crumbs, 1 1/2 cups (about 180 g) powdered sugar, and 1/4 tsp salt until evenly combined.For this step
- 2 cupsgraham cracker crumbs
- 1 1/2 cupspowdered (confectioners') sugar
- 1/4 tspsalt
Step 2: Melt butter and peanut butter, then mix
Active 7 min
In a small saucepan over low heat or in a microwave-safe bowl (30–40 seconds), melt 1/2 cup (113 g) unsalted butter with 1 1/2 cups (about 360 g) of the creamy peanut butter, stirring until smooth. Remove from heat and stir in 1 tsp vanilla. Pour the warm peanut-butter mixture over the dry ingredients and mix until fully combined and uniform. (Reserve 2 tbsp / about 30–32 g of the peanut butter for the chocolate topping — this recipe uses a total of 1 5/8 cups / ~390 g.)For this step
- 1/2 cupunsalted butter
- 1 5/8 cupscreamy peanut butter (total)
- 1 tspvanilla extract
Step 3: Press mixture into pan and chill
Active 5 min · Passive 60 min
Transfer the peanut-butter mixture into the prepared 8x8 pan and press it firmly and evenly into the bottom using a spatula or the back of a measuring cup. Smooth the surface for an even top. Chill in the refrigerator until firm, about 60 minutes.Step 4: Make the chocolate-peanut topping
Active 5 min
Place 1 cup (about 170 g) semisweet chocolate chips in a microwave-safe bowl. Add the reserved 2 tbsp (about 30 g) peanut butter. Microwave in 20-second bursts, stirring between intervals, until the chocolate is melted and the mixture is glossy and pourable (about 1–2 minutes total).For this step
- 1 cupsemisweet chocolate chips
Step 5: Top, set, and slice
Active 2 min · Passive 15 min
Pour the warm chocolate-peanut topping over the chilled base and spread evenly with an offset spatula. Return the pan to the refrigerator and chill another 15 minutes to set. Using the parchment overhang, lift the block from the pan and slice into 12 bars with a sharp knife. Serve chilled or at cool room temperature; store in an airtight container in the fridge up to 1 week.


- Line an 8x8-inch (20x20 cm) pan with parchment, leaving an overhang for easy removal. In a medium bowl, stir together 2 cups (about 200 g) graham cracker crumbs, 1 1/2 cups (about 180 g) powdered sugar, and 1/4 tsp salt until evenly combined.
- In a small saucepan over low heat or in a microwave-safe bowl (30–40 seconds), melt 1/2 cup (113 g) unsalted butter with 1 1/2 cups (about 360 g) of the creamy peanut butter, stirring until smooth. Remove from heat and stir in 1 tsp vanilla. Pour the warm peanut-butter mixture over the dry ingredients and mix until fully combined and uniform. (Reserve 2 tbsp / about 30–32 g of the peanut butter for the chocolate topping — this recipe uses a total of 1 5/8 cups / ~390 g.)
- Transfer the peanut-butter mixture into the prepared 8x8 pan and press it firmly and evenly into the bottom using a spatula or the back of a measuring cup. Smooth the surface for an even top. Chill in the refrigerator until firm, about 60 minutes.
- Place 1 cup (about 170 g) semisweet chocolate chips in a microwave-safe bowl. Add the reserved 2 tbsp (about 30 g) peanut butter. Microwave in 20-second bursts, stirring between intervals, until the chocolate is melted and the mixture is glossy and pourable (about 1–2 minutes total).
- Pour the warm chocolate-peanut topping over the chilled base and spread evenly with an offset spatula. Return the pan to the refrigerator and chill another 15 minutes to set. Using the parchment overhang, lift the block from the pan and slice into 12 bars with a sharp knife. Serve chilled or at cool room temperature; store in an airtight container in the fridge up to 1 week.
Easy Peanut Butter Bars Tips
Press Firmly and Evenly
Use the back of a measuring cup or a flat-bottomed glass to compact the base — a tightly packed layer prevents crumbling and gives neat slices.
Reserve Peanut Butter
Saving 2 tablespoons of peanut butter for the chocolate topping keeps the glaze glossy and pourable while reinforcing the peanut flavor.
Microwave in Short Bursts
Heat chocolate (and the reserved peanut butter) in 15–20 second intervals, stirring between bursts; this avoids overheating and prevents the chocolate from seizing.
Chill Before Cutting
Allow the pan to chill until the base is fully firm (about 60 minutes) and then re-chill after the topping; fully cold bars slice much cleaner.
Warm Knife for Clean Cuts
Run a sharp knife under hot water, dry it, then slice in long, confident strokes, wiping the blade between cuts for tidy edges.
Easy Peanut Butter Bars Variations and Substitutions
Crunchy Peanut Butter
Swap in crunchy peanut butter for some textural contrast; you may want to reduce the powdered sugar by a tablespoon if the mix feels too stiff.
Vegan and Dairy-Free
Replace the butter with coconut oil (use a tablespoon less if solid) and choose dairy-free chocolate chips — chill a bit longer as coconut oil sets differently.
Nut-Free Sunflower Bars
Use sunflower-seed butter in place of peanut butter and make sure your graham crumbs and chocolate chips are nut-free certified for a safe allergy-friendly treat.
Dark Chocolate + Sea Salt
Use 60–72% dark chocolate for the topping and finish with a sprinkle of flaky sea salt to sharpen the sweetness and deepen the chocolate notes.
How to Store and Make Easy Peanut Butter Bars Ahead
Store leftover bars in an airtight container in the refrigerator for up to one week. For longer storage, freeze separated by parchment layers for up to two months and thaw in the fridge for several hours before serving. If you prefer softer texture, bring bars to room temperature for 15–30 minutes before eating.
What to Serve With Easy Peanut Butter Bars
Serve small squares chilled alongside an ice-cold glass of milk or an espresso for contrast; a scoop of vanilla ice cream turns them into a luxe dessert. For a party platter, arrange with salted roasted peanuts and fresh apple or pear slices to cut through the richness.
Easy Peanut Butter Bars FAQs
Can I use natural peanut butter?
You can, but natural peanut butter tends to be looser and oil-separated, which can make the base softer; stir it very well and consider reducing the melted butter by a tablespoon or adding a little extra graham crumbs or powdered sugar to firm the base.
My chocolate seized — how can I fix it?
If the chocolate becomes grainy, stir in 1–2 teaspoons of neutral oil (vegetable or refined coconut) or an extra spoonful of warm peanut butter and gently microwave in short bursts until smooth.
Can I bake the base instead of chilling it?
Yes: press the base into the pan and bake at 350°F (175°C) for 6–8 minutes to slightly dry and set it, then cool completely before adding the topping; the flavor becomes a bit more toasty and the texture less candy-like.
Why is my base crumbly after chilling?
Most often it wasn’t compacted enough or didn’t have enough fat to bind the crumbs; rework the mixture with an extra tablespoon of melted butter or peanut butter, press firmly, and chill longer.
Can I scale this recipe up or down?
Yes — doubling fits comfortably in a 9x13-inch pan while halving works in a 6x6-inch or small loaf pan; be aware that thickness and chilling times will change so check firmness before topping and slicing.
How do I get perfectly neat squares?
Chill the bars until very firm, warm and dry your knife between each cut, and slice with long smooth strokes; alternatively, use a hot metal bench scraper or unflavored dental floss pulled taut under the cut for exact edges.
About the author
Jake WoodsHello, I'm Jake. I started this recipe site with the idea that I hated recipe websites that overwhelm you with long stories and ads just to see plain content that's not helpful. My goal is to provide you with quality recipes, simple ideas and a fun cooking experience. There's lots of fun things to cook, and I think as you browse the site you'll find that TopShelf.Recipes is the place for quality recipes on the web.
See all recipes by Jake Woods →Ratings & Reviews
Did you make this recipe?
Be the first to share your experience.
Nutrition Facts
Per serving: 1 bar (95g)
Nutrition values are estimated from USDA ingredient data and may vary based on preparation, brands, and portion sizes. Values are provided for informational purposes only.
Keep Reading
Guides & articles for this recipe

Healthy Eating
Gluten-Free Weeknight Grilling Plan
A 7-day gluten-free weeknight grilling plan with quick, family-friendly recipes, prep-ahead timelines, and a printable shopping list that spotlights late-summer produce and pantry staples. Includes clear cross-contamination safety tips and simple swaps to keep dinners fast and crowd-pleasing.

Healthy Eating
Low-Fat Grill Swaps for Big Flavor
A practical guide to trimming fat from grilled meals without losing juiciness or char. Learn yogurt- and citrus-based marinades, lean protein picks, searing and indirect-heat tricks, plus 5 quick low-fat marinades and a simple weeknight plan.

Recipes
DIY Edible Monster Eyes Candy
Make safe, fun edible monster eyes for cupcakes, cookies, and candy trays. Step-by-step recipes show baking-soda balls, chocolate and fondant eyes, wafer-print options, plus assembly, storage, and kid-friendly safety tips.
More from General
View all General recipes →
Lemon Butter Salmon

Carbonara Garlic Cream Sauce

Honey Garlic Glazed Salmon

One-pot Portuguese Chicken and Rice

Huli Huli Chicken

Summer Berry Trifle

Blueberry Cheesecake Cookies

Viral Dr Pepper Butter

Deep Fried Mini Apple Fritters
Ask me anything about this recipe — substitutions, scaling, techniques, timing.
Powered by AI · 6 questions per 5 minutes, 30 per day