Easy Homemade Yogurt Without Special Equipment
Thick, creamy homemade yogurt you can make with just a pot, a jar, and an oven or insulated container—no yogurt maker required. This simple method yields a high-protein breakfast base you can flavor or top to taste.
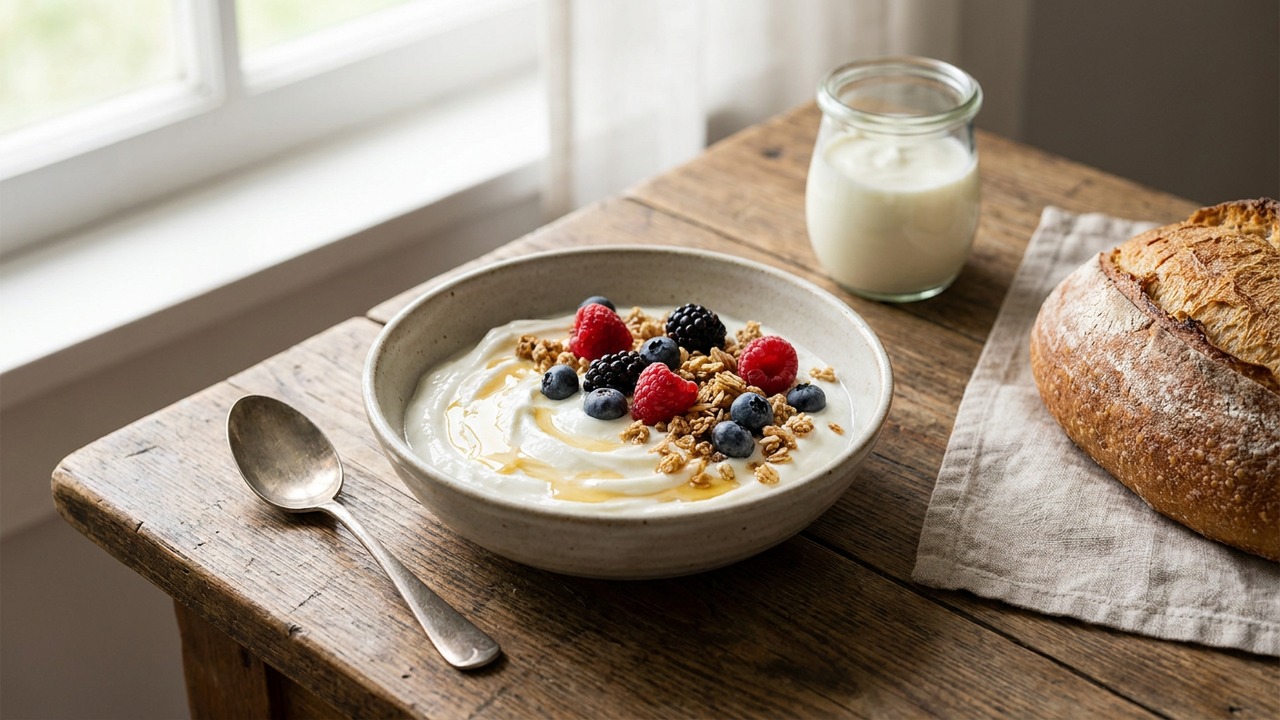
About This Recipe
This is the kind of everyday kitchen magic that rewards patience more than gear: thick, creamy yogurt made with whole milk, a spoonful of store-bought plain yogurt as a starter, and nothing more than a pot and a warm place to incubate. The nonfat dry milk powder is the unsung hero here — it increases the milk solids without adding extra liquid, so you get a spoonable texture that holds fruit and spoonfuls of honey. Heating the milk to 180°F and holding it briefly firms proteins so the cultures set into a creamy gel rather than a loose, runny puddle; cooling to about 110°F before adding the starter protects those fragile bacteria.
This method is for home cooks who want reliable results without a specialty appliance. It’s forgiving — longer incubation yields tangier yogurt, and you can trade sweetness, extract, or seasonal compote for flavor without disrupting the process. If you like thick, Greek-style yogurt, plan to strain it in cheesecloth after chilling. If you’re saving a bit of your batch as the next starter, choose a plain yogurt with live cultures and no stabilizers for the most consistent outcomes.
Ingredients for Easy Homemade Yogurt Without Special Equipment
- 4 cups Whole milk
- 2 tablespoons Nonfat dry milk powder
- 2 tablespoons Plain yogurt with live active cultures (starter)
- 1 teaspoon Vanilla extract (optional)
- 2 tablespoons Honey or maple syrup (optional, for serving)
- 1 cup Fresh berries (optional, for serving)
How to Make Easy Homemade Yogurt Without Special Equipment
Step 1: Heat milk with milk powder
Pour the whole milk into a heavy-bottomed pot and whisk in the nonfat dry milk powder to help thicken. Heat the milk over medium until it reaches 180°F (82°C) or just begins to steam and form small bubbles around the edges; hold at that temperature for 1–2 minutes to denature proteins, then remove from heat.For this step
- 4 cupsWhole milk
- 2 tablespoonsNonfat dry milk powder
Step 2: Cool to incubation temperature
Let the milk cool undisturbed until it reaches about 110°F (43°C); this takes roughly 30–45 minutes at room temperature. To speed cooling, set the pot in a sink of cold water and stir gently, checking with a thermometer occasionally.Step 3: Inoculate with starter
Spoon a few tablespoons of the warm milk into a small bowl and whisk in the plain yogurt starter until smooth to temper it. Pour the tempered starter back into the pot and whisk gently but thoroughly to distribute the cultures evenly.For this step
- 2 tablespoonsPlain yogurt with live active cultures (starter)
Step 4: Incubate without a yogurt maker
Transfer the mixture into a clean glass jar or jars, cover, and place in a warm, stable environment for fermentation: an oven with the light on, an insulated cooler with hot water bottles, or a thermos. Maintain a temperature around 100–110°F (37–43°C) and incubate undisturbed for 6–10 hours depending on desired tartness and thickness; longer incubation yields tangier, thicker yogurt.Step 5: Chill and flavor
When the yogurt has set to your liking, move it to the refrigerator and chill for at least 2 hours to firm up and stop fermentation. After chilling, stir in the vanilla if using and taste for sweetness or tang.For this step
- 1 teaspoonVanilla extract (optional)
Step 6: Serve and store
Spoon yogurt into bowls and top with honey or maple syrup and fresh berries as desired. Store homemade yogurt covered in the fridge for up to 7 days; reserve a couple of tablespoons to use as a starter for your next batch.For this step
- 2 tablespoonsHoney or maple syrup (optional, for serving)
- 1 cupFresh berries (optional, for serving)


- Pour the whole milk into a heavy-bottomed pot and whisk in the nonfat dry milk powder to help thicken. Heat the milk over medium until it reaches 180°F (82°C) or just begins to steam and form small bubbles around the edges; hold at that temperature for 1–2 minutes to denature proteins, then remove from heat.
- Let the milk cool undisturbed until it reaches about 110°F (43°C); this takes roughly 30–45 minutes at room temperature. To speed cooling, set the pot in a sink of cold water and stir gently, checking with a thermometer occasionally.
- Spoon a few tablespoons of the warm milk into a small bowl and whisk in the plain yogurt starter until smooth to temper it. Pour the tempered starter back into the pot and whisk gently but thoroughly to distribute the cultures evenly.
- Transfer the mixture into a clean glass jar or jars, cover, and place in a warm, stable environment for fermentation: an oven with the light on, an insulated cooler with hot water bottles, or a thermos. Maintain a temperature around 100–110°F (37–43°C) and incubate undisturbed for 6–10 hours depending on desired tartness and thickness; longer incubation yields tangier, thicker yogurt.
- When the yogurt has set to your liking, move it to the refrigerator and chill for at least 2 hours to firm up and stop fermentation. After chilling, stir in the vanilla if using and taste for sweetness or tang.
- Spoon yogurt into bowls and top with honey or maple syrup and fresh berries as desired. Store homemade yogurt covered in the fridge for up to 7 days; reserve a couple of tablespoons to use as a starter for your next batch.
Easy Homemade Yogurt Without Special Equipment Tips
Watch the temperatures
Use an instant-read thermometer to hit 180°F for denaturing and 110°F for inoculation; a few degrees either way can change set and tang.
Whisk in milk powder
Dissolving nonfat dry milk into cold milk before heating prevents clumps and boosts solids for a thicker final yogurt.
Temper the starter
Stir a few tablespoons of warm milk into the yogurt starter first, then whisk it back into the pot to avoid shocking or killing the cultures.
Maintain steady warmth
An oven with the light on or an insulated cooler keeps temperature stable; avoid frequent opening, which cools the mix and interrupts fermentation.
Avoid stirring while incubating
Once the starter is mixed in, transfer and cover without shaking — moving the mix can break the developing curd and produce a grainy texture.
Easy Homemade Yogurt Without Special Equipment Variations and Substitutions
Greek-style strained yogurt
After chilling, ladle into a cheesecloth-lined sieve and drain in the fridge for 2–6 hours to concentrate protein and thicken to a spoonable, spreadable consistency.
Lower-fat option
Use 2% milk but keep the same 2 tablespoons of nonfat dry milk powder to preserve texture; expect a slightly less luxurious mouthfeel than whole milk.
Coconut milk alternative
For a dairy-free version, use full-fat canned coconut milk with a commercial vegan yogurt starter and add 1 teaspoon of agar or tapioca starch to improve thickness, noting results differ from dairy yogurt.
Fruit-infused starter
Heat a few chopped apricots with a splash of water and a little sugar, cool, then swirl in after incubation for a quick compote-mixed yogurt without interfering with cultures.
How to Store and Make Easy Homemade Yogurt Without Special Equipment Ahead
Store homemade yogurt in a covered container in the refrigerator for up to 7 days; the cultures will continue to slowly acidify it, so flavor becomes tangier over time. Reserve 2 tablespoons from the freshest batch to inoculate your next batch, and never use a yogurt that smells off or shows visible mold. Do not reheat yogurt to serve; instead, serve chilled or let it come to room temperature for 10–15 minutes before eating.
What to Serve With Easy Homemade Yogurt Without Special Equipment
Spoon into bowls and finish with a drizzle of honey or maple syrup, a scatter of toasted nuts, and fresh berries for contrast. For savory uses, salt and fold in minced cucumber, dill, and lemon for a quick tzatziki to accompany grilled vegetables, eggs, or warm flatbreads. A cup of strong coffee or a citrusy green tea pairs nicely with the rich tang of homemade yogurt.
Easy Homemade Yogurt Without Special Equipment FAQs
Can I use pasteurized store-bought milk?
Yes — almost all store-bought milk is pasteurized and is ideal for yogurt; avoid ultra-high-temperature (UHT) milk if possible because it can change texture, though it still will ferment.
Why didn’t my yogurt set?
Common causes are incubation that was too cool, using an inactive starter, or an insufficient proportion of live cultures; reheat the mixture to 110°F, add fresh active starter, and incubate again, or extend incubation time if temperature was slightly low.
Can I use flavored or low-fat store yogurt as a starter?
Use plain yogurt with 'live and active cultures' for the most predictable results; flavored or low-fat yogurts often contain additives or fewer viable cultures and can affect texture and flavor.
How long should I incubate for tangier yogurt?
Incubate 6–8 hours for a mild yogurt and 8–10+ hours for tangier, firmer results; note that longer fermentation also increases acidity and decreases sweetness.
Is it safe to incubate in the oven with just the light on?
Yes, many home cooks use the oven light as a gentle heat source; verify temperature with a thermometer first and keep the door closed to maintain a steady 100–110°F environment.
About the author
Jake WoodsHello, I'm Jake. I started this recipe site with the idea that I hated recipe websites that overwhelm you with long stories and ads just to see plain content that's not helpful. My goal is to provide you with quality recipes, simple ideas and a fun cooking experience. There's lots of fun things to cook, and I think as you browse the site you'll find that TopShelf.Recipes is the place for quality recipes on the web.
See all recipes by Jake Woods →Ratings & Reviews
Did you make this recipe?
Be the first to share your experience.
Nutrition Facts
Per serving: about 2 cups
Nutrition values are estimated from USDA ingredient data and may vary based on preparation, brands, and portion sizes. Values are provided for informational purposes only.
Keep Reading
Guides & articles for this recipe

Tips & Techniques
Ultra-Tender Pork Spare Ribs: Tips & Techniques for Fall-Off-the-Bone Success
Master the craft of ultra-tender pork spare ribs with practical, no-nonsense techniques for selecting, prepping, smoking, and finishing. This guide focuses on what matters—temperature control, testing for doneness, wrapping choices, and common fixes—so your next rack comes out juicy, tender, and perfectly sauced.

Healthy Eating
Gluten-Free Weeknight Grilling Plan
A 7-day gluten-free weeknight grilling plan with quick, family-friendly recipes, prep-ahead timelines, and a printable shopping list that spotlights late-summer produce and pantry staples. Includes clear cross-contamination safety tips and simple swaps to keep dinners fast and crowd-pleasing.

Healthy Eating
Low-Fat Grill Swaps for Big Flavor
A practical guide to trimming fat from grilled meals without losing juiciness or char. Learn yogurt- and citrus-based marinades, lean protein picks, searing and indirect-heat tricks, plus 5 quick low-fat marinades and a simple weeknight plan.
More from Breakfast
View all Breakfast recipes →
Pumpkin Oat Muffins

Chocolate Chip Banana Muffins

Pad Krapow Pork

Canning Peaches Light Syrup

Maple Bacon Butter Board with Cracked Pepper and Toastables

Butter Board Lemon Thyme

Open-Faced Grilled Maple‑Mustard Chicken & Peach Breakfast Toast with Fried Egg

Pumpkin Spice Butter Board with Brown Sugar and Toasted Pecans

Eggs Benedict Florentine
Ask me anything about this recipe — substitutions, scaling, techniques, timing.
Powered by AI · 6 questions per 5 minutes, 30 per day