Instant Pot Beef and Rice
A quick, hands-off Instant Pot one-pot meal that layers savory ground beef with Mexican spices and tender rice for a hearty weeknight dinner. Ready in about 35 minutes, it’s flavorful, family-friendly, and perfect for topping with avocado, cheese or salsa.
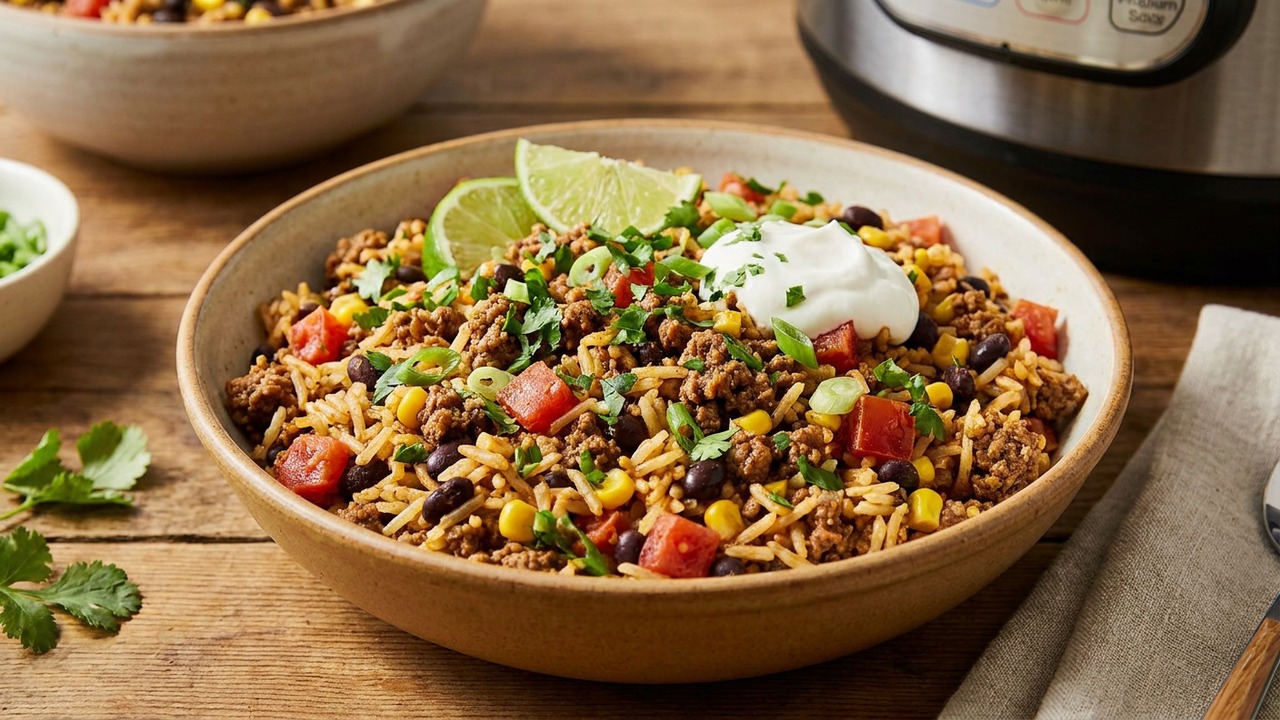
About This Recipe
This Instant Pot Beef and Rice is the kind of weeknight dinner that feels both effortless and thoughtfully composed. Browning the ground beef with onions creates a savory fond and toasting the chili and cumin briefly brings out deeper, warmer spice notes; combined with tomato sauce and beef broth, the pot develops a mild tang that the rice soaks up so every bite tastes finished. Because everything cooks together in one vessel, you end up with separate, tender grains punctuated by meaty, saucy pockets instead of a dry meat topping on plain rice.
I tuned this version for predictable texture: rinsed long-grain rice prevents clumping, and a 5-minute high-pressure cook followed by a 10-minute natural release finishes the rice gently so it won’t turn gluey. Using 80/20 beef gives the dish body and a silky mouthfeel, but the framework is forgiving — it’s easy to swap proteins, stretch with beans, or amplify brightness with lime, cilantro, avocado, or sharp cheese. It’s especially handy for meal prep since flavors deepen overnight and the hands-off Instant Pot timing makes the result reliably family-friendly on busy nights.
Ingredients for Instant Pot Beef and Rice
- 1 tbsp olive oil
- 1 lb ground beef (80/20)
- 1 medium yellow onion, diced
- 3 cloves garlic, minced
- 1 tbsp chili powder
- 1 tsp ground cumin
- 1 cup long-grain white rice, rinsed
- 1/2 cup tomato sauce
- 1 cup beef broth
- 1 tsp kosher salt
How to Make Instant Pot Beef and Rice
Step 1: Sauté aromatics and brown beef
Select Sauté on the Instant Pot and heat the olive oil until shimmering. Add the diced onion and cook 3–4 minutes until softened, then add the ground beef, breaking it up with a spoon. Stir in the minced garlic, chili powder, cumin and salt and cook until the beef is no longer pink and the mixture is fragrant, about 2 more minutes. Use a wooden spoon to scrape any browned bits from the bottom.For this step
- 1 tbspolive oil
- 1 lbground beef (80/20)
- 1 mediumyellow onion, diced
- 3 clovesgarlic, minced
- 1 tbspchili powder
- 1 tspground cumin
- 1 tspkosher salt
Step 2: Add rice and liquids
Pour the rinsed rice into the pot and stir to combine with the beef and aromatics so the grains are evenly coated. Add the tomato sauce and beef broth, stirring once to deglaze and make sure there are no stuck bits on the bottom. Level the mixture gently but do not over-stir; everything should be submerged in the liquid for even cooking.For this step
- 1 cuplong-grain white rice, rinsed
- 1/2 cuptomato sauce
- 1 cupbeef broth
Step 3: Pressure cook
Cancel Sauté, secure the lid and set the valve to sealing. Cook on High Pressure for 5 minutes, then allow a natural pressure release for 10 minutes to finish the rice gently. After the 10-minute natural release, carefully quick-release any remaining pressure and open the lid.Step 4: Fluff and adjust seasoning
Use a fork to fluff the rice and fold the beef mixture together, distributing liquid and solids evenly. Taste and adjust seasoning with additional salt or chili powder if desired. If the mixture seems too wet, let the pot sit uncovered a few minutes to mellow.Step 5: Serve
Scoop the beef and rice into bowls and serve hot. Garnish as desired with chopped cilantro, avocado, shredded cheese, salsa or lime wedges for a bright finish.


- Select Sauté on the Instant Pot and heat the olive oil until shimmering. Add the diced onion and cook 3–4 minutes until softened, then add the ground beef, breaking it up with a spoon. Stir in the minced garlic, chili powder, cumin and salt and cook until the beef is no longer pink and the mixture is fragrant, about 2 more minutes. Use a wooden spoon to scrape any browned bits from the bottom.
- Pour the rinsed rice into the pot and stir to combine with the beef and aromatics so the grains are evenly coated. Add the tomato sauce and beef broth, stirring once to deglaze and make sure there are no stuck bits on the bottom. Level the mixture gently but do not over-stir; everything should be submerged in the liquid for even cooking.
- Cancel Sauté, secure the lid and set the valve to sealing. Cook on High Pressure for 5 minutes, then allow a natural pressure release for 10 minutes to finish the rice gently. After the 10-minute natural release, carefully quick-release any remaining pressure and open the lid.
- Use a fork to fluff the rice and fold the beef mixture together, distributing liquid and solids evenly. Taste and adjust seasoning with additional salt or chili powder if desired. If the mixture seems too wet, let the pot sit uncovered a few minutes to mellow.
- Scoop the beef and rice into bowls and serve hot. Garnish as desired with chopped cilantro, avocado, shredded cheese, salsa or lime wedges for a bright finish.
Instant Pot Beef and Rice Tips
Brown in Batches
If your pot is crowded, brown the beef in two batches to promote caramelization and avoid steaming, which reduces flavor and increases liquid release.
Rinse Rice Thoroughly
Rinse until the water runs mostly clear to remove surface starch; this prevents gummy rice when cooking under pressure.
Fully Deglaze the Pot
After sautéing, pour in a bit of broth and scrape the bottom to lift any browned bits—this prevents a burn error and adds rich flavor to the rice.
Adjust Liquid Carefully
Measure liquids precisely; long-grain white rice needs about a 1:1 liquid ratio under pressure, so stick to the recipe amounts unless you swap rice types.
Rest Before Fluffing
Let the pot sit for the 10-minute natural release plus a minute before opening, then fluff gently with a fork to separate grains without crushing them.
Instant Pot Beef and Rice Variations and Substitutions
Ground Turkey or Chicken
Use 1 lb ground turkey or chicken and add an extra tablespoon of oil to compensate for lower fat; brown thoroughly for flavor and proceed with the same pressure time.
Vegetarian with Beans
Replace beef with 1½ cups cooked black beans or a can of drained black beans and add a splash more broth; reduce sauté time since there’s no raw meat to brown.
Brown Rice Swap
Use 1 cup of brown rice but increase pressure cooking to 22–24 minutes with a 10–12 minute natural release and add ¼ cup extra broth for adequate hydration.
Smoky Chipotle Twist
Stir in 1–2 teaspoons canned adobo sauce or a minced chipotle pepper with the spices and finish with crumbled cotija and chopped green onion for a smoky punch.
How to Store and Make Instant Pot Beef and Rice Ahead
Cool leftovers to room temperature then refrigerate in an airtight container for up to 4 days. For longer storage, freeze in portioned containers for up to 3 months. Reheat gently in the microwave with a tablespoon of broth or on the stovetop over low heat, stirring occasionally to restore moisture and avoid drying the rice.
What to Serve With Instant Pot Beef and Rice
Serve bowls topped with diced avocado, chopped cilantro, a squeeze of lime, and shredded cheddar or crumbled cotija for contrast and freshness. Offer warm tortillas or tortilla chips on the side and a simple cabbage slaw or charred corn salad to add crunch; pair with a light lager, a citrusy margarita, or an unoaked white wine.
Instant Pot Beef and Rice FAQs
Can I use frozen ground beef?
It’s best to thaw first for even browning; if you must start from frozen, use the Sauté setting to loosen and break the meat up, then cook until no longer pink before adding rice and liquids.
Why did I get a burn or stuck-on error?
Most burn errors come from bits stuck to the bottom or too little liquid—make sure you deglaze thoroughly after sautéing and that the rice and liquids are level and cover the meat, and avoid excessive stirring.
Can I double the recipe?
You can double it, but don’t exceed the Instant Pot’s max fill line; pressure cooking time stays the same, though time to come to pressure will be longer and natural release may take a bit more time.
My rice turned out mushy—what went wrong?
Mushy rice usually means too much liquid, overcooking, or using a shorter-grain rice without adjusting proportions; ensure you rinsed the rice and used the specified 1 cup rice to 1 cup liquid ratio for long-grain white rice and the 5-minute pressure time.
How can I add vegetables?
Fold in quick-cooking vegetables like frozen peas, corn, or diced bell pepper after pressure cooking and warm through on Sauté for a couple of minutes, or add heartier vegetables like carrots and potatoes sliced small and add 2–3 minutes to pressure time.
About the author
Jake WoodsHello, I'm Jake. I started this recipe site with the idea that I hated recipe websites that overwhelm you with long stories and ads just to see plain content that's not helpful. My goal is to provide you with quality recipes, simple ideas and a fun cooking experience. There's lots of fun things to cook, and I think as you browse the site you'll find that TopShelf.Recipes is the place for quality recipes on the web.
See all recipes by Jake Woods →Ratings & Reviews
Did you make this recipe?
Be the first to share your experience.
Nutrition Facts
Per serving: about ¾ cup
Nutrition values are estimated from USDA ingredient data and may vary based on preparation, brands, and portion sizes. Values are provided for informational purposes only.
Keep Reading
Guides & articles for this recipe

Healthy Eating
Gluten-Free Weeknight Grilling Plan
A 7-day gluten-free weeknight grilling plan with quick, family-friendly recipes, prep-ahead timelines, and a printable shopping list that spotlights late-summer produce and pantry staples. Includes clear cross-contamination safety tips and simple swaps to keep dinners fast and crowd-pleasing.

Healthy Eating
Low-Fat Grill Swaps for Big Flavor
A practical guide to trimming fat from grilled meals without losing juiciness or char. Learn yogurt- and citrus-based marinades, lean protein picks, searing and indirect-heat tricks, plus 5 quick low-fat marinades and a simple weeknight plan.

Recipes
DIY Edible Monster Eyes Candy
Make safe, fun edible monster eyes for cupcakes, cookies, and candy trays. Step-by-step recipes show baking-soda balls, chocolate and fondant eyes, wafer-print options, plus assembly, storage, and kid-friendly safety tips.
More from Instant Pot
View all Instant Pot recipes →
Instant Pot Strawberry Jam

Instant Pot Swedish Meatballs in Creamy Gravy

Snake River Farms Beef Tallow Instant Pot Braised Short Ribs

Instant Pot Beef Stew — Tender Chuck in 45 Minutes

Instant Pot Red Lentil Dal

Instant Pot Top Round Roast for Tender Sliced Roast Beef

Instant Pot Steel-Cut Oats with Apples and Cinnamon (Make-Ahead)

Instant Pot Sichuan Hot Pot Broth

Instant Pot Honey Garlic Chicken Thighs with Sauce-Soaked Rice Bowl
Ask me anything about this recipe — substitutions, scaling, techniques, timing.
Powered by AI · 6 questions per 5 minutes, 30 per day