Salt & Vinegar Potato Chips
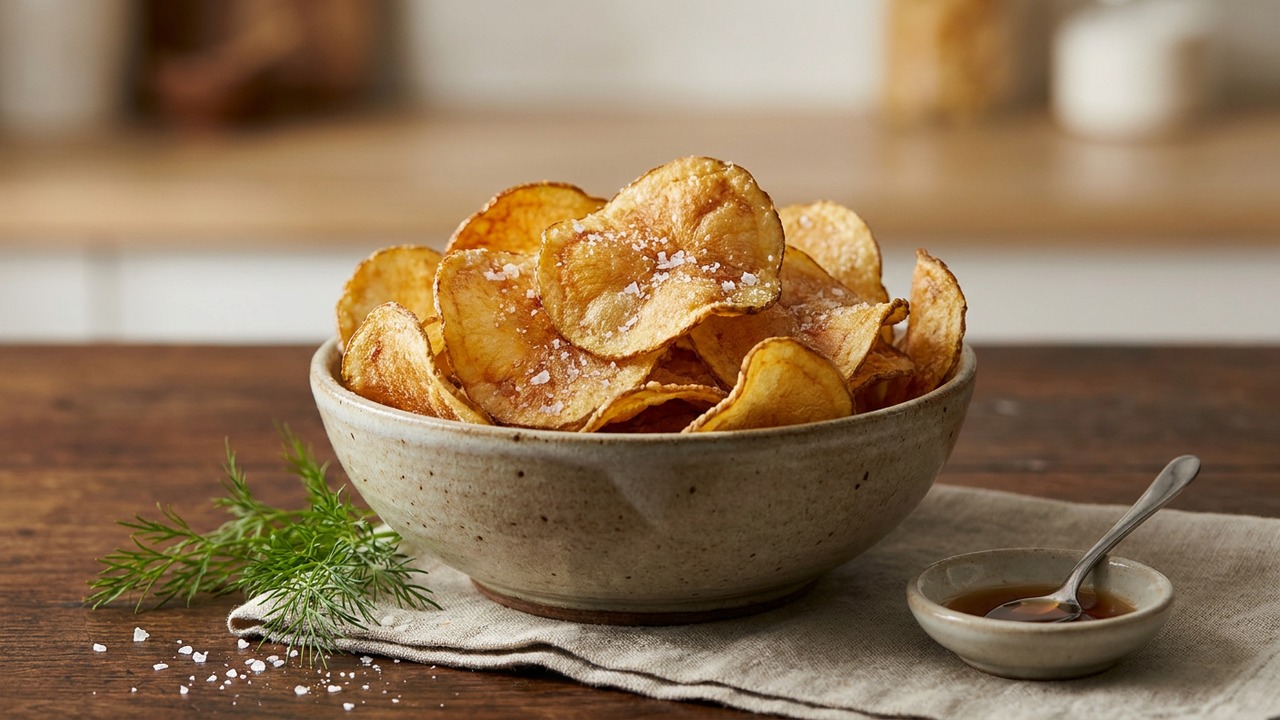
Crisp, homemade salt & vinegar potato chips made by thinly slicing potatoes, double-frying for superior crunch, and finishing with a quick pickled vinegar seasoning. The bright, tangy seasoning clings to hot chips for an addictively classic snack.
Jake Woods's note
"These chips are a great project for weekend snacking or a party platter — they beat store-bought bags in texture and vibrant vinegar flavor. Work in small batches and toss the chips while still hot for the best seasoning adhesion."
About This Recipe
There’s something compulsive about a bowl of salt & vinegar chips: the bright, immediate tang followed by a clean crunch that shatters on the first bite. This recipe is built around technique as much as ingredients — paper-thin russets, a light dusting of cornstarch, and a two-stage fry that separates cooking from crisping so you get consistently brittle, glassy chips rather than limp slices. The vinegar seasoning is a quick pickling bath rather than a soak, which lets the acidity cling to the hot oil-touched surface without turning the chips soggy.
This is the version to make when you want an elevated, homemade take on a pub classic — excellent for game nights, cocktail hours, or simply as the satisfying finishing touch to a sandwich. Pay attention to drying the slices and to the temperature swings between 325°F and 375°F; those details are what make this recipe sing. Adjust the vinegar-water balance to taste so the tang complements rather than overwhelms; a touch of sugar smooths the edge and makes the overall flavor more rounded.
Ingredients for Salt & Vinegar Potato Chips
- 3 large Russet potatoes
- 1 tbsp Cornstarch
- 4 cups Vegetable oil (for frying)
- 1/3 cup White vinegar
- 1/3 cup Water
- 1 tsp Granulated sugar
- 2 tsp Fine sea salt (plus extra for finishing)
How to Make Salt & Vinegar Potato Chips
Step 1: Slice and rinse the potatoes
Wash and peel the potatoes if desired. Using a mandoline or a very sharp knife, slice the potatoes paper-thin (about 1.5 mm / 1/16 inch). Place slices into a large bowl of cold water and swish to remove surface starch, then let sit while you prepare the next steps.For this step
- 3 largeRusset potatoes
Step 2: Dry and dust with cornstarch
Drain the potato slices and spread them in a single layer on clean kitchen towels or paper towels. Pat thoroughly dry (removing surface moisture prevents oil splatter). Put the dried slices in a bowl, sprinkle the cornstarch over them, and toss gently to coat — this helps achieve an extra-crisp texture.For this step
- 1 tbspCornstarch
Step 3: Heat oil and double-fry the chips
Pour the oil into a heavy, deep pot to a depth of about 2–3 inches and heat to 325°F (160°C). Fry the potato slices in small batches for 2–3 minutes until pale and limp but not browned; remove and drain on a wire rack. Raise the oil to 375°F (190°C) and return the batches to the oil, frying 1–2 minutes more until golden and crisp. Drain on paper towels or a rack and work in batches to keep chips from steaming.For this step
- 4 cupsVegetable oil (for frying)
Step 4: Make the quick pickling seasoning
While the chips fry, combine the white vinegar, water, sugar, and 2 tsp salt in a small bowl; stir until the sugar and salt dissolve. Taste and adjust — the mixture should be tangy with a slight sweetness to balance. Keep the pickling liquid at room temperature; do not over-saturate the chips.For this step
- 1/3 cupWhite vinegar
- 1/3 cupWater
- 1 tspGranulated sugar
- 2 tspFine sea salt (plus extra for finishing)
Step 5: Toss chips with vinegar and finish with salt
Working one batch at a time, place the hot chips in a large bowl and drizzle 1–2 tablespoons of the pickling mixture over them (you want a light coating rather than soaking). Toss gently so the vinegar flavor adheres, then immediately transfer to a serving bowl and sprinkle a light pinch of extra fine sea salt to taste. Serve warm or at room temperature; leftover chips will stay crisp in an airtight container for a day.


- Wash and peel the potatoes if desired. Using a mandoline or a very sharp knife, slice the potatoes paper-thin (about 1.5 mm / 1/16 inch). Place slices into a large bowl of cold water and swish to remove surface starch, then let sit while you prepare the next steps.
- Drain the potato slices and spread them in a single layer on clean kitchen towels or paper towels. Pat thoroughly dry (removing surface moisture prevents oil splatter). Put the dried slices in a bowl, sprinkle the cornstarch over them, and toss gently to coat — this helps achieve an extra-crisp texture.
- Pour the oil into a heavy, deep pot to a depth of about 2–3 inches and heat to 325°F (160°C). Fry the potato slices in small batches for 2–3 minutes until pale and limp but not browned; remove and drain on a wire rack. Raise the oil to 375°F (190°C) and return the batches to the oil, frying 1–2 minutes more until golden and crisp. Drain on paper towels or a rack and work in batches to keep chips from steaming.
- While the chips fry, combine the white vinegar, water, sugar, and 2 tsp salt in a small bowl; stir until the sugar and salt dissolve. Taste and adjust — the mixture should be tangy with a slight sweetness to balance. Keep the pickling liquid at room temperature; do not over-saturate the chips.
- Working one batch at a time, place the hot chips in a large bowl and drizzle 1–2 tablespoons of the pickling mixture over them (you want a light coating rather than soaking). Toss gently so the vinegar flavor adheres, then immediately transfer to a serving bowl and sprinkle a light pinch of extra fine sea salt to taste. Serve warm or at room temperature; leftover chips will stay crisp in an airtight container for a day.
Salt & Vinegar Potato Chips Tips
Use a mandoline safely
A mandoline yields the thinnest, most even slices; always use the hand guard or a cut-resistant glove and work slowly to avoid uneven thickness.
Rinse to remove starch
Swishing the slices in cold water removes surface starch that would otherwise cause chips to stick and brown unevenly during frying.
Pat thoroughly dry
Any surface moisture will make the oil spit and cause steaming that softens chips, so towel-dry slices until they look matte before cornstarch.
Double-fry for crunch
Fry first at the lower temperature to cook through, then finish at the hotter temp for rapid dehydration and a brittle, non-greasy texture.
Season while hot
Toss chips with the vinegar mixture immediately out of the fryer so the hot surface absorbs flavor; finish with a light sprinkle of fine sea salt.
Salt & Vinegar Potato Chips Variations and Substitutions
Malt vinegar twist
Swap half the white vinegar for malt vinegar to get the deeper, slightly sweeter tang familiar in British-style salt & vinegar crisps.
Herbed vinegar
Warm the vinegar briefly with a sprig of thyme or rosemary, cool, then strain — the herb infusion adds an aromatic layer that pairs especially well with heavier beers.
Sweet-and-sour
Increase the sugar to 1.5 teaspoons and add a pinch of black pepper for a tangy-sweet chip reminiscent of some gourmet kettle-cooked varieties.
Low-oil air-fryer
For a lower-fat option, spray slices lightly with oil and cook in a single layer in an air fryer at 375°F until crisp, then toss sparingly with the vinegar seasoning.
How to Store and Make Salt & Vinegar Potato Chips Ahead
These chips are best the day they’re made; store completely cooled chips in an airtight container at room temperature and consume within 24 hours to retain maximum crunch. Avoid refrigerating, which introduces moisture and makes them soggy. If they soften slightly, a short blast in a 300°F oven for 3–4 minutes can help re-crisp them.
What to Serve With Salt & Vinegar Potato Chips
Serve in a wide bowl so guests can dip in without sogging chips; they’re brilliant alongside burgers, fish and chips, or a charcuterie board where the acidity cuts through fatty cheeses. For drinks, pair with a crisp lager, sparkling wine, or a gin & tonic to echo the chips’ bright, vinegary notes.
Salt & Vinegar Potato Chips FAQs
Can I use Yukon Gold or red potatoes instead of Russets?
Yes — Yukon Golds will yield a slightly waxier, creamier interior and a less translucent chip, while reds stay firmer; you may need to adjust frying time slightly, but the method otherwise remains the same.
Why do we dust with cornstarch?
A light coating of cornstarch absorbs surface moisture and creates an extra-fine crisp crust as the chips finish frying, improving snap without adding visible residue.
How much vinegar seasoning should I use per batch?
Start with 1–2 tablespoons per batch and taste; the goal is a light, clingy coating rather than soaking the chips, so add sparingly and stop once the sharpness is balanced by a touch of sweetness.
My chips turned out greasy — what went wrong?
Greasy chips usually mean the oil temperature was too low, batches were too large, or chips weren’t drained on a rack; maintain steady temps and fry in small batches so oil recovers quickly.
Can I make the pickling liquid in advance?
Yes — you can mix the vinegar, water, sugar, and salt ahead and keep it at room temperature; just don’t soak chips in it, and taste before using since flavors mellow over time.
About the author
Jake WoodsHello, I'm Jake. I started this recipe site with the idea that I hated recipe websites that overwhelm you with long stories and ads just to see plain content that's not helpful. My goal is to provide you with quality recipes, simple ideas and a fun cooking experience. There's lots of fun things to cook, and I think as you browse the site you'll find that TopShelf.Recipes is the place for quality recipes on the web.
See all recipes by Jake Woods →Ratings & Reviews
Did you make this recipe?
Be the first to share your experience.
Nutrition Facts
Per serving: 1 serving
Nutrition values are estimated from USDA ingredient data and may vary based on preparation, brands, and portion sizes. Values are provided for informational purposes only.
Keep Reading
Guides & articles for this recipe

Healthy Eating
Gluten-Free Weeknight Grilling Plan
A 7-day gluten-free weeknight grilling plan with quick, family-friendly recipes, prep-ahead timelines, and a printable shopping list that spotlights late-summer produce and pantry staples. Includes clear cross-contamination safety tips and simple swaps to keep dinners fast and crowd-pleasing.

Healthy Eating
Low-Fat Grill Swaps for Big Flavor
A practical guide to trimming fat from grilled meals without losing juiciness or char. Learn yogurt- and citrus-based marinades, lean protein picks, searing and indirect-heat tricks, plus 5 quick low-fat marinades and a simple weeknight plan.

Recipes
DIY Edible Monster Eyes Candy
Make safe, fun edible monster eyes for cupcakes, cookies, and candy trays. Step-by-step recipes show baking-soda balls, chocolate and fondant eyes, wafer-print options, plus assembly, storage, and kid-friendly safety tips.
More from Snacks
View all Snacks recipes →
Labor Day Grilled Lobster Rolls with Charred Scallion Brown Butter & Lemon‑Herb Aioli

Easy Peanut Butter Bars

Holiday Cranberry Maple Chex Mix

Snake River Farms Beef Tallow Crispy Air Fryer Chicken Wings

Strawberry Yogurt Bark

Buffalo Chicken Dip

Snake River Farms Beef Tallow Popcorn with Parmesan and Herbs

Truffle Parmesan Butter Board with Crispy Breadcrumbs

S'mores Popcorn
Ask me anything about this recipe — substitutions, scaling, techniques, timing.
Powered by AI · 6 questions per 5 minutes, 30 per day