Buttermilk Chicken Tenders
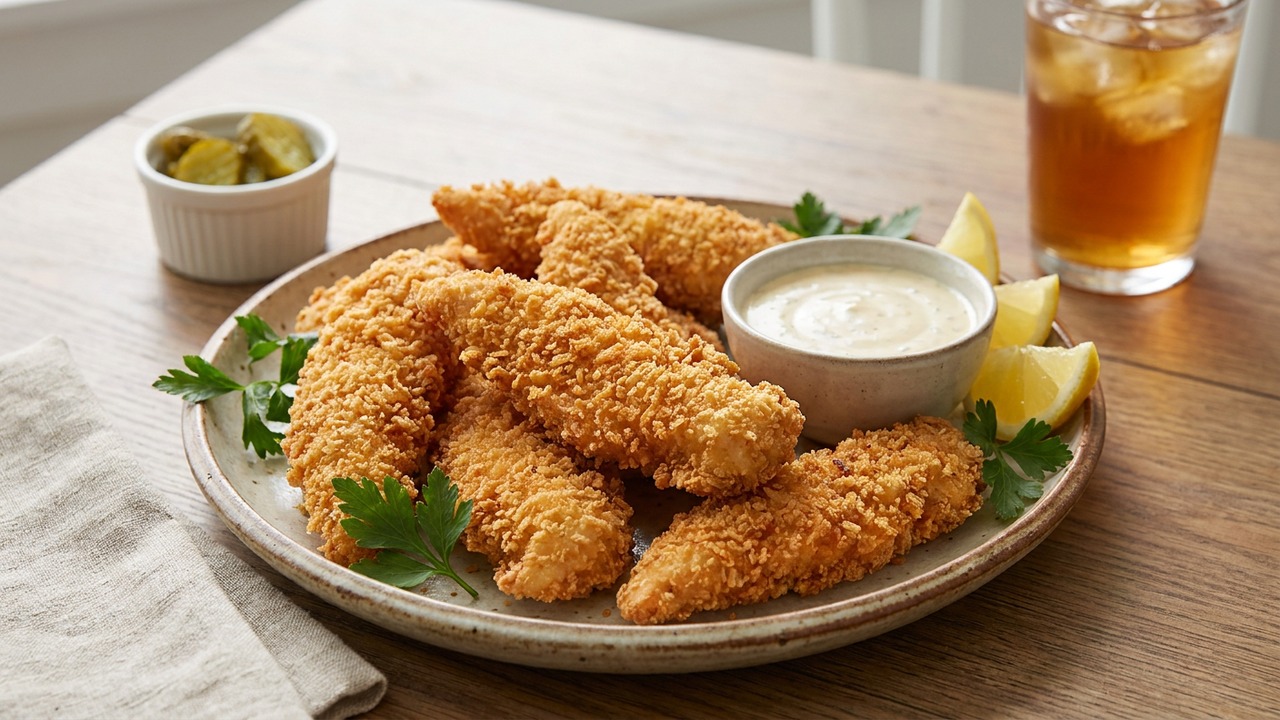
Crispy, family-friendly buttermilk chicken tenders with a crunchy panko coating and a make-ahead buttermilk brine for extra tender, flavorful chicken. Perfect for snack time, weeknight dinners, or feeding hungry kids and adults alike.
Ingredient Spotlight
Panko breadcrumbs
Panko are Japanese-style breadcrumbs made from crustless white bread that’s processed into large, airy flakes; they create a very light, extra-crispy coating when fried or baked. They have a very mild, bready flavor and little aroma—their main contribution is crunchy texture rather than taste. You can find panko in most supermarkets (often in the Asian or breading aisle) or online; good substitutes are regular dry breadcrumbs, crushed cornflakes or crackers, or pulse crustless white bread in a food processor and lightly dry it in the oven to approximate panko’s texture.
(paid link) — as an Amazon Associate we earn from qualifying purchases.
Jake Woods's note
"These tenders shine when made ahead—the buttermilk brine can sit overnight, so the chicken stays juicy and mild for picky eaters. They’re perfect for casual gatherings, packed lunches, or a satisfying after-school snack."
About This Recipe
Crispy, tender, and unfussy, these buttermilk chicken tenders are the sort of recipe that shows up at every good weeknight table and disappears fast. The secret here is the buttermilk brine: the tang and lactic acid gently break down muscle fibers while the salt seasons through, producing a noticeably juicier interior than a quick dredge ever will. Panko crumbs give the exterior a modern, shatteringly light crunch that stays crisp longer than traditional breadcrumbs, and a little granulated sugar in the brine nudges a deeper, more lacy brown on the crust during frying.
This version is designed with families and busy cooks in mind — the brine can be made the night before, and the dredging station keeps the assembly line moving when hunger hits. Fry at a steady 350°F and rest the tenders on a wire rack, not paper, to preserve that fragile crust. Serve them straight from the pan with a couple of contrasting dips and a crisp green salad, or double the batch and freeze a portion for fast, crowd-pleasing meals later in the week.
Ingredients for Buttermilk Chicken Tenders
How to Make Buttermilk Chicken Tenders
Step 1: Make the buttermilk brine and marinate
Whisk together the buttermilk, kosher salt, granulated sugar, garlic powder, and black pepper in a large bowl. Submerge the chicken tenderloins, cover, and refrigerate at least 2 hours or up to overnight for best flavor and tenderness.For this step
- 1 1/2 lbChicken tenderloins
- 2 cupsButtermilk
- 1 tbspKosher salt
- 1 tbspGranulated sugar
- 1 tspGarlic powder
- 1 tspBlack pepper
Step 2: Prepare the dredging station
When ready to cook, set up three shallow pans: one with the all-purpose flour, one with the beaten large eggs, and one with the panko breadcrumbs. Lightly season the flour with a pinch of the salt and pepper from the brine if desired.For this step
- 1 cupAll-purpose flour
- 2 largeLarge eggs
- 2 cupsPanko breadcrumbs
Step 3: Dredge the chicken
Remove tenders from the brine, letting excess drip off, then coat each piece in flour, dip into the beaten eggs, and press firmly into the panko breadcrumbs to build an even crust. Place breaded tenders on a wire rack while you heat the oil to keep the crust dry and secure.Step 4: Deep-fry until golden and cooked through
Heat vegetable oil in a deep fryer or heavy Dutch oven to 350°F (175°C). Fry the tenders in batches 3–4 minutes per batch, or until golden brown and an instant-read thermometer reads 165°F (74°C). Do not overcrowd the oil; adjust heat to maintain temperature.For this step
- 4 cupsVegetable oil (for frying)
Step 5: Drain, rest, and serve
Transfer cooked tenders to a paper towel-lined tray or wire rack to drain and rest 1–2 minutes. Serve warm with your favorite dipping sauces — ketchup, ranch, or honey mustard — and refrigerate leftovers in an airtight container for up to 3 days.


- Whisk together the buttermilk, kosher salt, granulated sugar, garlic powder, and black pepper in a large bowl. Submerge the chicken tenderloins, cover, and refrigerate at least 2 hours or up to overnight for best flavor and tenderness.
- When ready to cook, set up three shallow pans: one with the all-purpose flour, one with the beaten large eggs, and one with the panko breadcrumbs. Lightly season the flour with a pinch of the salt and pepper from the brine if desired.
- Remove tenders from the brine, letting excess drip off, then coat each piece in flour, dip into the beaten eggs, and press firmly into the panko breadcrumbs to build an even crust. Place breaded tenders on a wire rack while you heat the oil to keep the crust dry and secure.
- Heat vegetable oil in a deep fryer or heavy Dutch oven to 350°F (175°C). Fry the tenders in batches 3–4 minutes per batch, or until golden brown and an instant-read thermometer reads 165°F (74°C). Do not overcrowd the oil; adjust heat to maintain temperature.
- Transfer cooked tenders to a paper towel-lined tray or wire rack to drain and rest 1–2 minutes. Serve warm with your favorite dipping sauces — ketchup, ranch, or honey mustard — and refrigerate leftovers in an airtight container for up to 3 days.
Buttermilk Chicken Tenders Tips
Pat Tenders Dry
Blot excess buttermilk with paper towels before dredging to prevent a soggy flour layer and to help the panko adhere evenly.
Keep Oil Temperature
Use a thermometer and maintain 350°F; if the oil drops too low the coating will absorb oil, and if it's too hot the exterior will burn before the center cooks.
Press Panko Firmly
After dipping in egg, press the panko into the tenders with gentle, even pressure to create a continuous crust that won’t flake off while frying.
Use a Wire Rack
Drain fried tenders on a wire rack set over a sheet pan so air circulates under them and the crust stays crisp instead of steaming soggy.
Season Each Layer
Lightly season the flour and panko (salt and a touch of pepper or paprika) so every layer contributes flavor, not just the brine.
Buttermilk Chicken Tenders Variations and Substitutions
Baked Buttermilk Tenders
For a lighter option, bake at 425°F on a wire rack for 12–16 minutes, flipping once and spraying the crust with oil to encourage browning.
Gluten-Free Crunch
Swap the flour for rice flour or a gluten-free flour blend and use certified gluten-free panko or crushed cornflakes for a similar crisp texture.
Spicy Nashville Twist
Add 1–2 teaspoons cayenne and 1 teaspoon smoked paprika to the flour and panko, and finish with a brush of melted butter mixed with cayenne for a hot, sticky glaze.
Herbed Parmesan Crust
Mix 1/3 cup finely grated Parmesan and 1 teaspoon dried Italian herbs into the panko for a nutty, savory crust that pairs beautifully with lemon wedges.
How to Store and Make Buttermilk Chicken Tenders Ahead
Store cooled tenders in an airtight container in the refrigerator for up to 3 days. To freeze, flash-freeze in a single layer on a sheet tray, then transfer to a freezer bag for up to 1 month. Reheat in a 400°F oven or air fryer for 8–10 minutes from refrigerated, or 12–15 minutes from frozen, to restore crispness while ensuring the center reaches 165°F.
What to Serve With Buttermilk Chicken Tenders
Serve these tenders on a platter lined with a wire rack and provide a trio of dips like tangy honey mustard, peppery ranch, and a bright hot sauce; add dill pickles or quick cucumber slaw for acidity. For sides, pair with oven fries, a cabbage slaw, or baked sweet potato wedges and a crisp lager or iced tea to cut through the richness.
Buttermilk Chicken Tenders FAQs
How long should I brine the tenders?
Brine for a minimum of 2 hours to get noticeable tenderness; overnight (8–12 hours) is best for flavor and texture, but avoid going much beyond 24 hours or the meat can become mealy.
Can I substitute regular milk for buttermilk?
Yes — make an easy buttermilk substitute by stirring 1 tablespoon white vinegar or lemon juice into 1 cup milk and letting it sit 5–10 minutes; use the same amount called for in the recipe.
Is deep-frying the only option?
No — you can bake or air-fry them; bake at 425°F on a wire rack for 12–16 minutes or air-fry at 400°F for 8–10 minutes, turning once and lightly misting with oil to get a better crust.
How do I know when they’re done?
The most reliable method is an instant-read thermometer inserted into the thickest part reading 165°F; visually the crust should be golden and juices should run clear.
Why is there sugar in the brine?
A little sugar promotes browning and balances the salty and tangy flavors from the brine, giving the crust a more appealing color and subtle sweetness.
About the author
Jake WoodsHello, I'm Jake. I started this recipe site with the idea that I hated recipe websites that overwhelm you with long stories and ads just to see plain content that's not helpful. My goal is to provide you with quality recipes, simple ideas and a fun cooking experience. There's lots of fun things to cook, and I think as you browse the site you'll find that TopShelf.Recipes is the place for quality recipes on the web.
See all recipes by Jake Woods →Ratings & Reviews
Did you make this recipe?
Be the first to share your experience.
Nutrition Facts
Per serving: 1 serving
Nutrition values are estimated from USDA ingredient data and may vary based on preparation, brands, and portion sizes. Values are provided for informational purposes only.
Keep Reading
Guides & articles for this recipe

Healthy Eating
Gluten-Free Weeknight Grilling Plan
A 7-day gluten-free weeknight grilling plan with quick, family-friendly recipes, prep-ahead timelines, and a printable shopping list that spotlights late-summer produce and pantry staples. Includes clear cross-contamination safety tips and simple swaps to keep dinners fast and crowd-pleasing.

Healthy Eating
Low-Fat Grill Swaps for Big Flavor
A practical guide to trimming fat from grilled meals without losing juiciness or char. Learn yogurt- and citrus-based marinades, lean protein picks, searing and indirect-heat tricks, plus 5 quick low-fat marinades and a simple weeknight plan.

Recipes
DIY Edible Monster Eyes Candy
Make safe, fun edible monster eyes for cupcakes, cookies, and candy trays. Step-by-step recipes show baking-soda balls, chocolate and fondant eyes, wafer-print options, plus assembly, storage, and kid-friendly safety tips.
More from Snacks
View all Snacks recipes →
Easy Peanut Butter Bars

Salt & Vinegar Potato Chips

Holiday Cranberry Maple Chex Mix

Labor Day Grilled Lobster Rolls with Charred Scallion Brown Butter & Lemon‑Herb Aioli

Snake River Farms Beef Tallow Crispy Air Fryer Chicken Wings

Strawberry Yogurt Bark

Buffalo Chicken Dip

Snake River Farms Beef Tallow Popcorn with Parmesan and Herbs

Truffle Parmesan Butter Board with Crispy Breadcrumbs
Ask me anything about this recipe — substitutions, scaling, techniques, timing.
Powered by AI · 6 questions per 5 minutes, 30 per day