Charcoal Lemon Pepper Chicken
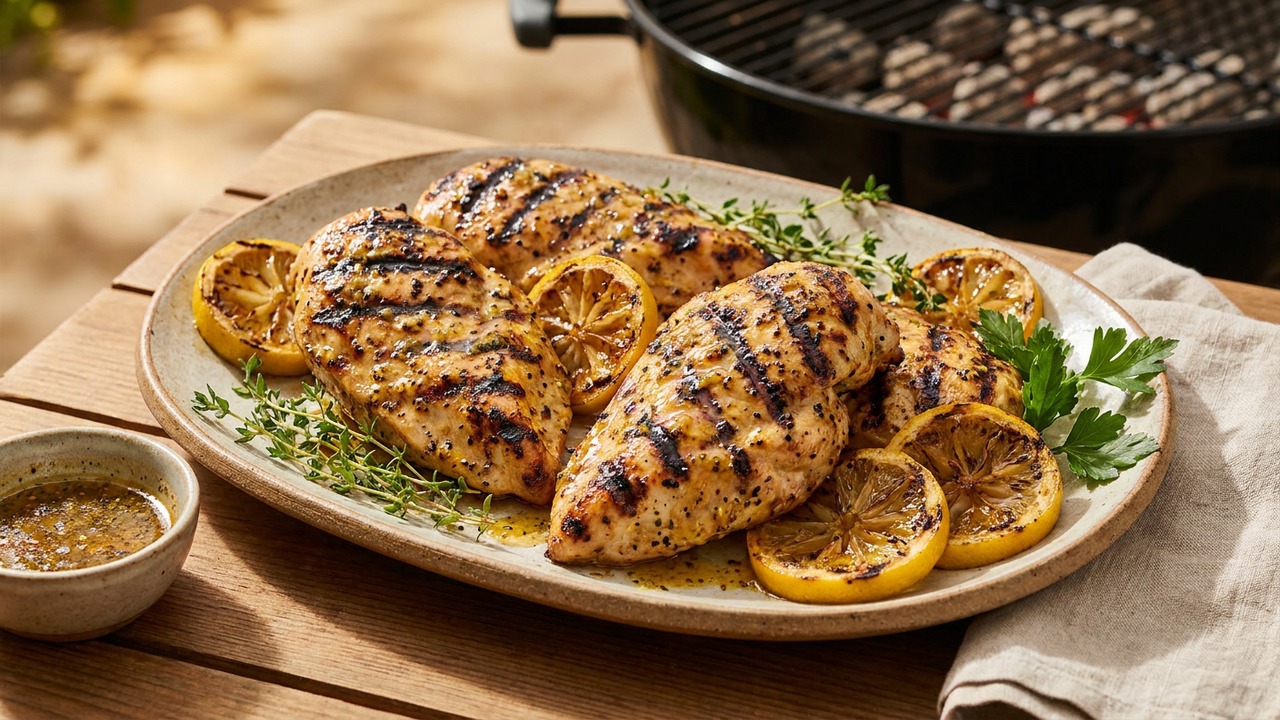
Juicy, bright lemon pepper chicken breasts cooked over a charcoal grill for authentic smoky flavor and crisp sear. This quick summer method uses a short marinade and two-zone charcoal grilling so breasts finish tender and perfectly charred.
Jake Woods's note
"This recipe shines at backyard cookouts and weeknight dinners when you want big grill flavor without a long wait. Home cooks will love the simple lemony marinade and the two-zone charcoal technique that keeps breasts juicy while giving great char marks."
About This Recipe
Charcoal Lemon Pepper Chicken is the kind of straightforward summer recipe that feels elevated without extra fuss. Bright lemon zest and freshly cracked lemon pepper pair with a short oil-and-acid marinade to season the meat, while cooking over charcoal delivers the one-two punch of smoky depth and crisp, caramelized edges. Because the breasts are seared quickly and finished over indirect heat, you get the best texture—deeply browned outside and tender, juicy interior—without the dry, chalky finish that often haunts grilled chicken.
This version leans on technique more than time: even thickness, a hot direct sear, then a calm finish on the cool side of the grill, and an immediate butter baste to gloss the meat and add subtle richness. It’s a quick weeknight winner that also performs well for company—slice it for a composed plate, or serve whole for easy family-style grilling. If you value bright citrus, assertive pepper, and genuine charcoal complexity, this method reliably delivers.
Ingredients for Charcoal Lemon Pepper Chicken
- 4 pieces Boneless skinless chicken breasts
- 1 1/2 tsp Kosher salt
- 2 tsp Lemon pepper seasoning (freshly ground if possible)
- 1 piece Lemon (zest + juice)
- 2 tbsp Extra-virgin olive oil
- 2 cloves Garlic (minced)
- 2 tbsp Unsalted butter
- 2 tbsp Fresh parsley (chopped, for garnish)
How to Make Charcoal Lemon Pepper Chicken
Step 1: Trim and marinate
Trim any excess fat from the chicken and, if very thick, halve horizontally to an even thickness (or lightly pound to about 3/4 inch). In a bowl or zip-top bag combine olive oil, lemon zest and juice, minced garlic, kosher salt, and lemon pepper; add the chicken, toss to coat, and refrigerate at room temperature for 15 minutes while you light the charcoal.For this step
- 4 piecesBoneless skinless chicken breasts
- 1 1/2 tspKosher salt
- 2 tspLemon pepper seasoning (freshly ground if possible)
- 1 pieceLemon (zest + juice)
- 2 tbspExtra-virgin olive oil
- 2 clovesGarlic (minced)
Step 2: Prepare the charcoal for two-zone fire
Light a chimney of charcoal and, once coals are covered in light ash (about 15–20 minutes), dump them to one side of the grill to create a hot direct zone and a cooler indirect zone. Leave the lid open while you oil the grate and transfer the chicken to a plate.Step 3: Sear over direct heat
Brush or oil the grill grate and place the breasts over the hot direct coals. Sear 3–4 minutes without moving to develop good char marks, then flip and sear the other side 3–4 minutes. You want a deep golden-brown sear but not a fully cooked interior—aim for an internal temperature around 150°F (65°C) before moving to indirect heat.Step 4: Finish over indirect heat
Move the seared breasts to the cooler side of the grill, close the lid, and let them finish cooking for 4–8 minutes, checking with an instant-read thermometer. Continue until the thermometer reads 160°F (71°C); carryover will bring them to a safe 165°F (74°C) while resting.Step 5: Rest and baste with butter
Remove the chicken to a cutting board, immediately spoon the unsalted butter over each breast so it melts and glossy the surface, and tent loosely with foil. Let rest for 5 minutes—this is when juices redistribute and the final temperature rises to 165°F (74°C).For this step
- 2 tbspUnsalted butter
Step 6: Slice, garnish and serve
Slice the breasts against the grain and transfer to a platter. Sprinkle chopped parsley for freshness and an extra squeeze of lemon if you like. Serve hot with grilled vegetables, salad, or over rice.For this step
- 2 tbspFresh parsley (chopped, for garnish)


- Trim any excess fat from the chicken and, if very thick, halve horizontally to an even thickness (or lightly pound to about 3/4 inch). In a bowl or zip-top bag combine olive oil, lemon zest and juice, minced garlic, kosher salt, and lemon pepper; add the chicken, toss to coat, and refrigerate at room temperature for 15 minutes while you light the charcoal.
- Light a chimney of charcoal and, once coals are covered in light ash (about 15–20 minutes), dump them to one side of the grill to create a hot direct zone and a cooler indirect zone. Leave the lid open while you oil the grate and transfer the chicken to a plate.
- Brush or oil the grill grate and place the breasts over the hot direct coals. Sear 3–4 minutes without moving to develop good char marks, then flip and sear the other side 3–4 minutes. You want a deep golden-brown sear but not a fully cooked interior—aim for an internal temperature around 150°F (65°C) before moving to indirect heat.
- Move the seared breasts to the cooler side of the grill, close the lid, and let them finish cooking for 4–8 minutes, checking with an instant-read thermometer. Continue until the thermometer reads 160°F (71°C); carryover will bring them to a safe 165°F (74°C) while resting.
- Remove the chicken to a cutting board, immediately spoon the unsalted butter over each breast so it melts and glossy the surface, and tent loosely with foil. Let rest for 5 minutes—this is when juices redistribute and the final temperature rises to 165°F (74°C).
- Slice the breasts against the grain and transfer to a platter. Sprinkle chopped parsley for freshness and an extra squeeze of lemon if you like. Serve hot with grilled vegetables, salad, or over rice.
Charcoal Lemon Pepper Chicken Tips
Even Thickness Matters
Halve or gently pound breasts to about 3/4 inch so they cook through evenly; thin edges won’t overcook while centers reach temperature.
Oil the Grate Well
Brush the grate with oil right before searing to prevent sticking and promote clean char marks—use a folded paper towel held with tongs soaked in oil.
Use Two-Zone Fire
Start over direct coals for 3–4 minutes per side for color, then shift to the cool side to finish gently without burning the exterior.
Target Temperatures
Pull breasts from direct heat around 150°F (65°C) and finish indirect until 160°F (71°C); carryover during a 5-minute rest brings them to the safe 165°F (74°C).
Butter Baste Immediately
Spoon unsalted butter over the hot breasts off the grill so it melts into the surface, adding gloss and a little fat to amplify juiciness.
Charcoal Lemon Pepper Chicken Variations and Substitutions
Herb Lemon Butter
Mix softened butter with chopped thyme and rosemary to baste the chicken for an herbal, savory finish that complements the lemon pepper.
Spicy Citrus Glaze
Add 1 tsp cayenne and 1 tbsp honey to the marinade for a sweet-heat glaze; apply more glaze in the last minute over indirect heat to prevent burning.
Mediterranean Twist
Swap lemon pepper for za'atar and add a tablespoon of plain yogurt to the marinade for tang and a warm, herbaceous flavor profile.
Bone-In Thighs Option
Use bone-in, skin-on thighs and extend indirect finish time; sear skin-side down until crisp, then move to indirect to cook through to 175°F (79°C).
How to Store and Make Charcoal Lemon Pepper Chicken Ahead
Store leftover chicken in an airtight container in the refrigerator for up to 3–4 days. To reheat, warm gently in a 300°F oven for 8–12 minutes or slice and briefly sauté in a hot pan with a splash of olive oil to refresh the sear; avoid microwaving which can dry the meat.
What to Serve With Charcoal Lemon Pepper Chicken
Serve the sliced breasts over a bed of lemony couscous or herbed rice with grilled vegetables like zucchini and cherry tomatoes to echo the charred flavor. A simple arugula salad dressed with olive oil and sherry vinegar adds peppery brightness, and a crisp white wine such as Sauvignon Blanc or an effervescent lager pairs nicely.
Charcoal Lemon Pepper Chicken FAQs
Can I marinate the chicken longer?
Yes—you can marinate up to 2 hours safely; beyond that, the acid can start to alter texture. For best quick results, 15–60 minutes is sufficient for flavor without softening the meat.
What if I don’t have an instant-read thermometer?
You can slice into the thickest part to check for clear juices and no visible pink, but this risks moisture loss; a thermometer is the most reliable way to hit the recommended temperatures without overcooking.
Can I cook this on a gas grill instead?
Yes—use a two-zone setup by turning one burner high and the other to low, sear over the hot side and finish over the cooler side, maintaining the same timing and temp targets.
Why baste with butter after cooking instead of during?
Basting immediately after removing from heat lets the butter melt into the hot surface without burning, contributing glossy finish and richness while the juices redistribute during resting.
Is lemon pepper better freshly ground?
Freshly cracked lemon pepper has brighter citrus oils and more lively black pepper notes, but pre-blended lemon pepper works fine; adjust quantity to taste if your store blend is saltier or more intense.
About the author
Jake WoodsHello, I'm Jake. I started this recipe site with the idea that I hated recipe websites that overwhelm you with long stories and ads just to see plain content that's not helpful. My goal is to provide you with quality recipes, simple ideas and a fun cooking experience. There's lots of fun things to cook, and I think as you browse the site you'll find that TopShelf.Recipes is the place for quality recipes on the web.
See all recipes by Jake Woods →Ratings & Reviews
Did you make this recipe?
Be the first to share your experience.
Nutrition Facts
Per serving: 1½ breasts
Nutrition values are estimated from USDA ingredient data and may vary based on preparation, brands, and portion sizes. Values are provided for informational purposes only.
Keep Reading
Guides & articles for this recipe

Guides
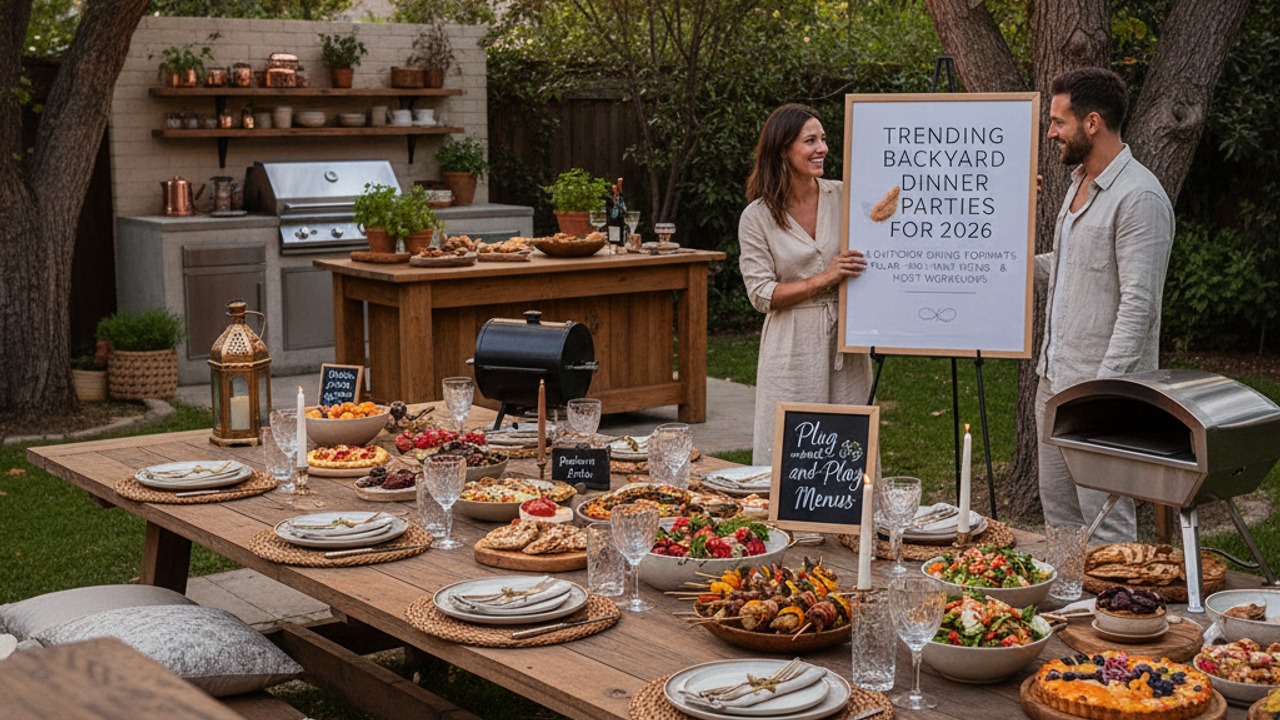
Trending Backyard Dinner Parties for 2026: 8 Outdoor Dining Formats, Ready‑Made Menus & Host Workflows
Discover the eight backyard dining formats taking off in 2026, with plug‑and‑play menu templates, grill timing and workflow checklists, decor shortcuts, and social‑media and sustainability tips. This practical guide turns your yard into a seamless, shareable dining experience—whether you're hosting a casual progressive grill or an intimate fireside chef demo.
Guides
Trending Backyard Dinner Parties for 2026: 8 Outdoor Dining Formats, Plug‑and‑Play Menus & Host Workflows
Discover eight backyard dinner-party formats taking off in 2026, each with plug‑and‑play menu templates, step‑by‑step host workflows, grill timing tips, decor shortcuts, and social & sustainable ideas. Turn your yard into a memorable, stress‑free dining experience.

Healthy Eating
Gluten-Free Weeknight Grilling Plan
A 7-day gluten-free weeknight grilling plan with quick, family-friendly recipes, prep-ahead timelines, and a printable shopping list that spotlights late-summer produce and pantry staples. Includes clear cross-contamination safety tips and simple swaps to keep dinners fast and crowd-pleasing.
More from Dinner
View all Dinner recipes →
Grilled Lemon Herb Chicken Pasta with Arugula and Pine Nuts

Air Fryer Crispy Chicken Cutlet Pasta with Garlic-Parmesan Butter

Classic Bacon Carbonara

Jamaican Jerk Chicken Marinade for Smoking or Grilling

Air Fryer Chicken Sliders

Smoked Chicken Burger

Beer-Can Grilled Whole Chicken

Grilled Chicken with Chimichurri

Campfire‑Smoked Potato Salad with Mustard‑Bacon Vinaigrette — A Labor Day Grilling Side for Steak
Ask me anything about this recipe — substitutions, scaling, techniques, timing.
Powered by AI · 6 questions per 5 minutes, 30 per day