Classic Canned Peaches
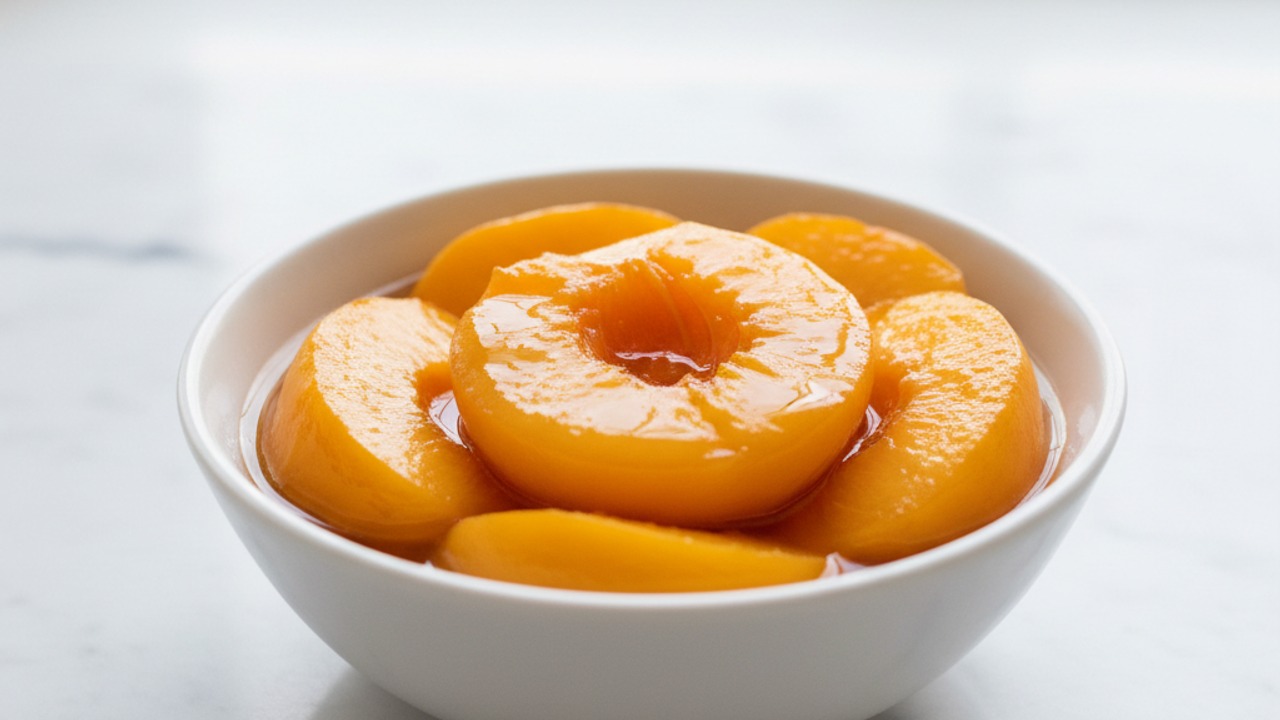
Classic Canned Peaches in a clear, lightly sweetened syrup — perfect for desserts, breakfasts, or snacks year-round. This beginner-friendly, step-by-step water-bath canning recipe teaches safe peeling, packing, and processing so you get bright, tender peaches every time.
Ingredient Spotlight
Canning/pickling salt (optional, for flavor)
Canning/pickling salt is pure granulated salt without iodine or anti-caking agents, used specifically in preserving because it dissolves cleanly and won’t make brines or syrups cloudy. It tastes like ordinary salt but avoids additives that can affect appearance or texture in long-term preserves. You’ll find it near canning supplies in grocery stores or online; if you can’t find it, kosher salt or fine sea salt can be used as a substitute (adjust by volume, and avoid iodized table salt if possible).
Ingredient Spotlight
Sterilized canning jars, new two-piece lids and rings (pint jars)
These are Mason-style glass jars plus the two-piece lids (a flat sealing disc with a sealing compound and a screw band) required for proper water-bath or pressure canning to create a vacuum seal. New lids are recommended because the sealing compound is designed for one-time use, and jars must be sterilized to prevent spoilage and botulism risk when making shelf-stable preserves. You can buy them at supermarkets, big-box stores, hardware stores, and online; glass jars can be reused but always use new lids for safe long-term canning, or for short-term refrigerated storage you can use clean jars with regular lids without a processed seal.
Jake Woods's note
"This is a reliable hot-pack water-bath method that yields bright, tender peach halves in a classic syrup — ideal for cobblers, yogurt toppers, or straight-from-the-jar snacking. Home cooks will appreciate the clear step sequence and tips for preventing browning and ensuring an airtight seal."
About This Recipe
There are few pantry staples as versatile and comforting as a jar of home-canned peaches. This recipe keeps the fruit bright, tender and unmistakably peach-forward by using a clear, lightly sweetened hot syrup and the hot-pack method — which helps preserve color, texture and flavor without the cloudy, overly sweet finish of some old-fashioned recipes. Because we blanch and slip the skins and briefly toss the halves in lemon juice, the finished peaches have a clean, glossy look and a fresh-edge acidity that makes them sing whether spooned over ice cream or folded into morning oatmeal.
This version is intentionally simple and approachable for first-time canners: modest sugar, straightforward equipment and plain syrup that lets the fruit shine. It’s for people who want a year-round shortcut to summer — bakers who stash filling-ready fruit for pies, home cooks who want an elegant topping for desserts, and snack-lovers who appreciate something wholesome straight from the jar. Follow the headspace and processing steps carefully, and you’ll get consistent, shelf-stable results that taste like summer any month of the year.
Ingredients for Classic Canned Peaches
- 8 medium peaches Fresh ripe peaches (halved and peeled)
- 4 cups Water (for syrup)
- 1 cup Granulated sugar (for medium syrup)
- 2 tablespoons Bottled lemon juice (to prevent browning)
- 1 teaspoon Canning/pickling salt (optional, for flavor)
- 4 pint jars (16 fl oz) Sterilized canning jars, new two-piece lids and rings (pint jars)
How to Make Classic Canned Peaches
Step 1: Prepare jars and peaches (peel & prevent browning)
Wash jars, lids, and rings in hot soapy water. Keep jars hot until ready—either in simmering water or in a 225°F (107°C) oven. To peel peaches quickly: bring a large pot of water to a rolling boil, cut a shallow X in the blossom end of each peach, and blanch 30–60 seconds (smaller fruit on the short end). Immediately plunge peaches into an ice water bath and slip off the skins. Halve and remove pits, then toss halves briefly in a bowl with the bottled lemon juice to keep them from browning.For this step
- 8 medium peachesFresh ripe peaches (halved and peeled)
- 2 tablespoonsBottled lemon juice (to prevent browning)
- 4 pint jars (16 fl oz)Sterilized canning jars, new two-piece lids and rings (pint jars)
Step 2: Make the hot syrup on the stovetop
Combine the 4 cups (960 ml) water, 1 cup (200 g) sugar, and optional teaspoon of canning salt in a large pot and bring to a gentle boil, stirring to dissolve the sugar. Reduce heat and keep the syrup hot but not aggressively boiling — you will fill jars with hot syrup for the hot-pack method. (For a lighter syrup, reduce sugar to 1/2 cup; for heavier syrup increase to 1 1/2 cups.)For this step
- 4 cupsWater (for syrup)
- 1 cupGranulated sugar (for medium syrup)
- 1 teaspoonCanning/pickling salt (optional, for flavor)
Step 3: Pack jars with peaches and hot syrup (hot-pack method)
Using a jar lifter, remove a hot jar from the sterilizing bath and place on a towel. Pack peach halves into the jar, rounded side inward, leaving 1/2 inch (1.3 cm) headspace. Pour the hot syrup over the peaches to cover, preserving the 1/2 inch headspace. Press fruit gently with a non-metallic spatula to remove large air pockets.Step 4: Remove air bubbles, wipe rims, and apply lids
Slide a bubble remover or plastic spatula down the inside of the jar to release trapped air; adjust syrup level if needed to maintain 1/2 inch headspace. Wipe the jar rim with a clean, damp paper towel to ensure a good seal. Place a new flat lid on each jar, screw on the ring to fingertip tight (do not over-tighten).Step 5: Process jars in a boiling water bath
Place filled jars on a rack in a boiling-water canner or a large pot with 2–3 inches (5–8 cm) of water above the jar tops. Bring water to a gentle rolling boil, then start timing. Process pint jars for 20 minutes at sea level; if using quarts process 25 minutes. Adjust processing time for altitude: add 5 minutes for 1,001–3,000 ft (305–914 m), 10 minutes for 3,001–6,000 ft (915–1,829 m), and 15 minutes above 6,000 ft (1,829 m). Keep the water at a full boil for the entire processing time.Step 6: Cool, check seals, and store
When time is up, turn off heat and remove the canner lid; let jars sit 5 minutes, then lift jars onto a towel and leave undisturbed for 12–24 hours to cool. After cooling, check seals (lid center should be concave and not pop when pressed). Remove rings, wipe jars, label with date, and store in a cool, dark place for up to 12–18 months. Refrigerate any jars that did not seal and use within a week.


- Wash jars, lids, and rings in hot soapy water. Keep jars hot until ready—either in simmering water or in a 225°F (107°C) oven. To peel peaches quickly: bring a large pot of water to a rolling boil, cut a shallow X in the blossom end of each peach, and blanch 30–60 seconds (smaller fruit on the short end). Immediately plunge peaches into an ice water bath and slip off the skins. Halve and remove pits, then toss halves briefly in a bowl with the bottled lemon juice to keep them from browning.
- Combine the 4 cups (960 ml) water, 1 cup (200 g) sugar, and optional teaspoon of canning salt in a large pot and bring to a gentle boil, stirring to dissolve the sugar. Reduce heat and keep the syrup hot but not aggressively boiling — you will fill jars with hot syrup for the hot-pack method. (For a lighter syrup, reduce sugar to 1/2 cup; for heavier syrup increase to 1 1/2 cups.)
- Using a jar lifter, remove a hot jar from the sterilizing bath and place on a towel. Pack peach halves into the jar, rounded side inward, leaving 1/2 inch (1.3 cm) headspace. Pour the hot syrup over the peaches to cover, preserving the 1/2 inch headspace. Press fruit gently with a non-metallic spatula to remove large air pockets.
- Slide a bubble remover or plastic spatula down the inside of the jar to release trapped air; adjust syrup level if needed to maintain 1/2 inch headspace. Wipe the jar rim with a clean, damp paper towel to ensure a good seal. Place a new flat lid on each jar, screw on the ring to fingertip tight (do not over-tighten).
- Place filled jars on a rack in a boiling-water canner or a large pot with 2–3 inches (5–8 cm) of water above the jar tops. Bring water to a gentle rolling boil, then start timing. Process pint jars for 20 minutes at sea level; if using quarts process 25 minutes. Adjust processing time for altitude: add 5 minutes for 1,001–3,000 ft (305–914 m), 10 minutes for 3,001–6,000 ft (915–1,829 m), and 15 minutes above 6,000 ft (1,829 m). Keep the water at a full boil for the entire processing time.
- When time is up, turn off heat and remove the canner lid; let jars sit 5 minutes, then lift jars onto a towel and leave undisturbed for 12–24 hours to cool. After cooling, check seals (lid center should be concave and not pop when pressed). Remove rings, wipe jars, label with date, and store in a cool, dark place for up to 12–18 months. Refrigerate any jars that did not seal and use within a week.
Classic Canned Peaches Tips
Pick the right peaches
Choose firm-ripe peaches that yield slightly to pressure; overly soft fruit will break down during blanching and packing. If fruit is too underripe, it will be mealy after processing.
Control blanching time
Blanch small peaches 30 seconds and larger ones up to 60 seconds to loosen skins without cooking the flesh. Always plunge into an ice bath immediately to halt cooking and preserve texture.
Keep jars and syrup hot
Filling jars with hot syrup and using preheated jars minimizes jar breakage and prevents fruit from sinking or floating during processing. Work in small batches so syrup stays near boiling.
Maintain 1/2-inch headspace
Consistent 1/2-inch headspace is critical for a good vacuum seal; use a ruler or headspace tool and adjust syrup levels before sealing. Too little headspace can cause overflow, and too much can leave jars unsealed.
Don’t over-tighten lids
Screw bands should be fingertip-tight before processing to allow air to escape; over-tightening can prevent proper sealing and make lids hard to remove later.
Classic Canned Peaches Variations and Substitutions
Lighter syrup option
Reduce sugar to 1/2 cup for a lighter, fresher-tasting syrup; the peaches will be less sweet but still shelf-stable when processed properly. This is great if you plan to use the peaches in tangy or spiced desserts.
Juice-packed peaches
Substitute equal parts apple or white grape juice for the water to make a naturally sweeter, more flavorful pack that plays nicely with breakfast dishes and salads. Heat the juice with sugar the same way to make the hot pack.
Vanilla-cinnamon peaches
Add a split vanilla bean and a single cinnamon stick to the syrup as it simmers, then remove before pouring into jars for a warm, aromatic twist. This variation works beautifully for spooning over baked goods.
Sugar-free packed peaches
Use plain boiling water with the same bottled lemon juice and process normally for a no-added-sugar option; expect a thinner syrup and softer texture. Sugar isn’t required for safety, but the result will be less glossy and more fragile.
How to Store and Make Classic Canned Peaches Ahead
Store sealed jars in a cool, dark place for best quality; use within 12–18 months for peak flavor. After opening, refrigerate any unused peaches and use within 5–7 days. Unsealed jars must be refrigerated and consumed quickly to avoid spoilage.
What to Serve With Classic Canned Peaches
Serve warm over vanilla ice cream or pound cake with a drizzle of the syrup for an effortless dessert; cold, they’re excellent layered into Greek yogurt or cottage cheese for breakfast. Finely chop and fold into whipped cream or pastry cream for tarts, and use the syrup to sweeten iced tea or cocktails for a summery touch.
Classic Canned Peaches FAQs
Do I have to peel the peaches before canning?
Yes — peeling yields a smoother texture and a clearer syrup; the blanch-and-slip method described is the quickest way to remove skins without bruising the fruit.
Can I use nectarines or other stone fruit instead?
Yes, nectarines, apricots and halves of plums can be canned almost the same way, though apricots are smaller and may require shorter blanch times and different packing to maintain texture.
Why use bottled lemon juice?
Bottled lemon juice has a consistent acidity level needed to prevent browning and ensure safe pH levels; fresh lemon juice can vary and isn’t recommended for reliable canning results.
What’s the difference between hot-pack and raw-pack?
Hot-packing (briefly heating fruit in syrup before filling jars) collapses air pockets and reduces floating, producing brighter color and firmer texture, whereas raw-packing is faster but often yields more cloudy syrup and drifting fruit.
How do I know a jar didn’t seal properly?
An unsealed jar will have a lid that flexes or pops when pressed, and it may develop cloudiness or fermentation off-odors; refrigerate and use those peaches within a week rather than storing them on the shelf.
Can I reduce processing time if my jars are small?
Follow the tested processing times in the recipe for pint and quart jars and apply altitude adjustments; altering processing times risks under-processing and unsafe jars.
About the author
Jake WoodsHello, I'm Jake. I started this recipe site with the idea that I hated recipe websites that overwhelm you with long stories and ads just to see plain content that's not helpful. My goal is to provide you with quality recipes, simple ideas and a fun cooking experience. There's lots of fun things to cook, and I think as you browse the site you'll find that TopShelf.Recipes is the place for quality recipes on the web.
See all recipes by Jake Woods →Ratings & Reviews
Did you make this recipe?
Be the first to share your experience.
Nutrition Facts
Per serving: about ¾ cup
Nutrition values are estimated from USDA ingredient data and may vary based on preparation, brands, and portion sizes. Values are provided for informational purposes only.
Keep Reading
Guides & articles for this recipe
Guides
Grilled & Campfire Seasonal Sweets: 12 Crowd‑Favorite Desserts and How to Make Them Year‑Round
A season-by-season guide to 12 grill- and campfire-friendly desserts with flame-safe techniques, make-ahead strategies, vegetarian and gluten-free swaps, plus serving and storage tips so your outdoor sweets shine any time of year.

Guides
Summer Weeknight Grilling Playbook: 4-Week Rotating Meal Plan with Quick Seasonal Recipes, Make‑Ahead Sides & Grill‑First Desserts
A practical, four-week summer grilling playbook built for busy weeknights: 12 fast mains, 8 make‑ahead sides, 4 grill-forward desserts, weekly shopping lists, prep timelines, and smart tips for backyard, tailgate, or campsite cooking. Get the rhythm of easy, seasonal grilling that keeps dinner fresh and fast.

Healthy Eating
Gluten-Free Weeknight Grilling Plan
A 7-day gluten-free weeknight grilling plan with quick, family-friendly recipes, prep-ahead timelines, and a printable shopping list that spotlights late-summer produce and pantry staples. Includes clear cross-contamination safety tips and simple swaps to keep dinners fast and crowd-pleasing.
More from Desserts
View all Desserts recipes →
Easy Peanut Butter Bars

Chocolate Peanut Butter Chex Mix

No-Churn Fresh Berry Ice Cream (No Machine, 5 Ingredients)

Molten Lemon Cake

Boozy Red White Blue Popsicles (Vodka Ice Pops for Adults)

Salted Caramel Stuffed Brownies with Crispy Edges and Sea Salt

Poached Pears with Pistachio

Affogato with Caramel

Canning Peaches Light Syrup
Ask me anything about this recipe — substitutions, scaling, techniques, timing.
Powered by AI · 6 questions per 5 minutes, 30 per day