Classic Cherries In The Snow
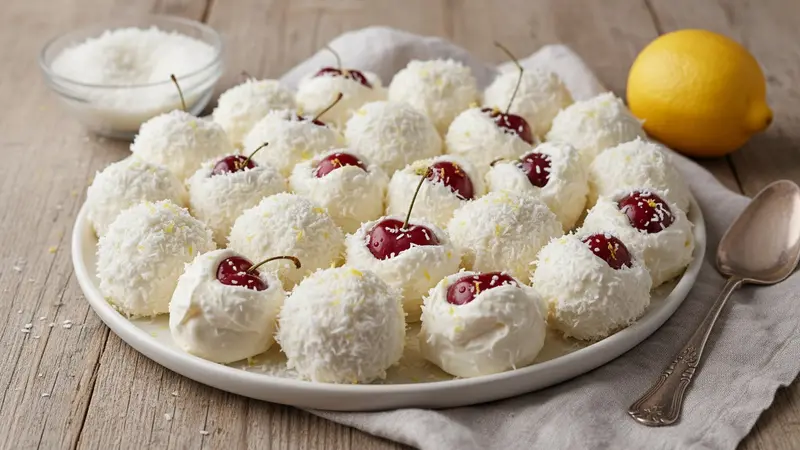
A nostalgic, no-bake party dessert of pitted cherries coated in a sweet, stabilized whipped cream and rolled in coconut for a ‘snowy’ finish. Simple ingredients and quick assembly make these elegant little bites perfect for holiday trays, potlucks, or an easy after-dinner treat.
Jake Woods's note
"These Cherry Snow bites are charming and fuss-free—great for holiday platters or a simple show-stopping dessert. Home cooks will love how quickly fresh cherries are transformed into an elegant little sweet with just a few pantry staples."
About This Recipe
Cherries in the Snow is one of those small, celebratory bites that reads as elegant but is astonishingly forgiving to make. Each piece is a bright, juicy cherry wrapped in a pillowy, stabilized whipped cream and dusted in shredded coconut so it arrives on the plate like a tiny snowball with a sweet core. The contrast — cold, tangy fruit; rich, slightly tangy cream; and chewy coconut — is what makes this simple combination feel sophisticated, not saccharine.
This version leans on a smear of cream cheese folded into the whipped cream rather than gelatin for stability, which keeps the texture lush while ensuring the coating holds its shape long enough for parties or a potluck tray. A quick chill firms the exterior and helps the coconut adhere, while a quick grate of lemon zest at the end lifts the flavor and cuts the creaminess. It’s fast to assemble, kid- and guest-friendly, and perfect for hosts who want to deliver a nostalgic, no-bake dessert with a fresh, modern finish.
Plan your timing
Ingredients for Classic Cherries In The Snow
- 24 count Fresh cherries, pitted
- 1 1/4 cups Heavy cream (cold)
- 3 tablespoons Powdered sugar (confectioners' sugar)
- 2 tablespoons Cream cheese, softened
- 1 teaspoon Vanilla extract
- 3/4 cup Shredded unsweetened coconut
- 1 teaspoon Lemon zest
How to Make Classic Cherries In The Snow
Step 1: Prepare the cherries
Active 10 min
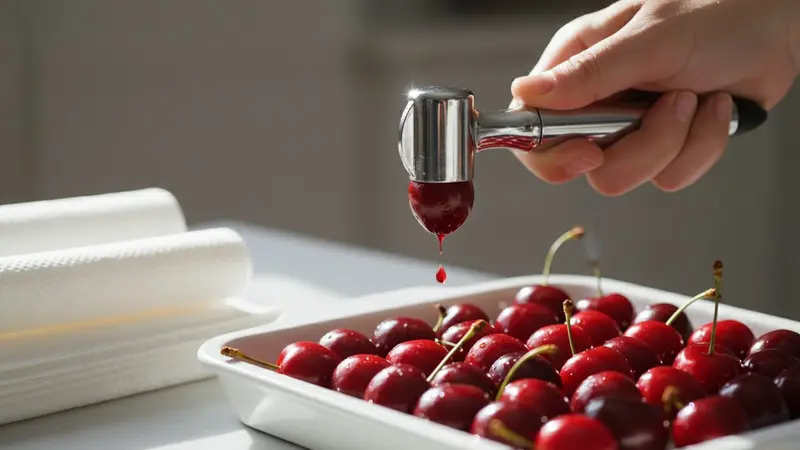
Wash the fresh cherries, remove stems and pit them with a cherry pitter or small knife. Pat the pitted cherries dry on paper towels so the whipped cream adheres; place them in a single layer on a tray while you prepare the cream.For this step
- 24 countFresh cherries, pitted
Step 2: Make the stabilized whipped cream
Active 5 min
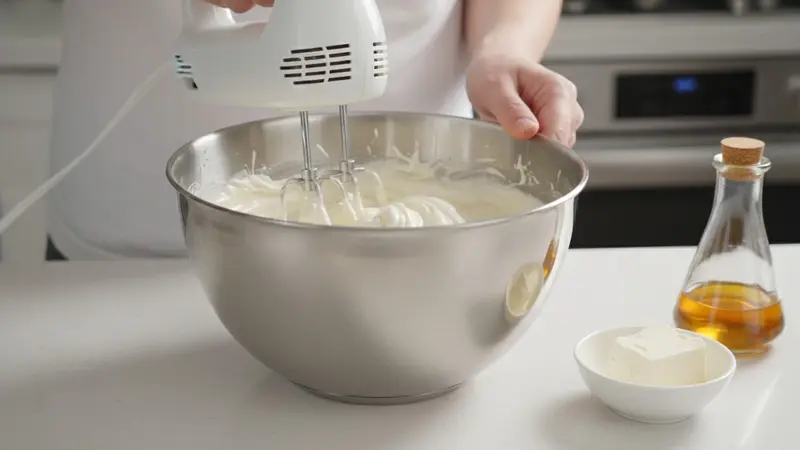
In a chilled mixing bowl, combine the cold heavy cream, powdered sugar, softened cream cheese, and vanilla extract. Whip with a hand mixer or stand mixer on medium-high until firm peaks form and the mixture is smooth and stable.For this step
- 1 1/4 cupsHeavy cream (cold)
- 3 tablespoonsPowdered sugar (confectioners' sugar)
- 2 tablespoonsCream cheese, softened
- 1 teaspoonVanilla extract
Step 3: Coat cherries with cream and coconut
Active 15 min
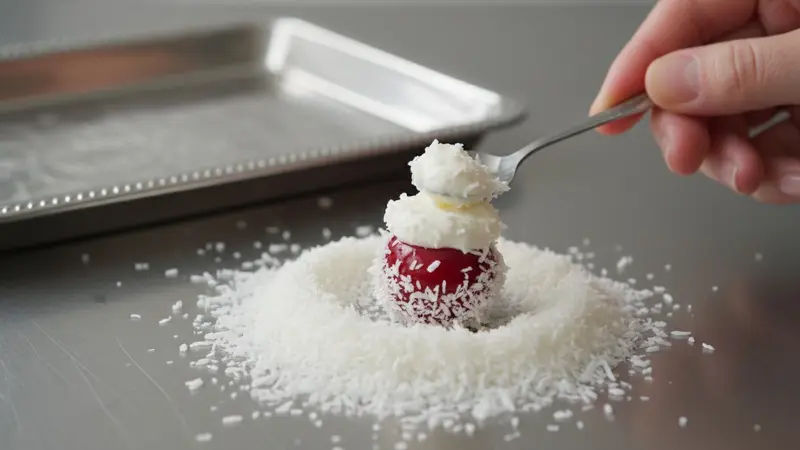
Using a small spoon or a piping bag fitted with a round tip, place a generous dollop of the whipped cream mixture over each pitted cherry so it is mostly covered. Immediately roll each cream-coated cherry in the shredded unsweetened coconut to create the ‘snow’ coating, and set them on a serving tray.For this step
- 3/4 cupShredded unsweetened coconut
Step 4: Chill to set
Passive 30 min
Refrigerate the plated cherries for about 30 minutes to allow the cream to firm up and hold its shape. Chilling also helps the coconut adhere. This recipe makes 24 pieces.Step 5: Finish and serve
Active 2 min
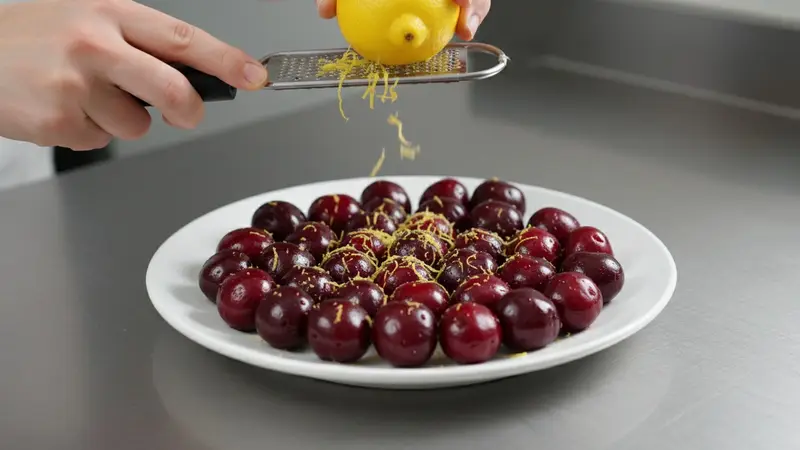
Just before serving, gently grate the lemon zest over the cherries for a bright lift and serve chilled. Arrange on a platter and enjoy one piece at a time as a bite-sized dessert.For this step
- 1 teaspoonLemon zest
- Wash the fresh cherries, remove stems and pit them with a cherry pitter or small knife. Pat the pitted cherries dry on paper towels so the whipped cream adheres; place them in a single layer on a tray while you prepare the cream.
- In a chilled mixing bowl, combine the cold heavy cream, powdered sugar, softened cream cheese, and vanilla extract. Whip with a hand mixer or stand mixer on medium-high until firm peaks form and the mixture is smooth and stable.
- Using a small spoon or a piping bag fitted with a round tip, place a generous dollop of the whipped cream mixture over each pitted cherry so it is mostly covered. Immediately roll each cream-coated cherry in the shredded unsweetened coconut to create the ‘snow’ coating, and set them on a serving tray.
- Refrigerate the plated cherries for about 30 minutes to allow the cream to firm up and hold its shape. Chilling also helps the coconut adhere. This recipe makes 24 pieces.
- Just before serving, gently grate the lemon zest over the cherries for a bright lift and serve chilled. Arrange on a platter and enjoy one piece at a time as a bite-sized dessert.
Classic Cherries In The Snow Tips
Chill the mixing bowl
Pop your bowl and beaters in the fridge for 15–30 minutes so the cream whips faster and reaches firmer peaks.
Dry cherries thoroughly
Pat pitted cherries completely dry before coating so the cream adheres rather than sliding off and creating soggy spots.
Soften cream cheese well
Bring the cream cheese to room temperature or briefly microwave in 5-second bursts before blending to avoid lumps in the whipped cream.
Use a piping bag
A small round piping tip gives neater, more uniform coatings and speeds assembly compared with spooning on the cream.
Press coconut lightly
After rolling, press shredded coconut gently into the cream to secure the flakes and prevent shedding while serving.
Classic Cherries In The Snow Variations and Substitutions
Chocolate-dipped finish
After chilling, dip half of each coated cherry in melted dark chocolate and let set for a mocha-berry contrast.
Toasted coconut swap
Toast the shredded coconut briefly until golden for a nuttier flavor and firmer texture that still reads ‘snowy’ but with depth.
Vegan coconut cream
Use full-fat chilled coconut cream whipped with a tablespoon of coconut yogurt and a vegan cream cheese alternative for a dairy-free version.
Citrus-ginger twist
Fold 1/2 teaspoon ground ginger into the cream and trade lemon zest for orange zest to add warm spice and bright citrus notes.
How to Store and Make Classic Cherries In The Snow Ahead
Store assembled cherries in a single layer in an airtight container in the refrigerator for up to 24 hours; beyond that the cream softens and coconut may weep. If you want to prep earlier, make the stabilized whipped cream and store it separately for up to 24 hours, then assemble cherries within a few hours of serving. Avoid freezing, as thawed whipped cream becomes watery and the texture will suffer.
What to Serve With Classic Cherries In The Snow
Arrange on a chilled platter with small paper doilies or toothpicks for easy grabbing; a single mint leaf or a thin strip of lemon peel on the plate adds color contrast. These bites pair beautifully with Champagne or a dry Prosecco, and also make a light finish alongside coffee or an herbal tea like chamomile or lemon verbena.
Classic Cherries In The Snow FAQs
Can I use frozen cherries?
You can if you thaw and very thoroughly drain them first, but fresh cherries give firmer texture and less water — frozen ones tend to make the cream runny.
What if I don’t have cream cheese?
You can stabilize the cream with 1 tablespoon of cornstarch dissolved into a tablespoon of cream, or use 1 teaspoon unflavored gelatin bloomed and dissolved, but the texture will differ slightly from the cream-cheese tang.
How can I prevent the cream from sliding off?
Make sure cherries are completely dry and the whipped cream is whipped to firm peaks; slightly under-whipped cream will slump, while over-whipped may break, so aim for smooth, stable peaks.
Is sweetened shredded coconut okay?
You can use sweetened coconut if you prefer extra sweetness, but it will add more sugar and a chewier, stickier finish — unsweetened keeps the flavors balanced.
How far ahead can I assemble these?
Assemble up to about 6–12 hours ahead and refrigerate, ideally no more than 24 hours, to preserve the best texture and appearance.
About the author
Jake WoodsHello, I'm Jake. I started this recipe site with the idea that I hated recipe websites that overwhelm you with long stories and ads just to see plain content that's not helpful. My goal is to provide you with quality recipes, simple ideas and a fun cooking experience. There's lots of fun things to cook, and I think as you browse the site you'll find that TopShelf.Recipes is the place for quality recipes on the web.
See all recipes by Jake Woods →Ratings & Reviews
Did you make this recipe?
Be the first to share your experience.
Nutrition Facts
Per serving: 1 serving
Nutrition values are estimated from USDA ingredient data and may vary based on preparation, brands, and portion sizes. Values are provided for informational purposes only.
Keep Reading
Guides & articles for this recipe

Recipes
Gut-Healthy Recipe Roundup
A practical collection of recipes that emphasize fiber, prebiotics, and fermented foods to support a diverse microbiome. Mix breakfasts, snacks, bowls and mains to build meals that feel good to eat and are gentle on digestion.

Recipes
Fun Kid-Friendly Halloween Recipes
Easy, playful Halloween recipes that kids can help make or will happily eat. From no-bake classroom treats to spooky grilled sweets, this roundup groups tried ideas for parties, after-school snacks, and trick-or-treat gatherings.

Seasonal
Thanksgiving on a Budget
Practical strategies for hosting a full-flavored Thanksgiving without overspending. Actionable planning, shopping and cooking tips that help you cut costs while serving classic crowd-pleasers.
More from General
View all General recipes →
Oven Roasted Thanksgiving Turkey

Goad Cheese and Chive Cream-Fried Eggs

Molly Yeh Popcorn Salad

Jack Frost Mimosa

Authentic Mai Tai
Viral Dr Pepper Butter
Dragon Fruit Salsa

Santa Strawberry Cheesecake Cups

White Chocolate Cherry Skulls
Ask me anything about this recipe — substitutions, scaling, techniques, timing.
Powered by AI · 6 questions per 5 minutes, 30 per day