Instant Pot Beef Bulgogi
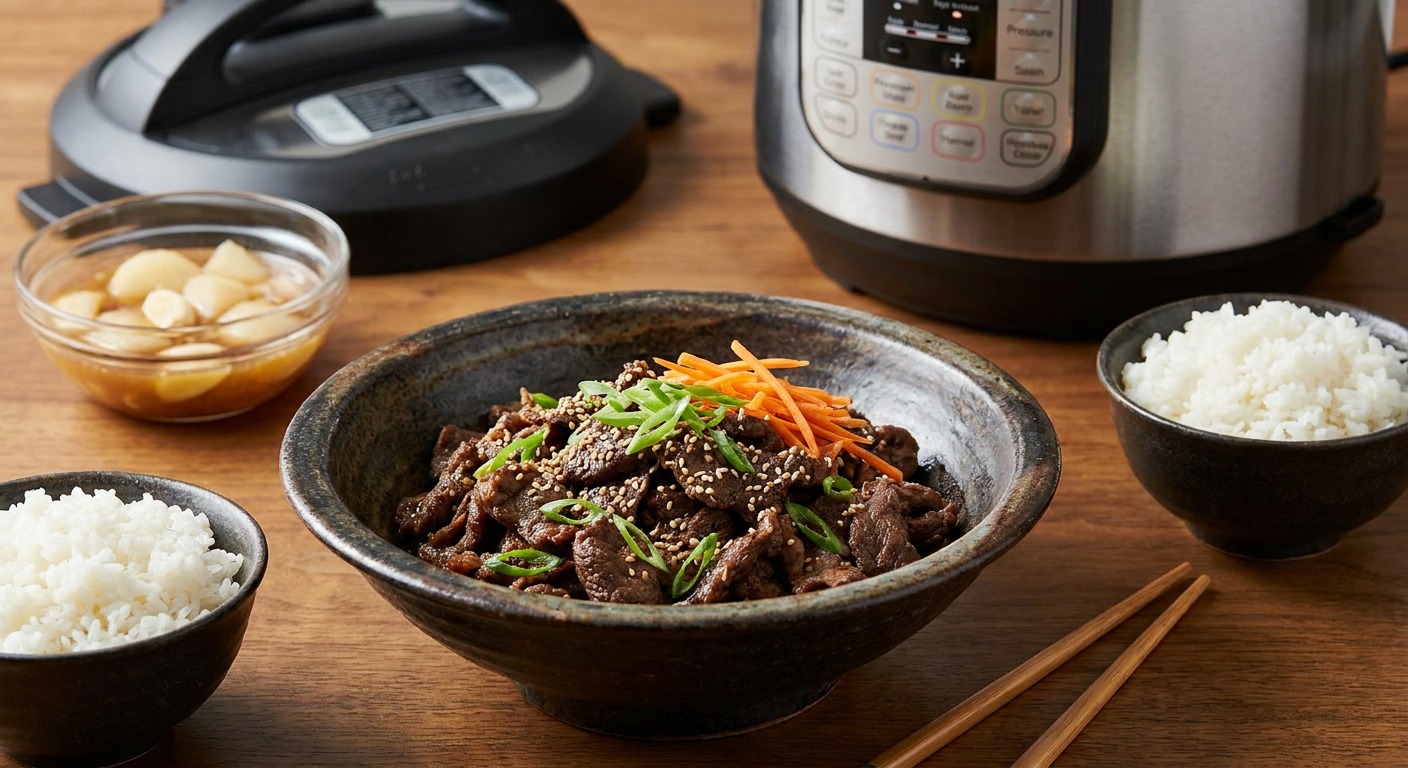
A fast, flavorful take on classic Korean bulgogi made in the Instant Pot for weeknights. Thinly sliced beef is marinated with pear, garlic, soy, and sesame, then pressure-cooked for tender, saucy Korean BBQ in under an hour.
Ingredient Spotlight
Asian pear (or apple)
A round, crisp pear common in East Asia (Korea, Japan, China) that is juicier and crisper than Western pears; it’s often grated into marinades (e.g., bulgogi) to add sweetness and gentle enzymatic tenderizing. It smells mildly floral and tastes sweet with a texture more like an apple-pear hybrid. Find it at Asian markets, many larger grocery stores, or farmers’ markets in season. If unavailable, a firm apple or a Bosc pear grated will work as a substitute (the recipe already lists apple as an option).
Jake Woods's note
"This Instant Pot method gives you authentic bulgogi flavor with much less hands-on time—perfect for busy evenings or casual dinners. Serve over steamed rice or in lettuce wraps for an easy crowd-pleaser."
About This Recipe
This Instant Pot Beef Bulgogi is a practical, flavor-forward shortcut that keeps the essentials of Korean bulgogi while shaving off the usual fuss. Thinly sliced ribeye or sirloin gets a short but potent bath of soy, brown sugar, sesame, garlic, ginger and grated Asian pear — the pear does double duty as a natural tenderizer and a bright, fruity counterpoint to the savory-sweet marinade. Searing the beef first builds the browned edges we crave, while pressure cooking finishes the meat quickly and yields an uncommonly tender result for a weeknight dish.
What makes this version work for busy cooks is the balance between quick marination and a brief pressure-cook: you retain texture and depth of flavor without an all-day brine. Use low-sodium soy sauce to avoid over-salting, and don’t skip the reduction step — concentrating the pan sauce after pressure cooking brings glossy, clingy flavor to rice, lettuce leaves, or a quick bibimbap. This recipe is ideal for people who want authentic-tasting Korean BBQ at home on weeknights, meal-prep bowls, or for feeding a small group without standing at the stove for hours.
Ingredients for Instant Pot Beef Bulgogi
- 1 1/2 lb Thinly sliced beef (ribeye or sirloin)
- 1/3 cup Low-sodium soy sauce
- 2 tbsp Packed brown sugar
- 1 tbsp Sesame oil
- 1 tbsp Vegetable oil (for sautéing)
- 4 cloves Garlic, minced (about 4 cloves)
- 1 tbsp Fresh ginger, minced
- 1/2 cup Asian pear (or apple), grated
- 2 stalks Scallions, thinly sliced
- 1 tbsp Toasted sesame seeds
How to Make Instant Pot Beef Bulgogi
Step 1: Make the bulgogi marinade
In a medium bowl whisk together the soy sauce, brown sugar, sesame oil, minced garlic, minced ginger, and grated Asian pear until the sugar dissolves. This combination adds savory, sweet, and tenderizing elements that define bulgogi's signature flavor.For this step
- 1/3 cupLow-sodium soy sauce
- 2 tbspPacked brown sugar
- 4 clovesGarlic, minced (about 4 cloves)
- 1 tbspFresh ginger, minced
- 1/2 cupAsian pear (or apple), grated
Step 2: Marinate the beef
Place the thinly sliced beef in a large bowl or resealable bag and pour the marinade over the meat, tossing to coat evenly. Let sit at room temperature for 10–15 minutes (or refrigerate for up to 2 hours) to allow the flavors to penetrate.For this step
- 1 1/2 lbThinly sliced beef (ribeye or sirloin)
Step 3: Sear and pressure cook in the Instant Pot
Set the Instant Pot to Sauté (High) and add the vegetable oil; when hot, add the beef in a single layer and quickly brown in batches for 1–2 minutes per side—don’t worry about cooking through. Cancel Sauté, return all browned beef to the pot with any reserved marinade, secure the lid, set to Pressure Cook/Manual on High for 5 minutes, then perform a quick release when the cook cycle finishes.For this step
- 1 tbspVegetable oil (for sautéing)
Step 4: Reduce sauce and finish
If the sauce is thin, switch the Instant Pot back to Sauté and simmer 2–3 minutes to reduce and concentrate the flavors, stirring to prevent sticking. Stir in half the sliced scallions and half the sesame seeds, reserving the rest for garnish.For this step
- 2 stalksScallions, thinly sliced
Step 5: Serve and garnish
Transfer the bulgogi to a serving platter and sprinkle with the remaining scallions and sesame seeds. Serve hot over steamed rice, with kimchi, or in lettuce wraps for a quick Korean BBQ-style meal.


- In a medium bowl whisk together the soy sauce, brown sugar, sesame oil, minced garlic, minced ginger, and grated Asian pear until the sugar dissolves. This combination adds savory, sweet, and tenderizing elements that define bulgogi's signature flavor.
- Place the thinly sliced beef in a large bowl or resealable bag and pour the marinade over the meat, tossing to coat evenly. Let sit at room temperature for 10–15 minutes (or refrigerate for up to 2 hours) to allow the flavors to penetrate.
- Set the Instant Pot to Sauté (High) and add the vegetable oil; when hot, add the beef in a single layer and quickly brown in batches for 1–2 minutes per side—don’t worry about cooking through. Cancel Sauté, return all browned beef to the pot with any reserved marinade, secure the lid, set to Pressure Cook/Manual on High for 5 minutes, then perform a quick release when the cook cycle finishes.
- If the sauce is thin, switch the Instant Pot back to Sauté and simmer 2–3 minutes to reduce and concentrate the flavors, stirring to prevent sticking. Stir in half the sliced scallions and half the sesame seeds, reserving the rest for garnish.
- Transfer the bulgogi to a serving platter and sprinkle with the remaining scallions and sesame seeds. Serve hot over steamed rice, with kimchi, or in lettuce wraps for a quick Korean BBQ-style meal.
Instant Pot Beef Bulgogi Tips
Slice meat ultra-thin
Freeze the beef for 20–30 minutes until firm and slice thinly across the grain to maximize tenderness and quick cooking.
Use Asian pear
Grated Asian pear adds sweetness and enzymes that gently tenderize; if unavailable, use a crisp apple but reduce the amount slightly to avoid excess liquid.
Brown in batches
Searing a single layer of beef in batches develops browning without steaming; don’t crowd the pot or you’ll lose caramelization.
Quick-release carefully
Perform a quick release immediately after the 5-minute cook to prevent overcooking thin slices; use a kitchen towel to shield your hand from steam if needed.
Reduce for glossy sauce
Finish on Sauté for 2–4 minutes to thicken the sauce; a cornstarch slurry (1 tsp starch + 1 tbsp water) can help if you prefer a sticky glaze.
Instant Pot Beef Bulgogi Variations and Substitutions
Chicken Bulgogi
Use thinly sliced boneless chicken thighs and reduce pressure-cook time to 3 minutes; the marinade works the same and yields juicy, less fatty results.
Spicy Gochujang Twist
Add 1–2 tablespoons gochujang and 1 teaspoon rice vinegar to the marinade for a tangy, spicy glaze; decrease brown sugar if you want less sweetness.
Vegetarian Mushroom Bulgogi
Replace beef with oyster or shiitake mushrooms (sliced thick) and skip pressure cooking — sauté mushrooms until richly browned and finish with the same marinade reduced to a glaze.
Low-sugar / Gluten-free
Swap brown sugar for 1–2 teaspoons of honey or a sugar-free sweetener and use tamari or coconut aminos instead of soy to make the dish gluten-free and lower in refined sugar.
How to Store and Make Instant Pot Beef Bulgogi Ahead
Cool leftovers to room temperature within 90 minutes and store in an airtight container in the refrigerator for up to 3–4 days. For longer storage, freeze in portioned containers for up to 2 months; thaw overnight in the fridge before reheating. Reheat gently in a skillet over medium heat with a splash of water or rice wine to revive the sauce, or microwave covered until just warmed through to avoid drying the beef.
What to Serve With Instant Pot Beef Bulgogi
Serve over steamed short-grain rice with a spoonful of the reduced sauce spooned over the top and a side of kimchi for acidity. For a hands-on meal, offer butter lettuce leaves, thinly sliced cucumbers, and gochujang mayo for wraps. A crisp, slightly sweet beer or chilled soju pairs well, while lightly dressed spinach or a quick carrot-shallot salad adds brightness and texture.
Instant Pot Beef Bulgogi FAQs
How long should I marinate the beef?
A short 10–15 minute marination at room temperature infuses flavor quickly thanks to the grated pear; for deeper flavor and more tender results, marinate up to 2 hours in the refrigerator but no longer than 6 hours to avoid mushiness.
Can I use frozen beef directly in the Instant Pot?
No — thin slices should be thawed first and, ideally, chilled and slightly firm for clean slicing; cooking from frozen will yield uneven results and longer cook times.
Why is the pressure-cook time only 5 minutes?
Thinly sliced beef cooks very quickly; 5 minutes under high pressure plus a quick release finishes tenderizing without overcooking, preserving texture rather than turning the meat stringy.
Can I skip searing the beef?
You can, but you’ll lose much of the desirable browned flavor and the sauce will be lighter; searing in batches is a small step that significantly improves depth and mouthfeel.
How do I get a sticky, caramelized glaze?
After pressure cooking, switch to Sauté and reduce the liquid until syrupy; if needed, whisk in a tiny cornstarch slurry (1 tsp cornstarch + 1 tbsp cold water) and simmer for 1–2 minutes to thicken and gloss the sauce.
About the author
Jake WoodsHello, I'm Jake. I started this recipe site with the idea that I hated recipe websites that overwhelm you with long stories and ads just to see plain content that's not helpful. My goal is to provide you with quality recipes, simple ideas and a fun cooking experience. There's lots of fun things to cook, and I think as you browse the site you'll find that TopShelf.Recipes is the place for quality recipes on the web.
See all recipes by Jake Woods →Ratings & Reviews
Did you make this recipe?
Be the first to share your experience.
Nutrition Facts
Per serving: 1 serving
Nutrition values are estimated from USDA ingredient data and may vary based on preparation, brands, and portion sizes. Values are provided for informational purposes only.
Keep Reading
Guides & articles for this recipe

Healthy Eating
Gluten-Free Weeknight Grilling Plan
A 7-day gluten-free weeknight grilling plan with quick, family-friendly recipes, prep-ahead timelines, and a printable shopping list that spotlights late-summer produce and pantry staples. Includes clear cross-contamination safety tips and simple swaps to keep dinners fast and crowd-pleasing.

Healthy Eating
Low-Fat Grill Swaps for Big Flavor
A practical guide to trimming fat from grilled meals without losing juiciness or char. Learn yogurt- and citrus-based marinades, lean protein picks, searing and indirect-heat tricks, plus 5 quick low-fat marinades and a simple weeknight plan.

Recipes
DIY Edible Monster Eyes Candy
Make safe, fun edible monster eyes for cupcakes, cookies, and candy trays. Step-by-step recipes show baking-soda balls, chocolate and fondant eyes, wafer-print options, plus assembly, storage, and kid-friendly safety tips.
More from Instant Pot
View all Instant Pot recipes →
Instant Pot Strawberry Jam

Instant Pot Swedish Meatballs in Creamy Gravy

Snake River Farms Beef Tallow Instant Pot Braised Short Ribs

Instant Pot Beef Stew — Tender Chuck in 45 Minutes

Instant Pot Red Lentil Dal

Instant Pot Top Round Roast for Tender Sliced Roast Beef

Instant Pot Steel-Cut Oats with Apples and Cinnamon (Make-Ahead)

Instant Pot Sichuan Hot Pot Broth

Instant Pot Honey Garlic Chicken Thighs with Sauce-Soaked Rice Bowl
Ask me anything about this recipe — substitutions, scaling, techniques, timing.
Powered by AI · 6 questions per 5 minutes, 30 per day