Kettle-Style Deep-Fried Chips
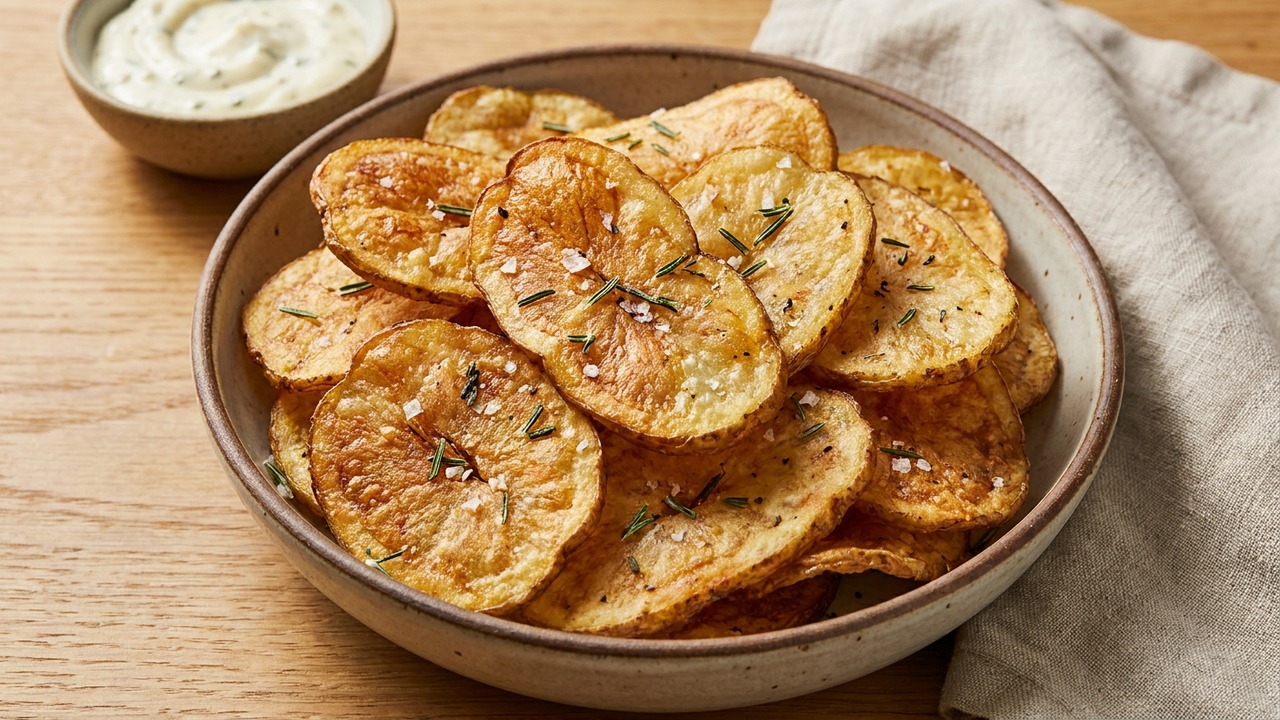
Thick-cut, kettle-style chips with a crackling, blistered crunch achieved by rinsing, soaking and a single high-temperature fry. Seasoned while hot for maximum adhesion and flavor, these chips recreate the classic snack-shop bite at home.
Ingredient Spotlight
Neutral oil for frying (canola or peanut)
This refers to a high-smoke-point, neutral-flavored oil; canola is very common in the U.S., while peanut oil is prized in many Asian and Southern cuisines for deep-frying because of its high smoke point and slight nutty aroma. Peanut oil may be unfamiliar to some home cooks and is an allergen to be aware of. You can find peanut oil in most supermarkets or Asian markets; if you want to avoid peanuts, use canola, sunflower, or refined avocado oil as straightforward substitutes.
Ingredient Spotlight
White or malt vinegar (optional, for a tangy finish)
Malt vinegar is made from malted barley and has roots in the UK (famously used on fish and chips); it has a malty, slightly sweet tang that’s deeper than plain white vinegar. It may be less common in some U.S. pantries compared with distilled white or apple cider vinegar. Buy it at most grocery stores or British/European specialty shops; substitute with white wine vinegar or apple cider vinegar (add a pinch of sugar if you want a touch of the malt sweetness).
Ingredient Spotlight
Smoked paprika (optional)
Smoked paprika (pimentón) is a Spanish spice made from smoked, dried red peppers and imparts a sweet-smoky, earthy flavor distinct from regular paprika. It’s central to many Spanish and Mediterranean dishes but might be unfamiliar to cooks who only use plain paprika. Look for it in the spice aisle, Latin or European markets, or online; if you don’t have it, mix regular paprika with a small pinch of chipotle powder or a drop of liquid smoke as a substitute.
Jake Woods's note
"These chips shine at casual gatherings and game nights—crisp, salty, and slightly blistered for real kettle-chip character. Home cooks will love how simple technique (soak, dry, single high-temp fry) makes a big crunchy payoff."
About This Recipe
These kettle-style deep-fried chips are about texture first: thick, slightly rippled discs that blister and crackle on the surface while keeping a tender, creamy interior. The trick is not overcomplicating the frying process but doing three things well—remove surface starch, dry completely, and fry once at a high, steady temperature—so each chip browns quickly and develops that signature snack-shop crunch instead of turning limp or greasy. Seasoning while the chips are still hot locks flavor into the oil film on the chip, giving every bite an immediate hit of salt and smoke.
This version was built for home cooks who want a satisfying, hands-on snack that outclasses bagged chips without exotic equipment. Russets give the best balance of starch and moisture for blistered, golden chips, and the optional sprinkle of malt vinegar and smoked paprika recreates that seaside-canteen tang. Plan 60–75 minutes from start to finish, mostly unattended soaking and cooling time, and you’ll end up with a batch that’s worth the slightly messy fry: rustic, bold, and utterly irresistible with a cold beer or a sharp dip.
Ingredients for Kettle-Style Deep-Fried Chips
- 1 1/2 pounds Russet potatoes
- 4 cups Cold water (with ice)
- 4 cups Neutral oil for frying (canola or peanut)
- 2 teaspoons Kosher salt
- 1 teaspoon White or malt vinegar (optional, for a tangy finish)
- 1/2 teaspoon Freshly ground black pepper
- 1/2 teaspoon Smoked paprika (optional)
How to Make Kettle-Style Deep-Fried Chips
Step 1: Slice and rinse the potatoes
Wash the russets and, if you like, leave the skins on for texture. Using a mandoline or a sharp knife, slice the potatoes to 1/8–3/16 inch (3–4.5 mm) thickness for a kettle-style heft, then transfer the slices to a large bowl.For this step
- 1 1/2 poundsRusset potatoes
- 4 cupsCold water (with ice)
Step 2: Soak and dry to remove starch
Cover the slices with cold water and ice and rinse until the water runs less cloudy, then soak at least 30 minutes (up to 2 hours) to draw out starch. Drain and spread the slices on clean kitchen towels or a rack and pat them completely dry—excess moisture will cause oil splatter and prevent crisping.Step 3: Heat oil and fry in batches
Pour oil into a heavy, deep pot so it fills about one-third to one-half the depth and heat to 350–375°F (175–190°C) using a thermometer for accuracy. Fry the potato slices in small, single layers (do not overcrowd) for about 3–4 minutes per batch, stirring occasionally until blistered and golden; remove with a slotted spoon to a paper towel- or rack-lined tray to drain.For this step
- 4 cupsNeutral oil for frying (canola or peanut)
Step 4: Season immediately while hot
While the chips are still hot and oily, sprinkle evenly with kosher salt and a light dusting of smoked paprika and black pepper; toss gently so the seasoning sticks. For a classic tang, lightly mist or toss with a teaspoon of vinegar before the final seasoning—do this sparingly so the chips don't become soggy.For this step
- 2 teaspoonsKosher salt
- 1 teaspoonWhite or malt vinegar (optional, for a tangy finish)
- 1/2 teaspoonFreshly ground black pepper
- 1/2 teaspoonSmoked paprika (optional)
Step 5: Cool, serve, and store
Let the chips cool completely to room temperature—the cooling completes the crisping process—and serve immediately for best texture. Store any leftovers in an airtight container at room temperature and eat within 1–2 days, as chips soften with time.


- Wash the russets and, if you like, leave the skins on for texture. Using a mandoline or a sharp knife, slice the potatoes to 1/8–3/16 inch (3–4.5 mm) thickness for a kettle-style heft, then transfer the slices to a large bowl.
- Cover the slices with cold water and ice and rinse until the water runs less cloudy, then soak at least 30 minutes (up to 2 hours) to draw out starch. Drain and spread the slices on clean kitchen towels or a rack and pat them completely dry—excess moisture will cause oil splatter and prevent crisping.
- Pour oil into a heavy, deep pot so it fills about one-third to one-half the depth and heat to 350–375°F (175–190°C) using a thermometer for accuracy. Fry the potato slices in small, single layers (do not overcrowd) for about 3–4 minutes per batch, stirring occasionally until blistered and golden; remove with a slotted spoon to a paper towel- or rack-lined tray to drain.
- While the chips are still hot and oily, sprinkle evenly with kosher salt and a light dusting of smoked paprika and black pepper; toss gently so the seasoning sticks. For a classic tang, lightly mist or toss with a teaspoon of vinegar before the final seasoning—do this sparingly so the chips don't become soggy.
- Let the chips cool completely to room temperature—the cooling completes the crisping process—and serve immediately for best texture. Store any leftovers in an airtight container at room temperature and eat within 1–2 days, as chips soften with time.
Kettle-Style Deep-Fried Chips Tips
Uniform Slicing
Use a mandoline set to 3–4.5 mm or a steady hand to ensure even cooking; uneven slices mean some chips burn while others stay floppy.
Cold Soak Matters
Soak at least 30 minutes in iced water to pull out surface starches—this is what prevents chips from sticking and promotes blistering rather than soggy oil absorption.
Dry Thoroughly
Pat each slice completely dry or use a wire rack to air-dry; any residual moisture will cause dangerous oil splatter and reduce crispness.
Temperature Control
Maintain 350–375°F (175–190°C) with a thermometer and adjust heat between batches; oil that’s too cool yields greasy chips, too hot burns them before they cook through.
Small Single Layers
Fry in thin, single layers without crowding so slices can move and blister; use a spider or slotted spoon to stir gently during frying.
Season While Hot
Salt and season as soon as chips come out of the oil so the granules adhere to the oil sheen; if using vinegar, apply only a light mist to avoid sogginess.
Kettle-Style Deep-Fried Chips Variations and Substitutions
Sweet Potato Chips
Swap russets for firm sweet potatoes and cut the same thickness; soak a bit less time (20–30 minutes) since they release less surface starch, and expect a shorter fry time.
Herbed Sea Salt
Mix finely chopped rosemary, thyme, or sage into flaky sea salt and sprinkle while hot for an aromatic, savory finish that pairs well with lamb or roast beef sandwiches.
Parmesan–Cayenne Dust
Toss hot chips with a mixture of finely grated Parmesan and a pinch of cayenne for a sharp, umami-forward twist—use sparingly so cheese doesn’t clump.
Air-Fryer Shortcut
For a lower-oil option, dry the slices thoroughly, mist lightly with oil, and air-fry at 375°F in a single layer for 8–12 minutes, flipping once; texture will be close but less blistered.
How to Store and Make Kettle-Style Deep-Fried Chips Ahead
Store cooled chips in an airtight container at room temperature for up to 48 hours, but expect them to soften after the first day. To revive slightly softened chips, warm them in a single layer on a baking sheet at 250–275°F for 5–8 minutes; avoid microwaving, which makes chips limp and chewy.
What to Serve With Kettle-Style Deep-Fried Chips
Serve these chips in a wide bowl or cone lined with parchment and finish with a pinch of flaky salt and a squeeze of lemon for brightness. They pair beautifully with a sharp cheddar dip, malt-vinegar aioli, or classic ketchup, and stand up well to pint glasses of lager or a crisp, acidic white wine like Albariño.
Kettle-Style Deep-Fried Chips FAQs
Can I reuse the frying oil?
Yes—strain the cooled oil through a fine mesh and store in a sealed container for up to two uses, keeping it in a cool, dark place; discard if it smells off or shows excessive foaming when heated.
Why fry once instead of twice?
With the starch removed in the cold soak and a hot single fry, these thicker slices blister and brown quickly without absorbing excess oil, so the usual double-fry method used for thinner chips isn't necessary here.
My chips browned unevenly—what happened?
Uneven thickness, overcrowding, or inconsistent oil temperature cause spotty coloring; make uniform slices, fry in small batches, and monitor temperature to fix this.
Can I use other potato varieties?
You can, but high-starch russets give the best blister-and-crisp contrast; waxy varieties like red potatoes stay firmer and won’t blister the same way, producing a different texture.
How much vinegar should I use?
Use no more than a teaspoon per batch as a fine mist or very light toss; too much liquid will make the chips soggy instead of giving a bright tang.
About the author
Jake WoodsHello, I'm Jake. I started this recipe site with the idea that I hated recipe websites that overwhelm you with long stories and ads just to see plain content that's not helpful. My goal is to provide you with quality recipes, simple ideas and a fun cooking experience. There's lots of fun things to cook, and I think as you browse the site you'll find that TopShelf.Recipes is the place for quality recipes on the web.
See all recipes by Jake Woods →Ratings & Reviews
Did you make this recipe?
Be the first to share your experience.
Nutrition Facts
Per serving: 1 serving
Nutrition values are estimated from USDA ingredient data and may vary based on preparation, brands, and portion sizes. Values are provided for informational purposes only.
Keep Reading
Guides & articles for this recipe

Healthy Eating
Gluten-Free Weeknight Grilling Plan
A 7-day gluten-free weeknight grilling plan with quick, family-friendly recipes, prep-ahead timelines, and a printable shopping list that spotlights late-summer produce and pantry staples. Includes clear cross-contamination safety tips and simple swaps to keep dinners fast and crowd-pleasing.

Healthy Eating
Low-Fat Grill Swaps for Big Flavor
A practical guide to trimming fat from grilled meals without losing juiciness or char. Learn yogurt- and citrus-based marinades, lean protein picks, searing and indirect-heat tricks, plus 5 quick low-fat marinades and a simple weeknight plan.

Recipes
DIY Edible Monster Eyes Candy
Make safe, fun edible monster eyes for cupcakes, cookies, and candy trays. Step-by-step recipes show baking-soda balls, chocolate and fondant eyes, wafer-print options, plus assembly, storage, and kid-friendly safety tips.
More from Snacks
View all Snacks recipes →
Easy Peanut Butter Bars

Holiday Cranberry Maple Chex Mix

Labor Day Grilled Lobster Rolls with Charred Scallion Brown Butter & Lemon‑Herb Aioli

Snake River Farms Beef Tallow Crispy Air Fryer Chicken Wings

Strawberry Yogurt Bark

Buffalo Chicken Dip

Snake River Farms Beef Tallow Popcorn with Parmesan and Herbs

Truffle Parmesan Butter Board with Crispy Breadcrumbs

S'mores Popcorn
Ask me anything about this recipe — substitutions, scaling, techniques, timing.
Powered by AI · 6 questions per 5 minutes, 30 per day