Classic Peanut Butter Cookies
A quick, no-chill version of the classic peanut butter crisscross cookie: crisp at the edges with a tender, peanut-forward center. These cookies come together in one bowl and bake in about 10 minutes — perfect for last-minute baking or cookie swaps.
Jake Woods's note
"This recipe is a fast, reliable take on the iconic crisscross peanut butter cookie — no chill time required. It’s ideal for weekday baking, school lunches, or whenever you want warm peanut-buttery cookies fast."
About This Recipe
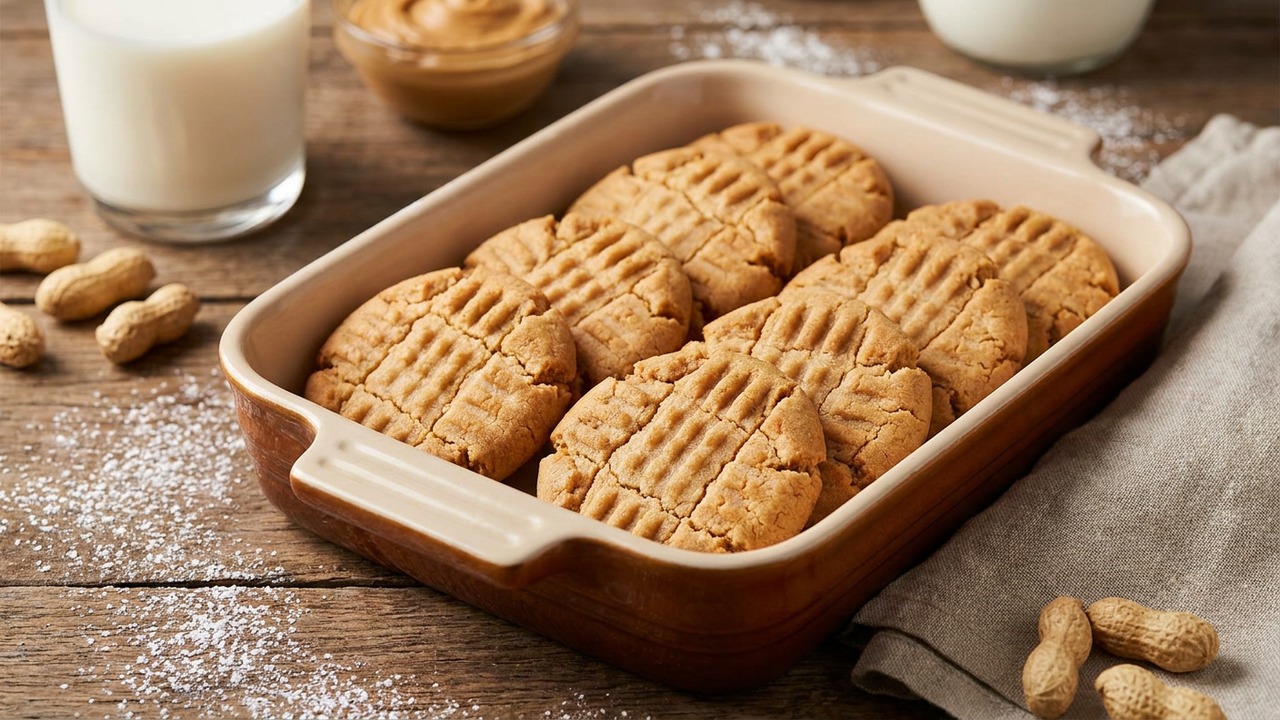
These peanut butter cookies are what my kitchen turns to when I want something fast, unfussy, and unmistakably peanutty. The dough comes together in one bowl with no chilling required, so you can scoop and bake within minutes; the result is a cookie with crisp, slightly caramelized edges and a tender, peanut-forward center that still melts on the tongue. The classic fork-cross pattern isn't just nostalgic — it helps the cookies bake evenly and creates the thin, crackled top that gives way to a softer interior.
What makes this version work is the balance between granulated and brown sugar and the inclusion of real butter alongside creamy peanut butter: the sugars give lift and crisping while the butter keeps the flavor round and rich. Use creamy peanut butter for a reliably smooth dough, or swap in a crunchy jar if you want texture; if you use natural peanut butter, stir it well and expect to chill briefly. Because this recipe yields a small, easily doubled batch, it's ideal for last-minute bake sales, quick gifts, or an afternoon treat with cold milk.
Ingredients for Classic Peanut Butter Cookies
- 1 1/4 cups All-purpose flour
- 1 tsp Baking soda
- 1/4 tsp Salt
- 1/2 cup Unsalted butter, softened
- 1/2 cup Granulated sugar
- 1/2 cup Light brown sugar, packed
- 1 cup Creamy peanut butter
- 1 large Large egg
- 1 tsp Vanilla extract
How to Make Classic Peanut Butter Cookies
Step 1: Preheat and prepare
Preheat the oven to 350°F (175°C) and line two baking sheets with parchment paper or a silicone mat. Have a fork and a small bowl of flour or sugar (optional) ready for pressing the cookies.Step 2: Whisk dry ingredients
In a medium bowl, whisk together the all-purpose flour, baking soda, and salt until evenly combined. Set the dry mix aside while you cream the sugars and fats — this prevents overmixing later.For this step
- 1 1/4 cupsAll-purpose flour
- 1 tspBaking soda
- 1/4 tspSalt
Step 3: Cream sugars, butter and peanut butter; add egg and vanilla
In a large bowl, use a hand mixer or stand mixer to beat the softened butter with the granulated and brown sugars until light and slightly fluffy, about 1–2 minutes. Add the peanut butter and beat until combined, then add the egg and vanilla and mix until smooth and glossy.For this step
- 1/2 cupUnsalted butter, softened
- 1/2 cupGranulated sugar
- 1/2 cupLight brown sugar, packed
- 1 cupCreamy peanut butter
- 1 largeLarge egg
- 1 tspVanilla extract
Step 4: Combine wet and dry
Fold the dry ingredients into the peanut butter mixture with a spatula until just incorporated; do not overmix. The dough will be soft but manageable — if it feels too sticky to shape, chill 5–10 minutes, though this recipe is designed to work without chilling.Step 5: Shape and create crisscross pattern
Scoop level tablespoons of dough and roll into balls (about 1 tbsp for smaller cookies or 1½ tbsp for larger). Place 2 inches apart on prepared sheets. Dip a fork in flour or granulated sugar and press down once, rotate 90°, and press again to make the classic crisscross pattern. If cookies spread too quickly, press a bit deeper so they maintain the pattern after baking.Step 6: Bake and cool
Bake one sheet at a time in the preheated oven for 9–11 minutes, until edges are set and lightly golden — centers may look slightly soft but will firm as they cool. Transfer cookies to a wire rack after 2 minutes on the sheet to finish cooling; store fully cooled cookies in an airtight container for up to 4 days.


- Preheat the oven to 350°F (175°C) and line two baking sheets with parchment paper or a silicone mat. Have a fork and a small bowl of flour or sugar (optional) ready for pressing the cookies.
- In a medium bowl, whisk together the all-purpose flour, baking soda, and salt until evenly combined. Set the dry mix aside while you cream the sugars and fats — this prevents overmixing later.
- In a large bowl, use a hand mixer or stand mixer to beat the softened butter with the granulated and brown sugars until light and slightly fluffy, about 1–2 minutes. Add the peanut butter and beat until combined, then add the egg and vanilla and mix until smooth and glossy.
- Fold the dry ingredients into the peanut butter mixture with a spatula until just incorporated; do not overmix. The dough will be soft but manageable — if it feels too sticky to shape, chill 5–10 minutes, though this recipe is designed to work without chilling.
- Scoop level tablespoons of dough and roll into balls (about 1 tbsp for smaller cookies or 1½ tbsp for larger). Place 2 inches apart on prepared sheets. Dip a fork in flour or granulated sugar and press down once, rotate 90°, and press again to make the classic crisscross pattern. If cookies spread too quickly, press a bit deeper so they maintain the pattern after baking.
- Bake one sheet at a time in the preheated oven for 9–11 minutes, until edges are set and lightly golden — centers may look slightly soft but will firm as they cool. Transfer cookies to a wire rack after 2 minutes on the sheet to finish cooling; store fully cooled cookies in an airtight container for up to 4 days.
Classic Peanut Butter Cookies Tips
Room-temperature butter
Butter should be soft enough to dent with a finger but not shiny or greasy; this ensures the sugars aerate properly for a light crumb.
Weigh or spoon flour
Spoon flour into the measuring cup and level it off or, better yet, weigh it; too much flour makes dry, cakey cookies.
Flour the fork
Dip your fork into a little flour or granulated sugar before pressing to prevent the dough from sticking and to keep the crisscross clean.
Control cookie spread
If dough seems too loose, chill scooped balls 5–10 minutes; you can also slightly reduce butter by a tablespoon to tighten structure without changing flavor.
Pull slightly underbaked
Take cookies out when edges are set but centers look a bit soft; they firm up as they cool, preserving a tender middle.
Classic Peanut Butter Cookies Variations and Substitutions
Crunchy Peanut Butter
Swap creamy for crunchy peanut butter and fold in an extra tablespoon of nut pieces for more texture; reduce mix-ins if dough becomes too dry.
Chocolate-studded
Press two small chocolate chunks into each cookie before baking or fold in 1/3 cup mini chocolate chips to add melty pockets of chocolate without overpowering the peanut flavor.
Brown-butter & Sea Salt
Brown the butter first for a nutty depth, cool it to room temperature, then proceed; finish with a light sprinkle of flaky sea salt right out of the oven.
Peanut-free Sunflower
Use an equal amount of sunflower seed butter for a nut-free version; omit brown sugar by 1–2 tablespoons if the seed butter is especially sweet to avoid cloying.
Gluten-free swap
Replace the flour with a 1:1 gluten-free baking blend that contains xanthan gum; expect the texture to be slightly denser but the flavor unchanged.
How to Store and Make Classic Peanut Butter Cookies Ahead
Store fully cooled cookies in an airtight container at room temperature for up to 4 days, separating layers with parchment to keep surfaces crisp. For longer storage, freeze baked cookies in a single layer on a tray, then transfer to a zip-top bag for up to 3 months; thaw at room temperature. To refresh, warm in a 300°F oven for 4–6 minutes or microwave a single cookie for 8–12 seconds to bring back that just-baked softness.
What to Serve With Classic Peanut Butter Cookies
These cookies are classic with a cold glass of milk or a café-style latte; the milk cuts the richness and highlights the peanut notes. For an indulgent dessert, sandwich a scoop of vanilla ice cream between two warm cookies and press gently for a gooey, tactile treat.
Classic Peanut Butter Cookies FAQs
Why did my cookies spread too much?
Over-soft butter, an overly warm kitchen, or too little flour can cause excess spread; chill scooped dough 5–10 minutes and check your oven temperature with a thermometer to ensure it's accurate.
My cookies are crumbly in the center — what happened?
Crumbly centers usually mean the cookies were overbaked or you added too much flour; shorten the bake time by a minute or two and make sure your flour is measured correctly.
Can I use natural peanut butter?
Yes, but natural peanut butter (with oil separation) can make the dough looser and greasier; stir it thoroughly and consider chilling the dough 10–20 minutes before shaping.
Can I freeze the dough or baked cookies?
Both freeze well: freeze shaped dough balls on a tray, then bag for up to 3 months and bake from frozen with an extra 1–2 minutes, or freeze baked cookies in layers with parchment and thaw at room temperature.
How do I keep the fork crisscross clear?
Dip the fork in flour or granulated sugar to prevent sticking, press firmly once, rotate 90 degrees, and press again — if the pattern fades while baking, press a touch deeper before putting the sheet in the oven.
About the author
Jake WoodsHello, I'm Jake. I started this recipe site with the idea that I hated recipe websites that overwhelm you with long stories and ads just to see plain content that's not helpful. My goal is to provide you with quality recipes, simple ideas and a fun cooking experience. There's lots of fun things to cook, and I think as you browse the site you'll find that TopShelf.Recipes is the place for quality recipes on the web.
See all recipes by Jake Woods →Ratings & Reviews
Did you make this recipe?
Be the first to share your experience.
Nutrition Facts
Per serving: 2 cookies (70g)
Nutrition values are estimated from USDA ingredient data and may vary based on preparation, brands, and portion sizes. Values are provided for informational purposes only.
Keep Reading
Guides & articles for this recipe

Tips & Techniques
Baking Soda and Tenderized Beef
Learn how baking soda can tenderize, boost browning, and improve moisture for ground beef and other meats. This practical guide covers the science, step-by-step techniques, common mistakes, and recipes to try.

Healthy Eating
Gluten-Free Weeknight Grilling Plan
A 7-day gluten-free weeknight grilling plan with quick, family-friendly recipes, prep-ahead timelines, and a printable shopping list that spotlights late-summer produce and pantry staples. Includes clear cross-contamination safety tips and simple swaps to keep dinners fast and crowd-pleasing.

Healthy Eating
Low-Fat Grill Swaps for Big Flavor
A practical guide to trimming fat from grilled meals without losing juiciness or char. Learn yogurt- and citrus-based marinades, lean protein picks, searing and indirect-heat tricks, plus 5 quick low-fat marinades and a simple weeknight plan.
More from Baking
View all Baking recipes →
Gluten-Free Soft Pretzels

Sticky Gochujang Spare Ribs (Oven-Baked Korean-Inspired)

Apple Cider Muffins

Baked Buffalo Chicken Wings with Blue Cheese Dip (Crispy Oven Method)

Gluten-Free Honey Garlic Chicken Thighs with Tamari and Toasted Sesame

Sheet Pan Baked Honey Garlic Chicken Breasts with Roasted Vegetables

Juicy Oven-Baked Chicken Breasts (No-Dryness Method)

Cloud Bread Sandwiches

Honey Mustard Chicken Nuggets
Ask me anything about this recipe — substitutions, scaling, techniques, timing.
Powered by AI · 6 questions per 5 minutes, 30 per day