Peppermint Chocolate Cookie Bars
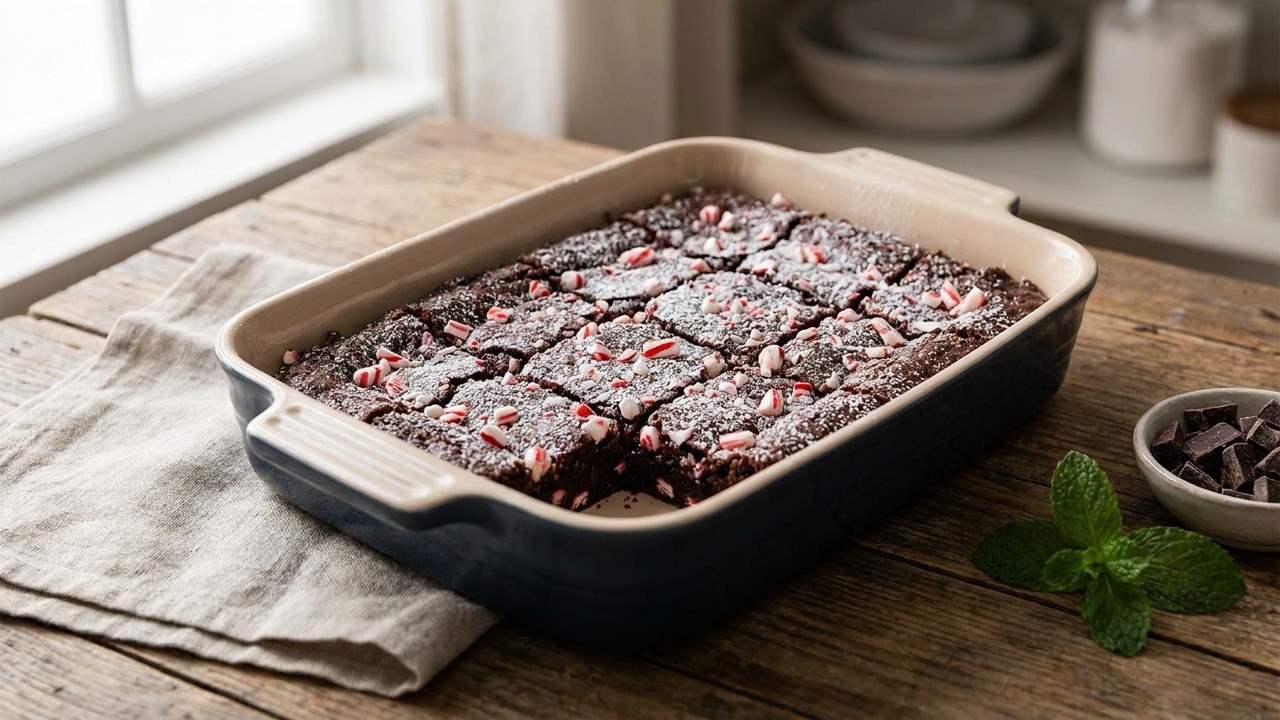
Fudgy, intensely chocolatey cookie bars studded with crunchy peppermint for a bright, festive bite. A simple batter comes together quickly with an easy bake, plus a no-bake chilling option for busy bakers who still want rich texture and peppermint crunch.
Jake Woods's note
"These bars balance deep, fudgy chocolate with a crisp peppermint finish—perfect for holiday cookie trays or an easy weeknight treat. Home bakers will love how forgiving the batter is and that there's a quick no-bake path when oven time is limited."
About This Recipe
These Peppermint Chocolate Cookie Bars land squarely between a fudgy brownie and a dense chocolate cookie: deeply cocoa-forward, glossy, and studded with molten pockets of semisweet chips and bright, crunchy peppermint. The method—melting butter then whisking in sugar and cocoa, followed by warm eggs—creates a sheen and tender crumb that keeps the center irresistibly gooey while the edges set, and the reserved crushed candy on top gives each bite a festive snap. Baking at a modest 325°F and pulling the pan when the center still jiggles preserves that fudgy texture, and there’s also an easy no-bake finish if you need to skip the oven without losing intensity.
This version works because of the balance: semisweet chips temper the peppermint’s sharpness, and just three-quarters of the crushed candy inside plus a sprinkling on top keeps peppermint from dissolving into the batter. It’s a great make-ahead treat for holiday trays, cookie exchanges, or after-dinner sweets—and the no-bake option makes it perfect for packed schedules or hot kitchens. These bars also travel and freeze well, so they’re ideal for gifting; just reserve a few whole candy pieces for garnish so they read as homemade and thoughtful.
Ingredients for Peppermint Chocolate Cookie Bars
- 1/2 cup unsalted butter
- 1 cup granulated sugar
- 1/2 cup unsweetened cocoa powder
- 1/2 teaspoon fine salt
- 2 large large eggs
- 1 teaspoon vanilla extract
- 3/4 cup all-purpose flour
- 1 cup semisweet chocolate chips
- 3/4 cup crushed peppermint candy (candy cane or peppermint chips)
How to Make Peppermint Chocolate Cookie Bars
Step 1: Warm and combine the chocolate base
Preheat the oven to 325°F (163°C) and line an 8x8-inch (20x20 cm) pan with parchment, leaving an overhang. In a medium saucepan over low heat, melt the butter while stirring, then remove from heat and whisk in the granulated sugar, cocoa powder, and salt until smooth and glossy.For this step
- 1/2 cupunsalted butter
- 1 cupgranulated sugar
- 1/2 cupunsweetened cocoa powder
- 1/2 teaspoonfine salt
Step 2: Incorporate the eggs and vanilla
Let the chocolate mixture cool for 1–2 minutes off the heat, then whisk in the eggs one at a time until fully incorporated and the batter is shiny. Stir in the vanilla extract and mix until smooth and slightly thickened.For this step
- 2 largelarge eggs
- 1 teaspoonvanilla extract
Step 3: Add the flour
Sift or spoon the all-purpose flour over the batter and fold gently with a spatula until just combined; avoid overmixing to keep the bars fudgy. Scrape the batter into the prepared pan and smooth the top with an offset spatula.For this step
- 3/4 cupall-purpose flour
Step 4: Fold in chips and peppermint
Fold the semisweet chocolate chips and three-quarters of the crushed peppermint into the batter, reserving the rest for sprinkling on top. Sprinkle the reserved peppermint over the surface so each bar has a bright peppermint crunch after baking.For this step
- 1 cupsemisweet chocolate chips
- 3/4 cupcrushed peppermint candy (candy cane or peppermint chips)
Step 5: Bake or use the no-bake finish, then cool and cut
Bake for 18–22 minutes until edges are set and the center is still slightly jiggy for a fudgy texture; cool completely in the pan before lifting and slicing. No-bake option: instead of baking, press the batter firmly into the lined pan, top with reserved peppermint, and chill at least 2 hours (or until firm); for a glossier top, melt 2–3 tablespoons of additional chocolate and drizzle before chilling.


- Preheat the oven to 325°F (163°C) and line an 8x8-inch (20x20 cm) pan with parchment, leaving an overhang. In a medium saucepan over low heat, melt the butter while stirring, then remove from heat and whisk in the granulated sugar, cocoa powder, and salt until smooth and glossy.
- Let the chocolate mixture cool for 1–2 minutes off the heat, then whisk in the eggs one at a time until fully incorporated and the batter is shiny. Stir in the vanilla extract and mix until smooth and slightly thickened.
- Sift or spoon the all-purpose flour over the batter and fold gently with a spatula until just combined; avoid overmixing to keep the bars fudgy. Scrape the batter into the prepared pan and smooth the top with an offset spatula.
- Fold the semisweet chocolate chips and three-quarters of the crushed peppermint into the batter, reserving the rest for sprinkling on top. Sprinkle the reserved peppermint over the surface so each bar has a bright peppermint crunch after baking.
- Bake for 18–22 minutes until edges are set and the center is still slightly jiggy for a fudgy texture; cool completely in the pan before lifting and slicing. No-bake option: instead of baking, press the batter firmly into the lined pan, top with reserved peppermint, and chill at least 2 hours (or until firm); for a glossier top, melt 2–3 tablespoons of additional chocolate and drizzle before chilling.
Peppermint Chocolate Cookie Bars Tips
Warm the chocolate base
Take the butter off heat before adding sugar and cocoa so the mixture cools just enough to prevent the eggs from cooking, but is still warm enough to melt sugar into a glossy batter.
Crush peppermint correctly
Use a zip-top bag and a rolling pin to crush candy canes to mostly small shards; avoid pulverizing into powder, which can bleed color and make the bars gritty.
Watch for the jiggle
Bake until the edges are set but the center still jiggles slightly—carryover heat will finish it, giving fudgy bars rather than a cakey slice.
Prevent chips from sinking
Toss the chocolate chips in a teaspoon of flour before folding them in to help them suspend evenly through the batter.
Press firmly for no-bake
If using the no-bake option, press the batter tightly into the pan with the bottom of a measuring cup to eliminate air pockets and create a denser, fudgelike bite.
Peppermint Chocolate Cookie Bars Variations and Substitutions
Dark chocolate upgrade
Swap the semisweet chips for chopped 70% dark chocolate and add 1/2 teaspoon instant espresso powder to deepen the cocoa flavor without altering technique.
Nutty peppermint bars
Fold in 1/2 cup toasted chopped walnuts or pecans for crunch and to cut the sweetness while keeping the same baking time and temperature.
Gluten-free swap
Replace the all-purpose flour with an equal amount of a 1:1 gluten-free baking blend; fold gently and bake as directed, though the texture will be slightly more tender.
Orange–peppermint twist
Add 1 teaspoon finely grated orange zest to the batter and use dark chocolate chips to introduce a bright citrus contrast to the mint.
Less-sweet option
Reduce the granulated sugar to 3/4 cup and substitute half the semisweet chips with unsweetened chocolate pieces to lower sweetness while preserving structure.
How to Store and Make Peppermint Chocolate Cookie Bars Ahead
Because these bars contain eggs and butter, store them airtight in the refrigerator for up to 5 days. You can also freeze cut bars in a single layer on a baking sheet, then transfer to a freezer bag for up to 2 months; thaw at room temperature for 30–60 minutes before serving. For the no-bake version, keep chilled until ready to serve and bring to room temperature briefly to soften the texture if preferred.
What to Serve With Peppermint Chocolate Cookie Bars
Serve slightly chilled or at room temperature with a dollop of whipped cream or a small scoop of vanilla ice cream to balance the peppermint. Pair with black coffee or an espresso for contrast, or offer peppermint hot chocolate for a festive, mint-forward dessert course. For gift jars or platters, garnish slices with a few whole peppermint shards and a dusting of cocoa for an elegant finish.
Peppermint Chocolate Cookie Bars FAQs
Can I use Dutch-processed cocoa instead of natural cocoa?
Yes—Dutch-processed cocoa works well and will give a mellower, darker chocolate flavor; there’s no leavening in this recipe so you don’t need to adjust for acidity.
Why does the recipe call for a lower oven temperature?
Baking at 325°F reduces the chance of overcooking the edges while the center sets, which helps achieve the fudgy, glossy interior these bars are known for.
My peppermint turned soggy—what happened?
If peppermint is too finely powdered or added while the batter is hot, it can dissolve; use coarser shards and reserve most for sprinkling on top so some stays crisp after baking.
Can I double the recipe?
Yes, double the ingredients and bake in a 9x13-inch pan; you may need to increase baking time by 5–10 minutes and check for the same 'edges set, center jiggles' doneness.
How do I get clean slices?
Chill the pan completely, then lift the parchment out and slice with a large, sharp knife wiped clean between cuts; for glossy tops on the no-bake version, wait until fully firm before slicing.
About the author
Jake WoodsHello, I'm Jake. I started this recipe site with the idea that I hated recipe websites that overwhelm you with long stories and ads just to see plain content that's not helpful. My goal is to provide you with quality recipes, simple ideas and a fun cooking experience. There's lots of fun things to cook, and I think as you browse the site you'll find that TopShelf.Recipes is the place for quality recipes on the web.
See all recipes by Jake Woods →Ratings & Reviews
Did you make this recipe?
Be the first to share your experience.
Nutrition Facts
Per serving: 1 bar (95g)
Nutrition values are estimated from USDA ingredient data and may vary based on preparation, brands, and portion sizes. Values are provided for informational purposes only.
Keep Reading
Guides & articles for this recipe

Tips & Techniques
Baking Soda and Tenderized Beef
Learn how baking soda can tenderize, boost browning, and improve moisture for ground beef and other meats. This practical guide covers the science, step-by-step techniques, common mistakes, and recipes to try.

Healthy Eating
Gluten-Free Weeknight Grilling Plan
A 7-day gluten-free weeknight grilling plan with quick, family-friendly recipes, prep-ahead timelines, and a printable shopping list that spotlights late-summer produce and pantry staples. Includes clear cross-contamination safety tips and simple swaps to keep dinners fast and crowd-pleasing.

Healthy Eating
Low-Fat Grill Swaps for Big Flavor
A practical guide to trimming fat from grilled meals without losing juiciness or char. Learn yogurt- and citrus-based marinades, lean protein picks, searing and indirect-heat tricks, plus 5 quick low-fat marinades and a simple weeknight plan.
More from Baking
View all Baking recipes →
Gluten-Free Soft Pretzels

Sticky Gochujang Spare Ribs (Oven-Baked Korean-Inspired)

Apple Cider Muffins

Baked Buffalo Chicken Wings with Blue Cheese Dip (Crispy Oven Method)

Gluten-Free Honey Garlic Chicken Thighs with Tamari and Toasted Sesame

Sheet Pan Baked Honey Garlic Chicken Breasts with Roasted Vegetables

Juicy Oven-Baked Chicken Breasts (No-Dryness Method)

Cloud Bread Sandwiches

Honey Mustard Chicken Nuggets
Ask me anything about this recipe — substitutions, scaling, techniques, timing.
Powered by AI · 6 questions per 5 minutes, 30 per day