Perfect Scrambled Eggs
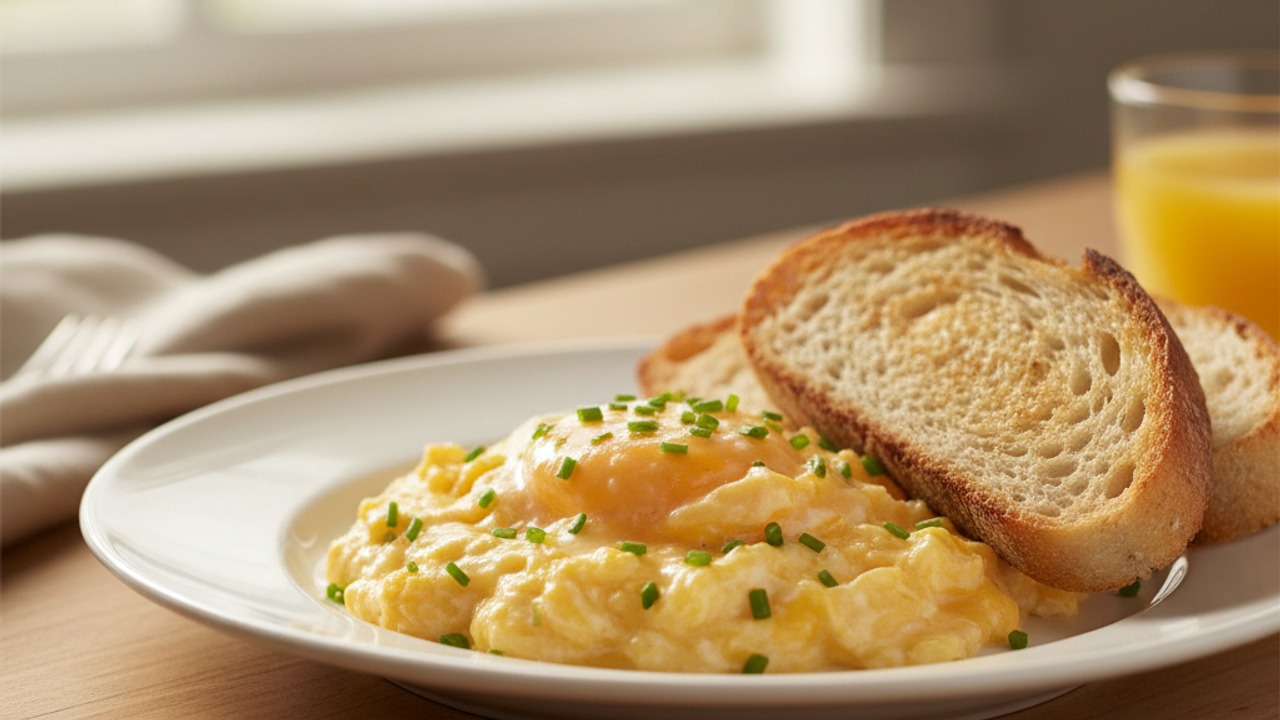
Silky, creamy scrambled eggs made extra-luxurious by a touch of sour cream. Slow-cooked on the stovetop and finished with fresh chives, this method yields soft curds and consistent results every time.
Jake Woods's note
"A small spoonful of sour cream makes the eggs noticeably creamier and helps carry flavor—perfect for leisurely weekend breakfasts or a fast weekday upgrade. Home cooks will love how forgiving the low-and-slow method is."
About This Recipe
These scrambled eggs are built around one small, counterintuitive idea: a spoonful of full‑fat sour cream adds silkiness, sheen, and a gentle tang that lifts the eggs without weighing them down. Cooked low and slow in a nonstick or well‑seasoned pan, the whites and yolks form soft, pillowy curds rather than tight, rubbery lumps; folding the custard-like mixture and finishing off the heat produces the glossy, barely-set texture that separates good scrambled eggs from great ones.
This version is for cooks who want consistent, restaurant‑style results in ten minutes with minimal fuss — a weekday luxury or a no‑stress weekend centerpiece. The milk, sour cream, and a modest amount of butter create an emulsion that tempers heat, while a final scattering of fresh chives brightens the palate; optional finishing touches like a pat of butter or extra dollop of sour cream let you dial the richness. Learn the slow-fold method here and you’ll be able to reproduce the same silky curds every time, whether you’re feeding two or scaling up for a brunch crowd.
Ingredients for Perfect Scrambled Eggs
- 4 large Large eggs
- 2 tbsp Sour cream (full-fat)
- 1 tbsp Whole milk
- 1/2 tsp Kosher salt
- 1/4 tsp Freshly ground black pepper
- 1 tbsp Unsalted butter
- 1 tbsp Fresh chives, finely chopped
How to Make Perfect Scrambled Eggs
Step 1: Whisk eggs with sour cream and seasonings
Crack the eggs into a medium bowl. Add the sour cream, milk, salt, and black pepper and whisk briskly until the mixture is uniform and slightly frothy—this helps incorporate air for creamier curds.For this step
- 4 largeLarge eggs
- 2 tbspSour cream (full-fat)
- 1 tbspWhole milk
- 1/2 tspKosher salt
- 1/4 tspFreshly ground black pepper
Step 2: Heat the pan and melt butter
Place a nonstick or well-seasoned skillet over low to medium-low heat and add the butter. Let the butter melt and foam without browning so the pan is warm and the butter coats the surface.For this step
- 1 tbspUnsalted butter
Step 3: Cook the eggs slowly, stirring gently
Pour the egg mixture into the pan and let it sit undisturbed for about 10–15 seconds until edges begin to set. Using a flexible spatula, gently push the set edges toward the center and tilt the pan to let uncooked egg flow to the perimeter; repeat in slow folds until soft curds form. Keep the heat low—the eggs should never sizzle; total cook time is about 2–4 minutes depending on your stove.Step 4: Finish off off-heat and add chives
When the eggs are mostly set but still glossy and slightly runny, remove the pan from the heat—the residual heat will finish them. Stir in the chopped chives and, if desired, a tiny pat of butter or a dollop of sour cream for extra silkiness; rest for 20–30 seconds.For this step
- 1 tbspFresh chives, finely chopped
Step 5: Serve immediately
Transfer to warmed plates and season to taste with a final sprinkle of salt and pepper. Serve straightaway alongside toast or roasted tomatoes for a simple, elegant breakfast.


- Crack the eggs into a medium bowl. Add the sour cream, milk, salt, and black pepper and whisk briskly until the mixture is uniform and slightly frothy—this helps incorporate air for creamier curds.
- Place a nonstick or well-seasoned skillet over low to medium-low heat and add the butter. Let the butter melt and foam without browning so the pan is warm and the butter coats the surface.
- Pour the egg mixture into the pan and let it sit undisturbed for about 10–15 seconds until edges begin to set. Using a flexible spatula, gently push the set edges toward the center and tilt the pan to let uncooked egg flow to the perimeter; repeat in slow folds until soft curds form. Keep the heat low—the eggs should never sizzle; total cook time is about 2–4 minutes depending on your stove.
- When the eggs are mostly set but still glossy and slightly runny, remove the pan from the heat—the residual heat will finish them. Stir in the chopped chives and, if desired, a tiny pat of butter or a dollop of sour cream for extra silkiness; rest for 20–30 seconds.
- Transfer to warmed plates and season to taste with a final sprinkle of salt and pepper. Serve straightaway alongside toast or roasted tomatoes for a simple, elegant breakfast.
Perfect Scrambled Eggs Tips
Whisk Until Slightly Frothy
Vigorously whisking incorporates air and helps break up the white strands so you get uniform, creamy curds rather than separate translucent bits.
Keep Heat Very Low
Use a low to medium-low flame and resist upping the temperature; the eggs should never sizzle—gentle heat gives time for small curds to form.
Use the Right Pan
A 8–10 inch nonstick or well-seasoned skillet gives the eggs enough surface area to spread thinly and cook evenly without sticking.
Fold, Don’t Scrape
Push set edges to the center and tilt the pan so uncooked liquid flows to the sides; this creates soft folds rather than tiny, grainy curds.
Finish Off-Heat
Remove the pan while the eggs are still glossy and slightly underdone—the residual heat will carry them to perfect doneness without overcooking.
Perfect Scrambled Eggs Variations and Substitutions
Crème Fraîche Swap
Substitute crème fraîche for sour cream to increase richness and reduce tang; it also tolerates heat well and keeps the eggs velvety.
Herbed and Cheesy
Stir in a tablespoon of grated aged cheddar or Gruyère at the end and swap some chives for tarragon or chervil for an elevated brunch flavor.
Smoked Salmon Finish
Fold in small ribbons of smoked salmon and a squeeze of lemon after cooking, and serve on buttered toast for a luxurious open-faced option.
Lower-Fat Option
Use low-fat plain Greek yogurt thinned with a splash of milk instead of sour cream and reduce butter to a teaspoon; texture will be slightly firmer but still creamy.
How to Store and Make Perfect Scrambled Eggs Ahead
Scrambled eggs are best eaten immediately; if you must store leftovers, cool them quickly and refrigerate in an airtight container for up to 48 hours. Reheat gently over very low heat in a nonstick pan with a teaspoon of milk or butter, stirring frequently, or microwave in short 15–20 second bursts, stirring between intervals to avoid drying out.
What to Serve With Perfect Scrambled Eggs
Serve these eggs on warm, buttered sourdough or a seeded toast to add textural contrast, and pair with roasted cherry tomatoes or sautéed mushrooms for savory balance. A simple side of avocado slices or a smoked salmon platter elevates it for guests, while a strong coffee, fresh-pressed juice, or a light sparkling wine complements the creaminess.
Perfect Scrambled Eggs FAQs
Why use sour cream instead of milk or cream?
Full-fat sour cream adds both fat and a touch of acidity that enhances flavor and creates a silkier, more stable emulsion than milk; heavy cream will be richer but less tangy.
Can I season the eggs earlier or later?
Seasoning in the whisking stage distributes salt uniformly, but if you’re sensitive to sodium, finish with a final sprinkle so you can adjust to taste after the eggs finish cooking.
How do I fix overcooked dry eggs?
If eggs are overcooked, briefly fold in a teaspoon of sour cream or butter off the heat to add moisture and gloss, but results won’t match perfectly cooked eggs.
Can I scale this recipe up for a crowd?
Yes—scale the eggs and dairy proportionally, but cook in batches so the pan isn’t overcrowded; keeping heat low and using the same folding technique ensures consistent texture.
Is the 20–30 second rest necessary?
Yes—the short rest lets residual heat finish setting the eggs uniformly without direct heat, which prevents carryover overcooking and helps achieve that glossy finish.
About the author
Jake WoodsHello, I'm Jake. I started this recipe site with the idea that I hated recipe websites that overwhelm you with long stories and ads just to see plain content that's not helpful. My goal is to provide you with quality recipes, simple ideas and a fun cooking experience. There's lots of fun things to cook, and I think as you browse the site you'll find that TopShelf.Recipes is the place for quality recipes on the web.
See all recipes by Jake Woods →Ratings & Reviews
Did you make this recipe?
Be the first to share your experience.
Nutrition Facts
Per serving: 2½ tbsp
Nutrition values are estimated from USDA ingredient data and may vary based on preparation, brands, and portion sizes. Values are provided for informational purposes only.
Keep Reading
Guides & articles for this recipe

Healthy Eating
Gluten-Free Weeknight Grilling Plan
A 7-day gluten-free weeknight grilling plan with quick, family-friendly recipes, prep-ahead timelines, and a printable shopping list that spotlights late-summer produce and pantry staples. Includes clear cross-contamination safety tips and simple swaps to keep dinners fast and crowd-pleasing.

Healthy Eating
Low-Fat Grill Swaps for Big Flavor
A practical guide to trimming fat from grilled meals without losing juiciness or char. Learn yogurt- and citrus-based marinades, lean protein picks, searing and indirect-heat tricks, plus 5 quick low-fat marinades and a simple weeknight plan.

Recipes
DIY Edible Monster Eyes Candy
Make safe, fun edible monster eyes for cupcakes, cookies, and candy trays. Step-by-step recipes show baking-soda balls, chocolate and fondant eyes, wafer-print options, plus assembly, storage, and kid-friendly safety tips.
More from General
View all General recipes →
Easy Peanut Butter Bars

Lemon Butter Salmon

Carbonara Garlic Cream Sauce

Honey Garlic Glazed Salmon

One-pot Portuguese Chicken and Rice

Huli Huli Chicken

Summer Berry Trifle

Blueberry Cheesecake Cookies

Viral Dr Pepper Butter
Ask me anything about this recipe — substitutions, scaling, techniques, timing.
Powered by AI · 6 questions per 5 minutes, 30 per day