Restaurant Style Fried Pickles
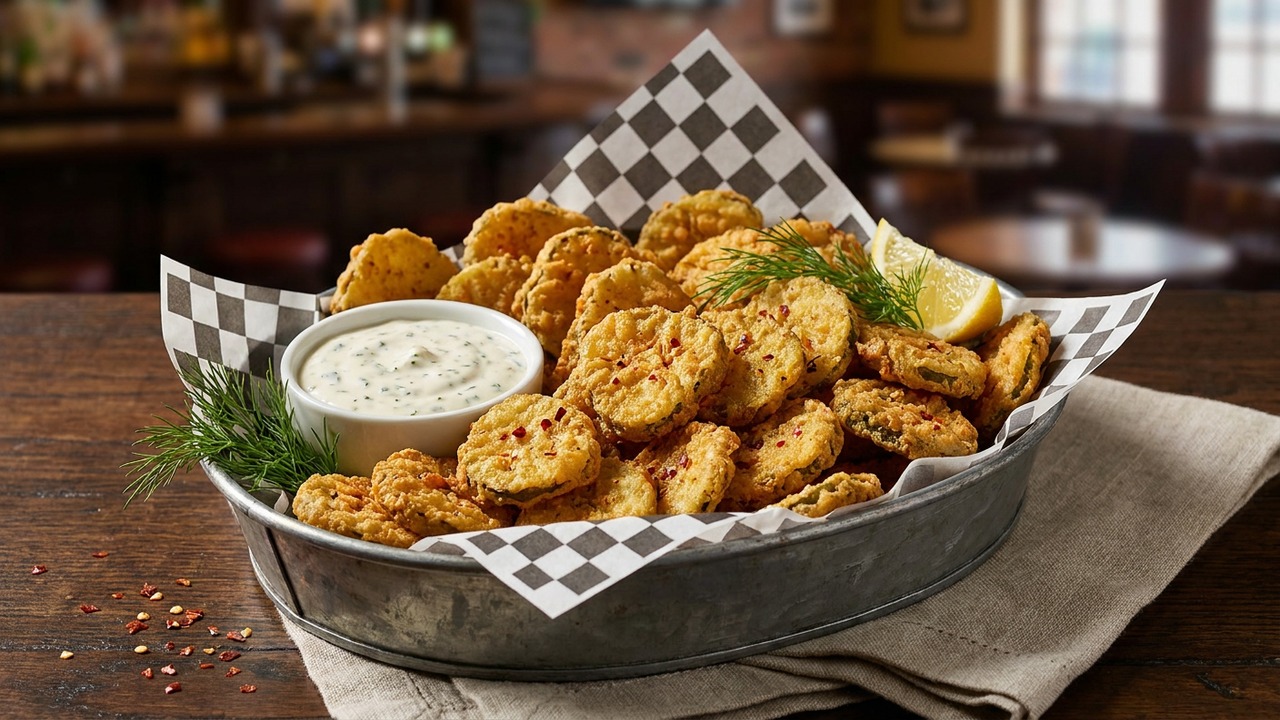
Crispy, tangy dill pickle chips coated in a seasoned double breading and finished with a double fry for the deep crunch you'd expect from a restaurant. Serve hot with a creamy dip for game day, parties, or a snack that steals the show.
Ingredient Spotlight
Panko breadcrumbs
Panko are Japanese-style breadcrumbs made from crustless white bread baked into a light, airy flake rather than fine crumbs; they originate in Japanese cuisine and are used for very crisp coatings. They have a neutral flavor and a noticeably crunchy, dry texture when fried or baked, without the density of regular breadcrumbs. Find them in most supermarkets (often in the Asian foods or breading aisle) or at Asian markets; good substitutes are crushed cornflakes, crushed saltine crackers, or homemade breadcrumbs made from crustless white bread pulsed briefly and dried for a similar airy texture.
(paid link) — as an Amazon Associate we earn from qualifying purchases.
Jake Woods's note
"This recipe uses a double breading plus a two-stage fry to lock in crunch and keep the interior tender — the technique is what makes it feel restaurant-made. Perfect for game day or as a shareable starter."
About This Recipe
This version of fried pickles aims to recreate that irresistible restaurant crunch without resorting to complicated batters or long marinating times. Thin dill chips are first dried, coated in a cornstarch-boosted flour, dipped in a tangy buttermilk-egg wash, and pressed into panko for a crust that shatters with every bite. A short low-temperature fry cooks the coating through, and a hotter second fry crisps it to the pale-golden, crackling finish you expect from a bar plate—smoked paprika in the dry mix adds a whisper of warmth that complements the pickle’s bright vinegar tang.
This recipe is for hosts who want a shareable snack that stands up to crowds and for cooks who love a strong textural contrast: the acidic snap of pickle, airy flake of panko, and the rich mouthfeel of fried coating. Small technique choices—draining thoroughly, pressing the panko, and resting between fries—make the difference between a soggy board of pickles and something worth building a party menu around. Serve immediately with a cooling dip and let guests argue over who gets the last piece.
Ingredients for Restaurant Style Fried Pickles
- 16 oz Dill pickle chips (well drained)
- 1 cup All-purpose flour
- 1/2 cup Cornstarch
- 1 1/2 tsp Kosher salt
- 1 tsp Freshly ground black pepper
- 1 tsp Smoked paprika
- 2 each Large eggs
- 3/4 cup Buttermilk
- 2 cups Panko breadcrumbs
- 4 cups Neutral oil for frying (vegetable, canola, or peanut)
🛒 = paid link — as an Amazon Associate we earn from qualifying purchases.
How to Make Restaurant Style Fried Pickles
Step 1: Drain and dry the pickles
Open the jar of dill pickle chips and pour into a colander. Let drain for 10 minutes, then spread chips in a single layer on paper towels and press gently to remove excess brine — the drier the surface, the better the coating will stick.For this step
- 16 ozDill pickle chips (well drained)
Step 2: Make the seasoned dry mix
In a shallow bowl combine the all-purpose flour, cornstarch, kosher salt, black pepper, and smoked paprika. Whisk until evenly blended; the cornstarch helps absorb moisture and boosts final crispiness.For this step
- 1 cupAll-purpose flour
- 1/2 cupCornstarch
- 1 1/2 tspKosher salt
- 1 tspFreshly ground black pepper
- 1 tspSmoked paprika
Step 3: Prepare the egg-buttermilk wash
In a separate shallow bowl whisk together the large eggs and buttermilk until smooth. This wet wash is the first adhesive layer that helps the panko cling for the double breading.For this step
- 2 eachLarge eggs
- 3/4 cupButtermilk
Step 4: Double bread the pickles
Working in batches, dredge each pickle chip in the seasoned flour, shake off excess, dip into the egg-buttermilk wash, then press into the panko so it adheres well. For extra coating, return each chip to the egg wash then press into panko a second time — this double breading builds the thick, crunchy crust familiar from restaurants.For this step
- 2 cupsPanko breadcrumbs
Step 5: Double-fry for maximum crunch
Heat oil in a heavy pot or deep fryer to 325°F (163°C). Fry batches briefly (about 2–3 minutes) until pale golden — this cooks through the coating without overbrowning. Drain on a wire rack, let rest 4–5 minutes, then increase oil to 375°F (190°C) and fry again 1–1.5 minutes until deep golden and ultra-crispy. Drain and immediately season lightly with salt.For this step
- 4 cupsNeutral oil for frying (vegetable, canola, or peanut)
Step 6: Serve hot with dipping sauce
Arrange fried pickles on a paper-towel-lined plate or wire rack and serve hot with ranch, spicy aioli, or remoulade. They’re best the first 10 minutes while the crust is at its crispiest.


- Open the jar of dill pickle chips and pour into a colander. Let drain for 10 minutes, then spread chips in a single layer on paper towels and press gently to remove excess brine — the drier the surface, the better the coating will stick.
- In a shallow bowl combine the all-purpose flour, cornstarch, kosher salt, black pepper, and smoked paprika. Whisk until evenly blended; the cornstarch helps absorb moisture and boosts final crispiness.
- In a separate shallow bowl whisk together the large eggs and buttermilk until smooth. This wet wash is the first adhesive layer that helps the panko cling for the double breading.
- Working in batches, dredge each pickle chip in the seasoned flour, shake off excess, dip into the egg-buttermilk wash, then press into the panko so it adheres well. For extra coating, return each chip to the egg wash then press into panko a second time — this double breading builds the thick, crunchy crust familiar from restaurants.
- Heat oil in a heavy pot or deep fryer to 325°F (163°C). Fry batches briefly (about 2–3 minutes) until pale golden — this cooks through the coating without overbrowning. Drain on a wire rack, let rest 4–5 minutes, then increase oil to 375°F (190°C) and fry again 1–1.5 minutes until deep golden and ultra-crispy. Drain and immediately season lightly with salt.
- Arrange fried pickles on a paper-towel-lined plate or wire rack and serve hot with ranch, spicy aioli, or remoulade. They’re best the first 10 minutes while the crust is at its crispiest.
Restaurant Style Fried Pickles Tips
Dry Pickles Thoroughly
Pat chips well and let them drain; excess brine prevents the flour from sticking and creates steam that ruins crispiness.
Use an Instant Thermometer
Keep oil at 325°F for the first fry and 375°F for the second to control cooking and avoid overbrowned crusts.
Press Panko Firmly
Gently press the panko into each chip and repeat the egg-panko step for a thicker, more restaurant-style crust that won’t fall off.
Rest Between Fries
Let the first fry chips drain on a wire rack for 4–5 minutes so steam escapes before the final high-heat fry for ultimate crisp.
Salt Immediately After Frying
Season right out of the oil so the salt adheres to the hot crust instead of falling through to the oil.
Don’t Overcrowd Batches
Fry in small batches to keep oil temperature steady; crowded oil drops in temp and makes soggy, greasy crumbs.
Restaurant Style Fried Pickles Variations and Substitutions
Gluten-Free Crunch
Swap the flour for a 1:1 gluten-free flour blend and use gluten-free panko or crushed rice cereal to maintain the flaky crunch.
Spicy Nashville Style
Add 1/2–1 tsp cayenne to the flour mix and mix hot honey into your dip for a spicy-sweet finish that pairs well with dill.
Pickle Spears
Use whole dill spears instead of chips—increase the first fry to 3–4 minutes and the second to 2–2.5 minutes to ensure the thicker pieces heat through.
Air-Fryer Shortcut
For a lower-oil option, spray breaded pickles with oil and air-fry at 375°F for 6–8 minutes, flipping once, though the crust will be slightly less shatteringly crisp.
How to Store and Make Restaurant Style Fried Pickles Ahead
Fried pickles are best eaten immediately; the crust is crispiest in the first 10 minutes. Store leftovers in an airtight container lined with paper towels in the refrigerator for up to 48 hours, and re-crisp in a 400°F oven or 375°F air fryer for 5–8 minutes rather than microwaving. You can bread the chips ahead and freeze them in a single layer, then fry from frozen adding ~30–60 seconds to each fry.
What to Serve With Restaurant Style Fried Pickles
Serve with a trio of dips—classic ranch, a tangy remoulade, and a spicy sriracha-mayo—for variety. Pair with fizzy pale lagers or hoppy IPAs to cut the richness, or a bright citrusy cocktail; on a snack table, place them next to sliders, loaded fries, or a sharp cheddar board for contrast.
Restaurant Style Fried Pickles FAQs
Can I use sweet bread-and-butter pickles instead of dill?
Yes, but sweet pickles will change the flavor profile—expect a sweeter, less tang-forward bite that pairs nicely with spicy dips but may need less added sugar in accompanying sauces.
Why add cornstarch to the flour mix?
Cornstarch absorbs surface moisture and creates a glassier, crispier crust once fried, helping the coating stay light instead of gummy.
My coating falls off—what went wrong?
Common issues are wet pickles, insufficient pressing of the panko, or skipping the double-dip; make sure you shake off excess flour, press the panko into the wet wash, and avoid flipping them too aggressively while frying.
Can I skip the double-fry step?
You can, but the coating won’t be as durable or crunchy; the first low-temperature fry cooks the coating through, and the second high-heat blast removes remaining moisture for peak crispiness.
How do I stop oil from foaming with pickles?
Foaming usually comes from brine or coating bits in the oil—dry pickles thoroughly, avoid dropping wet batter, and skim out stray crumbs between batches to keep the oil clean.
About the author
Jake WoodsHello, I'm Jake. I started this recipe site with the idea that I hated recipe websites that overwhelm you with long stories and ads just to see plain content that's not helpful. My goal is to provide you with quality recipes, simple ideas and a fun cooking experience. There's lots of fun things to cook, and I think as you browse the site you'll find that TopShelf.Recipes is the place for quality recipes on the web.
See all recipes by Jake Woods →Ratings & Reviews
Did you make this recipe?
Be the first to share your experience.
Nutrition Facts
Per serving: 1 serving
Nutrition values are estimated from USDA ingredient data and may vary based on preparation, brands, and portion sizes. Values are provided for informational purposes only.
Keep Reading
Guides & articles for this recipe

Healthy Eating
Gluten-Free Weeknight Grilling Plan
A 7-day gluten-free weeknight grilling plan with quick, family-friendly recipes, prep-ahead timelines, and a printable shopping list that spotlights late-summer produce and pantry staples. Includes clear cross-contamination safety tips and simple swaps to keep dinners fast and crowd-pleasing.

Healthy Eating
Low-Fat Grill Swaps for Big Flavor
A practical guide to trimming fat from grilled meals without losing juiciness or char. Learn yogurt- and citrus-based marinades, lean protein picks, searing and indirect-heat tricks, plus 5 quick low-fat marinades and a simple weeknight plan.

Recipes
DIY Edible Monster Eyes Candy
Make safe, fun edible monster eyes for cupcakes, cookies, and candy trays. Step-by-step recipes show baking-soda balls, chocolate and fondant eyes, wafer-print options, plus assembly, storage, and kid-friendly safety tips.
More from Snacks
View all Snacks recipes →
Easy Peanut Butter Bars

Fried Jalapeno Rings

Gluten Free Fried Pickles

Labor Day Grilled Lobster Rolls with Charred Scallion Brown Butter & Lemon‑Herb Aioli

Salt & Vinegar Potato Chips

Holiday Cranberry Maple Chex Mix

Snake River Farms Beef Tallow Crispy Air Fryer Chicken Wings

Strawberry Yogurt Bark

Buffalo Chicken Dip
Ask me anything about this recipe — substitutions, scaling, techniques, timing.
Powered by AI · 6 questions per 5 minutes, 30 per day