Keto-Friendly Honey Garlic Chicken Thighs with Sugar-Free Glaze
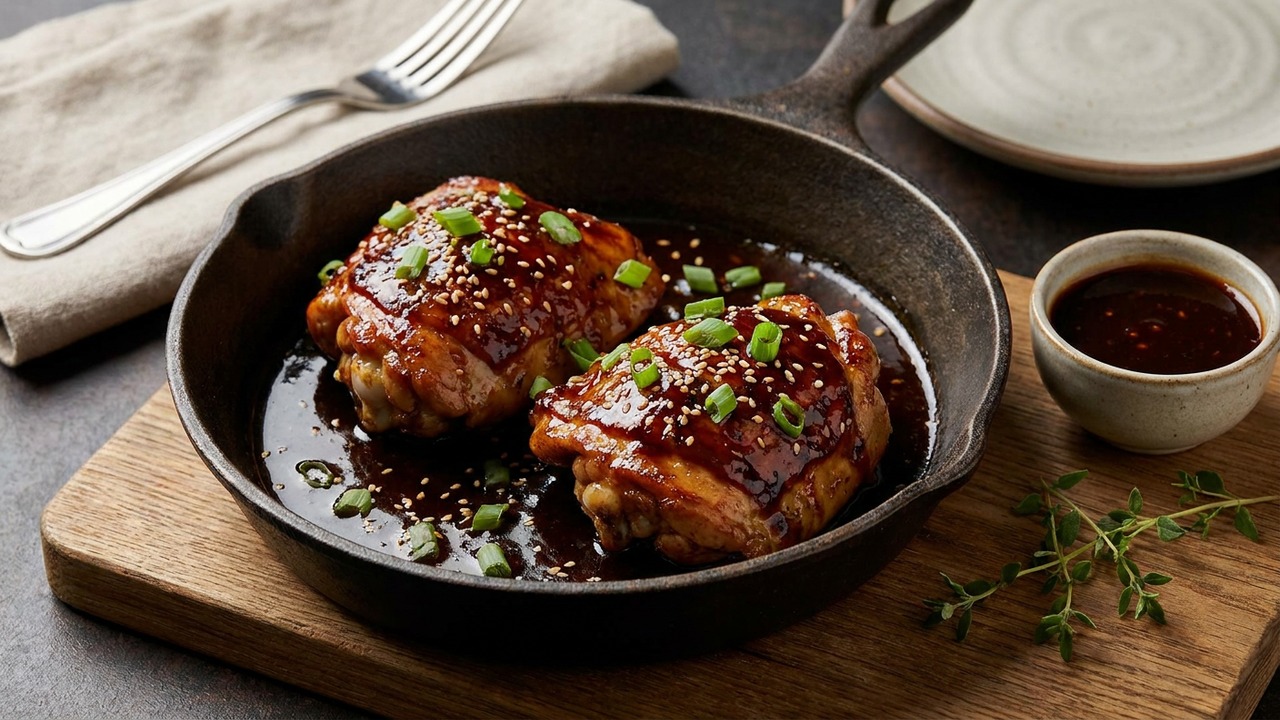
Succulent stovetop chicken thighs glazed in a sugar-free 'honey' garlic sauce that stays sticky and glossy thanks to reduction and a tiny bit of xanthan gum. Low-carb and keto-friendly, this recipe uses an allulose-based honey substitute and pantry staples for a fast, weeknight-friendly dinner.
About This Recipe
This version of honey garlic chicken is built around a simple idea: keep the luxuries of a glossy, sticky glaze but strip out the sugar. Bone-in, skin-on thighs give you the two textures that make the dish feel indulgent — the deeply caramelized, crackling skin and the rich, succulent meat beneath — while an allulose-based ‘honey’ syrup takes on the dark, honeyed notes without the carbs. A quick stovetop finish means you get those lacquered, restaurant-style thighs on a weeknight, and the tiny stabilizing touch of xanthan gum keeps the glaze clingy and shiny instead of separating or becoming grainy when it cools.
What makes this recipe work is technique more than trickery: a long, confident sear to build Maillard character, a gentle reduction that intensifies savory-sweet flavors, and an acid anchor (apple cider vinegar) to stop the sweetness from flaring too bright. Tamari contributes deep umami and salt without drowning the glaze, and finishing with butter not only adds gloss but smooths the palate. It’s ideal for low-carb and keto cooks who miss sticky sauces, but it’s equally satisfying for anyone after a quick, comforting dinner with big flavors and minimal fuss.
Ingredients for Keto-Friendly Honey Garlic Chicken Thighs with Sugar-Free Glaze
- 4 pieces Bone-in, skin-on chicken thighs
- 1 tsp Kosher salt
- 1 tbsp Avocado oil (or neutral oil)
- 1/3 cup Sugar-free honey substitute (allulose-based or similar keto 'honey' syrup)
- 3 tbsp Tamari (or low-sodium soy sauce)
- 3 cloves Fresh garlic, minced
- 1 tbsp Apple cider vinegar
- a pinch Xanthan gum (very small pinch to stabilize glaze)
- 1 tbsp Unsalted butter
- 1 tsp Toasted sesame seeds (for garnish)
How to Make Keto-Friendly Honey Garlic Chicken Thighs with Sugar-Free Glaze
Step 1: Season and sear the chicken
Pat the chicken thighs dry, then season both sides with kosher salt. Heat a large heavy skillet over medium-high heat with the avocado oil until shimmering, then place the thighs skin-side down and sear until deeply golden and crisp, about 6–8 minutes. Flip and sear the other side 3–4 minutes; remove excess rendered fat, leaving about 1–2 tablespoons in the pan.For this step
- 4 piecesBone-in, skin-on chicken thighs
- 1 tspKosher salt
- 1 tbspAvocado oil (or neutral oil)
Step 2: Make the sugar-free honey garlic glaze
Lower the heat to medium and add the minced garlic to the pan, stirring 20–30 seconds until fragrant. Stir in the sugar-free honey substitute, tamari, and apple cider vinegar and bring to a gentle simmer. To give the glaze a sticky, glossy finish, sprinkle the xanthan gum very gradually into the simmering liquid while whisking constantly to avoid clumps — start with a tiny pinch and add only if needed once the sauce reduces slightly.For this step
- 1/3 cupSugar-free honey substitute (allulose-based or similar keto 'honey' syrup)
- 3 tbspTamari (or low-sodium soy sauce)
- 3 clovesFresh garlic, minced
- 1 tbspApple cider vinegar
- a pinchXanthan gum (very small pinch to stabilize glaze)
Step 3: Coat and finish the chicken in the glaze
Return the seared thighs to the pan, skin-side up, spooning the glaze over each piece to coat. Reduce the heat to medium-low and simmer, occasionally spooning sauce over the thighs until the internal temperature reaches 165°F (about 6–8 minutes) and the glaze thickens and becomes sticky. Stir in the unsalted butter off heat for extra shine and a silky mouthfeel, then tilt the pan and spoon concentrated glaze over the thighs to build a lacquered finish.For this step
- 1 tbspUnsalted butter
Step 4: Rest and garnish
Transfer the thighs to a cutting board or plate and let rest 3–5 minutes so juices redistribute and the glaze sets slightly. Sprinkle toasted sesame seeds over the chicken just before serving for texture and visual contrast.For this step
- 1 tspToasted sesame seeds (for garnish)
Step 5: Serving tips to preserve stickiness
Serve immediately while warm—if you must hold the chicken, keep it loosely tented and spoon a little extra glaze before plating. To maintain stickiness on reheating, warm gently in a skillet over low heat and add a splash of water or a tiny extra amount of sugar-free honey substitute, stirring until the glaze loosens and re-coats the chicken.


- Pat the chicken thighs dry, then season both sides with kosher salt. Heat a large heavy skillet over medium-high heat with the avocado oil until shimmering, then place the thighs skin-side down and sear until deeply golden and crisp, about 6–8 minutes. Flip and sear the other side 3–4 minutes; remove excess rendered fat, leaving about 1–2 tablespoons in the pan.
- Lower the heat to medium and add the minced garlic to the pan, stirring 20–30 seconds until fragrant. Stir in the sugar-free honey substitute, tamari, and apple cider vinegar and bring to a gentle simmer. To give the glaze a sticky, glossy finish, sprinkle the xanthan gum very gradually into the simmering liquid while whisking constantly to avoid clumps — start with a tiny pinch and add only if needed once the sauce reduces slightly.
- Return the seared thighs to the pan, skin-side up, spooning the glaze over each piece to coat. Reduce the heat to medium-low and simmer, occasionally spooning sauce over the thighs until the internal temperature reaches 165°F (about 6–8 minutes) and the glaze thickens and becomes sticky. Stir in the unsalted butter off heat for extra shine and a silky mouthfeel, then tilt the pan and spoon concentrated glaze over the thighs to build a lacquered finish.
- Transfer the thighs to a cutting board or plate and let rest 3–5 minutes so juices redistribute and the glaze sets slightly. Sprinkle toasted sesame seeds over the chicken just before serving for texture and visual contrast.
- Serve immediately while warm—if you must hold the chicken, keep it loosely tented and spoon a little extra glaze before plating. To maintain stickiness on reheating, warm gently in a skillet over low heat and add a splash of water or a tiny extra amount of sugar-free honey substitute, stirring until the glaze loosens and re-coats the chicken.
Keto-Friendly Honey Garlic Chicken Thighs with Sugar-Free Glaze Tips
Dry the Skin Thoroughly
Pat the thighs completely dry before salting; moisture is the enemy of a crisp sear and will prevent the skin from rendering properly.
Render Fat First
Sear skin-side down long enough to render most fat (6–8 minutes) then remove excess fat so the glaze doesn’t swim in grease and the sauce clings better.
Add Xanthan Slowly
Sprinkle a tiny pinch into the simmering liquid while whisking constantly to prevent lumps — a little goes a long way, and you can always add more later.
Control Heat to Avoid Burn
Allulose browns and can scorch faster than sugar; keep the glaze at a gentle simmer and lower the heat when the sauce begins to darken.
Use an Instant Thermometer
Check doneness with an instant-read probe (165°F/74°C target) to avoid overcooking thighs while you wait for the glaze to thicken.
Keto-Friendly Honey Garlic Chicken Thighs with Sugar-Free Glaze Variations and Substitutions
Soy-Free Coconut Aminos
Swap tamari for coconut aminos to keep the glaze gluten-free and reduce sodium, adjusting salt to taste since coconut aminos are milder and sweeter.
Spicy Chili Twist
Stir in 1–2 teaspoons of sambal oelek or chile garlic sauce to the glaze for heat, or finish with a sprinkle of red pepper flakes when serving.
Fresh Herb Brightness
Fold in chopped cilantro or Thai basil just before serving for a fresher, aromatic counterpoint to the rich glaze.
Non-Keto Honey Option
If you’re not limiting carbs, replace the allulose honey with real honey at a 1:1 ratio but reduce simmer time slightly to prevent burning.
How to Store and Make Keto-Friendly Honey Garlic Chicken Thighs with Sugar-Free Glaze Ahead
Cool leftovers to room temperature, then store in an airtight container in the refrigerator for up to 3–4 days; the glaze will thicken as it chills. Reheat gently in a skillet over low heat and add a splash of water or a teaspoon of sugar-free honey substitute to loosen and recoat the thighs. You can freeze cooked thighs for up to 2 months — thaw overnight in the fridge before reheating.
What to Serve With Keto-Friendly Honey Garlic Chicken Thighs with Sugar-Free Glaze
Serve these thighs over cauliflower rice or a bed of sesame-scented sautéed bok choy to keep the meal low-carb while soaking up every bit of glaze. A crisp, acidic side like quick-pickled cucumbers or a cabbage slaw cuts through the richness, and for drinks choose a dry white wine (like a Grüner or unoaked Chardonnay) or a light lager to balance the sweet-savory profile. Finish with a scattering of toasted sesame seeds and sliced scallions for color and texture.
Keto-Friendly Honey Garlic Chicken Thighs with Sugar-Free Glaze FAQs
How much xanthan gum should I really use?
Start with a very small pinch (about 0.1–0.15 tsp total for the whole pan) and whisk it in gradually; more xanthan will make the sauce gummy, not glossy. If you over-add, thin the glaze with a splash of water and reheat briefly while whisking.
Can I use boneless chicken thighs or breasts?
Yes — boneless thighs will be faster (reduce cooking time by a few minutes) and remain forgiving; breasts will cook faster and can dry out, so watch temperature closely and remove them from the sauce at 160°F then rest to reach 165°F.
Why did my glaze separate or become grainy?
Separation usually means the sauce was overheated or the sweetener isn’t compatible; using too much xanthan gum can also create a strange texture. Reheat gently, whisk in a tiny splash of water, and strain if necessary, then finish with butter off heat to re-emulsify.
Is allulose safe and interchangeable with erythritol?
Allulose behaves more like sugar in browning and mouthfeel and is a good choice here; erythritol can recrystallize and feel gritty. If you use another sweetener, test a small amount first and be prepared for different caramelization and texture.
Can I broil the skin at the end for extra crisp?
You can briefly broil skin-side up for 1–2 minutes if you want extra crisp, but do it before finishing with the glaze or watch closely — the glaze and allulose can burn quickly under intense heat.
About the author
Jake WoodsHello, I'm Jake. I started this recipe site with the idea that I hated recipe websites that overwhelm you with long stories and ads just to see plain content that's not helpful. My goal is to provide you with quality recipes, simple ideas and a fun cooking experience. There's lots of fun things to cook, and I think as you browse the site you'll find that TopShelf.Recipes is the place for quality recipes on the web.
See all recipes by Jake Woods →Ratings & Reviews
Did you make this recipe?
Be the first to share your experience.
Nutrition Facts
Per serving: 1 serving
Nutrition values are estimated from USDA ingredient data and may vary based on preparation, brands, and portion sizes. Values are provided for informational purposes only.
Keep Reading
Guides & articles for this recipe

Guides
Heat-Proof Summer Sips
A practical guide to 2026’s daytime-friendly summer drinks: 14 low-ABV, hydration-forward, camp-ready sips built to beat the heat. Includes dilution-proof chilling hacks, no-shaker assembly tips, easy mocktail swaps, and quick grilled pairings for picnics and backyard hangouts.

Guides
Trending Small‑Space Grilling for 2026: Balcony, Rooftop & Apartment‑Friendly Setups, Safety Tips, and 10 Compact Recipes
Small-space grilling has matured: smarter, cleaner gear and smarter workflows let apartment dwellers grill with less fuss and fewer complaints. This guide covers what’s legal and effective in 2026, practical smoke-management and safety workflows, compact storage and multi-use tool choices, neighbor-friendly timing, permit basics, plus 10 tested site recipes optimized for tiny grills.

Healthy Eating
Gluten-Free Weeknight Grilling Plan
A 7-day gluten-free weeknight grilling plan with quick, family-friendly recipes, prep-ahead timelines, and a printable shopping list that spotlights late-summer produce and pantry staples. Includes clear cross-contamination safety tips and simple swaps to keep dinners fast and crowd-pleasing.
More from Stovetop
View all Stovetop recipes →
One-Pot Beef Bolognese

Stovetop Dutch-Oven Herb-Crusted Beef Roast with Pan Gravy

Dubai Tacos

Italian-Style Pot Roast with Tomatoes Olives and Fresh Herbs

Labor Day Grilled Lobster Rolls with Charred Scallion Brown Butter & Lemon‑Herb Aioli

Hainanese Chicken Rice

Pad Krapow Pork

Twice-Fried Restaurant Style Crispy Sweet Potato Fries (Stovetop Deep Fry)

Xiao Long Bao Soup Dumplings
Ask me anything about this recipe — substitutions, scaling, techniques, timing.
Powered by AI · 6 questions per 5 minutes, 30 per day