Raspberry Crumble Bars
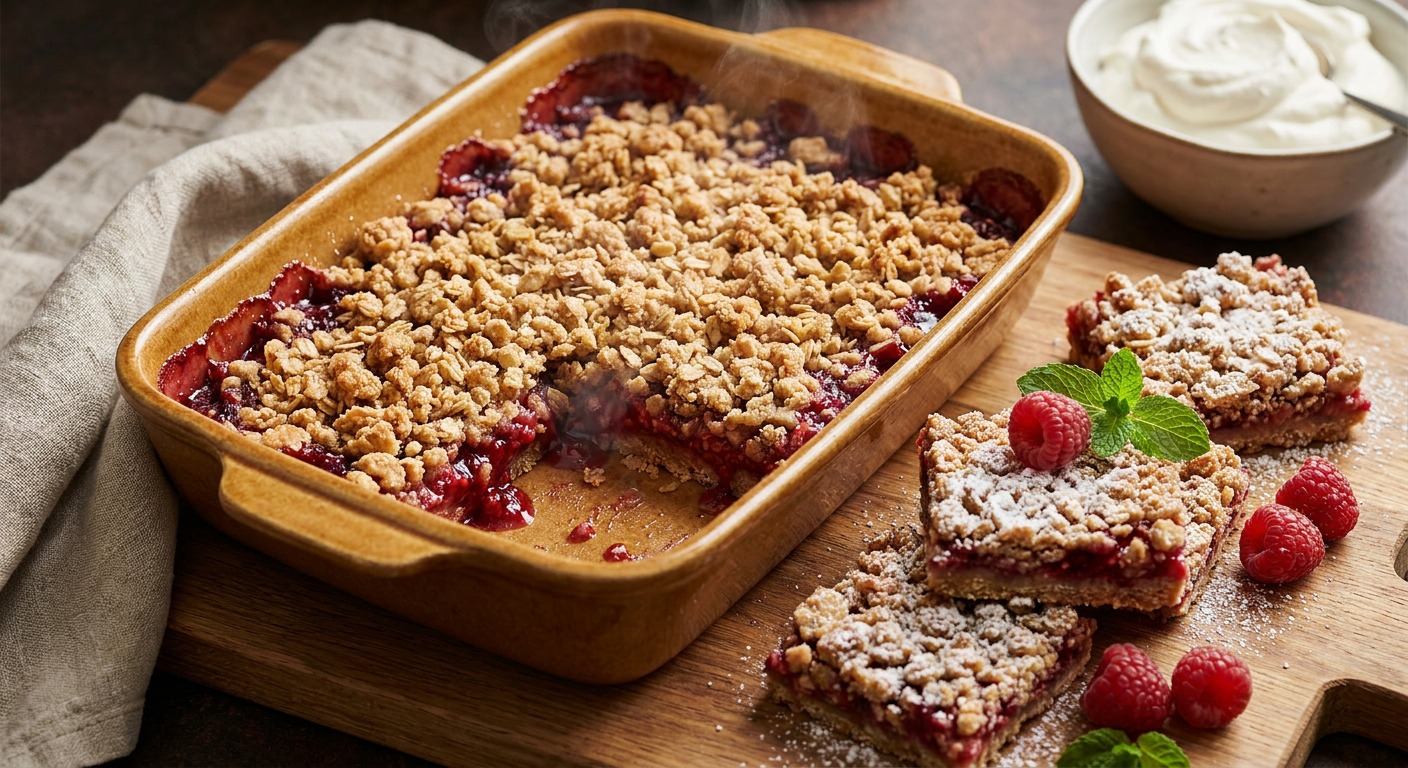
Buttery oat crumble bars with a bright, jammy raspberry filling — a tender, shortbread-like oat base and crunchy crumble topping that surround a tart, set berry center. These easy, make-ahead bars bake in a single 8x8-inch pan and slice clean once fully cooled.
Sara's note
"These bars balance a buttery, oat-laced crumble with a simple raspberry filling that bakes in the oven — no stovetop required. They’re terrific for summer gatherings or boxed lunches and keep well in the fridge for several days."
About This Recipe
Raspberry Crumble Bars live at the intersection of tender shortbread and rustic oat crumble — a buttery, slightly chewy base topped with a jammy, bright raspberry center and a crunchy, golden streusel. The contrast is what makes them addictive: the oats and brown sugar bring toasty depth, the raspberries add clean acidity and perfume, and the cornstarch gives the filling a glossy, set texture that slices clean once fully cooled. Because they bake in a single 8x8 pan and use pantry-forward ingredients, they’re a reliable, unfussy treat for day-to-day baking or a make-ahead dessert for casual entertaining.
What makes this version work is the two-stage bake: par-baking the base firms the shortbread so it won’t turn soggy under the fruit, while the remaining crumble bakes to a crisp without overbrowning. I use melted salted butter to ensure even distribution through the oat mixture and to create those large, buttery crumble clusters you want on top. These bars are ideal for lunchboxes, coffee hour, or a light finish to a weeknight meal — and they improve after a few hours or overnight in the refrigerator when the filling fully gels and the flavors marry.
Ingredients for Raspberry Crumble Bars
- 1 cup all-purpose flour (or certified gluten free flour blend)
- 1 cup old-fashioned rolled oats (certified gluten free if necessary)
- 3/4 cup light brown sugar (loosely packed)
- 1/2 teaspoon baking powder
- 1 pinch fine sea salt
- 1/2 cup salted butter, melted
- 2 cups fresh raspberries
- 1/4 cup granulated sugar (adjust to taste)
- 1 tablespoon cornstarch
- 1 tablespoon freshly squeezed lemon juice
How to Make Raspberry Crumble Bars
Step 1: Preheat and prepare pan
Preheat the oven to 350°F (175°C). Line an 8x8-inch (20x20 cm) baking pan with parchment paper, leaving an overhang on two sides to lift the bars out easily.Step 2: Mix the oatmeal crumble
In a large bowl, stir together the flour (or GF blend), rolled oats, light brown sugar, baking powder, and sea salt until evenly combined. Pour in the melted salted butter and mix with a spatula until the mixture forms coarse crumbs with some larger chunks for texture.Step 3: Press and par-bake the base
Press about half of the crumble mixture firmly and evenly into the bottom of the prepared pan to form a compact base. Use the bottom of a measuring cup or your fingers to smooth the surface. Bake for 12–15 minutes, or until the base is set and just beginning to turn golden.Step 4: Prepare the raspberry filling
While the base par-bakes, gently toss the raspberries with the granulated sugar, cornstarch, and lemon juice in a bowl until evenly coated. Let sit briefly so the sugar begins to draw juices from the berries.Step 5: Assemble and top
Spread the raspberry mixture in an even layer over the warm par-baked base. Crumble the remaining oat mixture over the top, leaving some larger pieces for a rustic texture, and press very lightly so the topping adheres but stays crumbly.Step 6: Bake, cool, and slice
Return the pan to the oven and bake 25–27 minutes, or until the topping is golden and the raspberry filling is bubbling in the center. If the edges brown too quickly, tent loosely with foil. Cool completely in the pan on a wire rack (at least 1½–2 hours) to let the filling set, then use the parchment overhang to lift out and slice into 8 bars.


- Preheat the oven to 350°F (175°C). Line an 8x8-inch (20x20 cm) baking pan with parchment paper, leaving an overhang on two sides to lift the bars out easily.
- In a large bowl, stir together the flour (or GF blend), rolled oats, light brown sugar, baking powder, and sea salt until evenly combined. Pour in the melted salted butter and mix with a spatula until the mixture forms coarse crumbs with some larger chunks for texture.
- Press about half of the crumble mixture firmly and evenly into the bottom of the prepared pan to form a compact base. Use the bottom of a measuring cup or your fingers to smooth the surface. Bake for 12–15 minutes, or until the base is set and just beginning to turn golden.
- While the base par-bakes, gently toss the raspberries with the granulated sugar, cornstarch, and lemon juice in a bowl until evenly coated. Let sit briefly so the sugar begins to draw juices from the berries.
- Spread the raspberry mixture in an even layer over the warm par-baked base. Crumble the remaining oat mixture over the top, leaving some larger pieces for a rustic texture, and press very lightly so the topping adheres but stays crumbly.
- Return the pan to the oven and bake 25–27 minutes, or until the topping is golden and the raspberry filling is bubbling in the center. If the edges brown too quickly, tent loosely with foil. Cool completely in the pan on a wire rack (at least 1½–2 hours) to let the filling set, then use the parchment overhang to lift out and slice into 8 bars.
Raspberry Crumble Bars Tips
Press base firmly
Compressing the bottom layer firmly into the pan creates a compact shortbread that holds together when sliced; use the bottom of a measuring cup for even pressure.
Par-bake base first
Baking the base 12–15 minutes before adding the filling prevents a soggy bottom by setting the dough so it doesn’t absorb excess berry juices.
Adjust cornstarch amount
If your raspberries are very juicy or frozen, increase cornstarch to 1½ tablespoons to ensure the filling sets firmly after cooling.
Cool completely before slicing
Let the pan cool 1½–2 hours (or refrigerate 2–4 hours) so the filling firms; for clean slices, chill briefly and cut with a hot, dry knife between warm water dips.
Protect edges from overbrowning
If the crumble is browning faster than the filling is bubbling, tent the pan loosely with foil for the final 10–12 minutes of baking.
Raspberry Crumble Bars Variations and Substitutions
Mixed Berry Twist
Swap half the raspberries for blackberries or blueberries and add 1 teaspoon lemon zest to the filling for more complexity and a slightly sweeter profile.
Almond Oat Crumble
Replace 1/4 cup of the flour with finely ground almond flour and stir 1/3 cup chopped toasted almonds into the crumble for a nutty flavor and extra crunch.
Vegan Coconut Version
Use refined coconut oil (melted) in place of butter and a flax 'egg' (1 tbsp ground flax + 3 tbsp water) if you want a slightly firmer crumb—ensure your oats and flour are certified vegan.
Jam Shortcut
For speed, swap the fresh raspberries for about 1 to 1¼ cups of thick raspberry jam mixed with 1 teaspoon lemon juice and a pinch of cornstarch to mimic fresh fruit texture.
How to Store and Make Raspberry Crumble Bars Ahead
Stored in an airtight container, these bars keep in the refrigerator for up to 5 days; the chill helps the filling remain set. You can freeze whole or sliced bars for up to 3 months — wrap individual slices in plastic and foil. To serve, thaw in the refrigerator and bring to room temperature for 20–30 minutes, or warm briefly in a low oven if you prefer them slightly soft.
What to Serve With Raspberry Crumble Bars
Serve bars with a dollop of lightly sweetened whipped cream or a scoop of vanilla ice cream to balance the bright tartness. For brunch, pair with a strong coffee or a floral tea like Earl Grey; for an afternoon pick-me-up, they’re lovely with a glass of milk or a chilled rosé.
Raspberry Crumble Bars FAQs
Can I use frozen raspberries?
Yes — thaw and gently drain any excess water, then toss with the sugar, cornstarch, and lemon juice; you may need an extra 3–5 minutes of baking and consider increasing cornstarch to 1½ tablespoons to compensate for extra moisture.
Why does the filling stay runny?
Runny filling is usually from underbaking or insufficient thickener; make sure the filling is visibly bubbling in the center during baking and cool the bars completely (or refrigerate) so the cornstarch fully gels.
My bars fall apart when cut — how do I fix that?
Press the base more firmly before par-baking and ensure the base is fully set and golden; chilling the finished pan before slicing also helps the bars hold their shape.
Can I halve or double the recipe?
Halving works well in a smaller pan; doubling should be baked in a 9x13-inch pan but expect slightly longer bake times (monitor for bubbling filling and golden topping).
What can I use instead of cornstarch?
Arrowroot works as a 1:1 substitute and gives a clear finish; all-purpose flour can be used but requires a bit more (about 2–3 tablespoons) and yields a less glossy filling.
Ratings & Reviews
Did you make this recipe?
Be the first to share your experience.
Nutrition Facts
Per serving: 1 serving
Nutrition values are estimated from USDA ingredient data and may vary based on preparation, brands, and portion sizes. Values are provided for informational purposes only.
Keep Reading
Guides & articles for this recipe

Recipes
Best Halloween Recipes For Parties
A practical guide to Halloween recipes that literally have “Halloween” in the name—party-ready snacks, kid-friendly treats, mains, drinks, and make-ahead desserts. Pick recipes, plan timing, and scale a spooky menu with straightforward shopping and prep advice.
Tips & Techniques
Baking Soda and Tenderized Beef
Learn how baking soda can tenderize, boost browning, and improve moisture for ground beef and other meats. This practical guide covers the science, step-by-step techniques, common mistakes, and recipes to try.

Healthy Eating
Gluten-Free Weeknight Grilling Plan
A 7-day gluten-free weeknight grilling plan with quick, family-friendly recipes, prep-ahead timelines, and a printable shopping list that spotlights late-summer produce and pantry staples. Includes clear cross-contamination safety tips and simple swaps to keep dinners fast and crowd-pleasing.
More from Baking
View all Baking recipes →
Cloud Bread Sandwiches

Honey Mustard Chicken Nuggets

Cheddar Jalapeño Corn Muffins

Basque Burnt Cheesecake

30-Minute Sticky Baked Honey Garlic Chicken Thighs with Crisp Edges

Lemon Butter Salmon

Spritz Cookies

Brown Butter Vanilla Syrup

Honey Glazed Easter Ham
Ask me anything about this recipe — substitutions, scaling, techniques, timing.
Powered by AI · 6 questions per 5 minutes, 30 per day