Skillet Apple Crisp
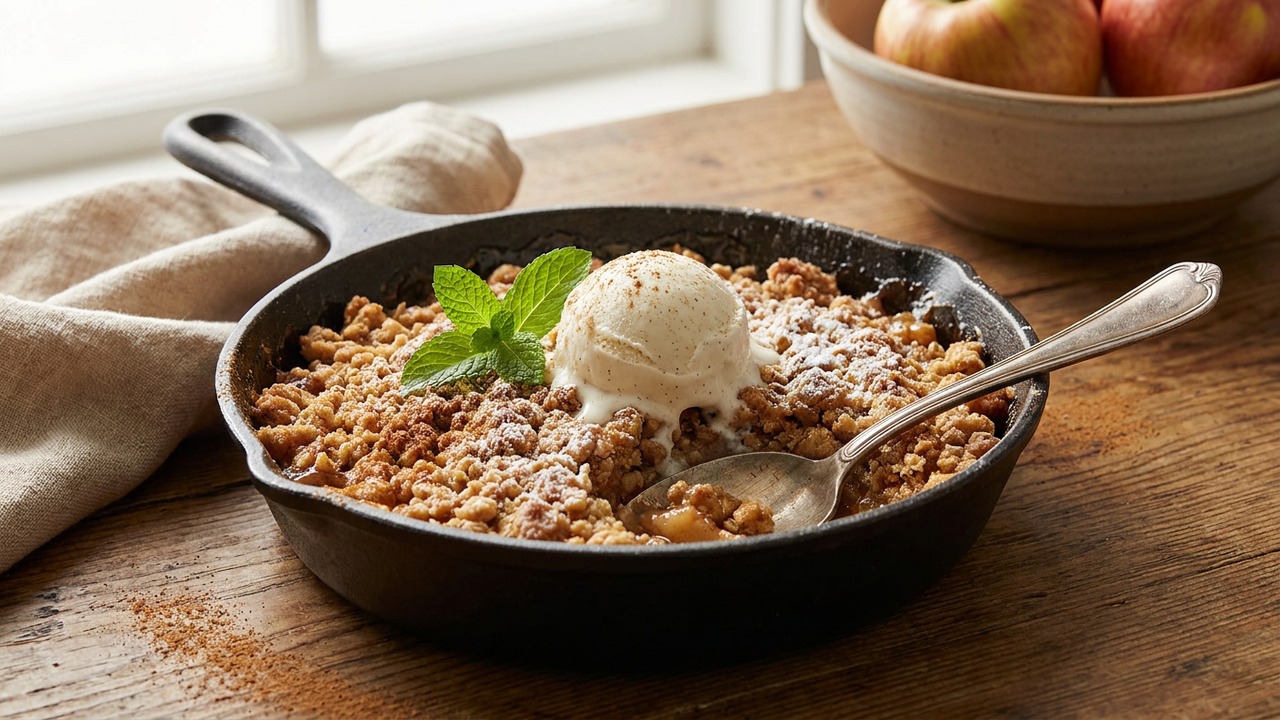
A cozy, single-pan apple crisp made entirely on the stovetop — perfect for weeknight desserts or a small-batch treat for two. Tender cinnamon apples get a buttery oat crumble and cooks quickly in an 8–10-inch skillet for warm, comforting results without an oven.
Jake Woods's note
"This compact skillet apple crisp is ideal for couples or when you want dessert without heating the oven. It comes together quickly and delivers the same warm, homey flavors of a full-size crisp in a fraction of the time."
About This Recipe
This skillet apple crisp is the kind of dessert that feels intentionally homey without asking for an afternoon. Built for an 8–10‑inch pan and two people, it skips the oven and relies on a gentle stovetop finish so you get tender, sauced apples and a buttery, oat-forward crumble in about half an hour. The method leans on quick maceration and a short sear to concentrate apple flavor, then a low covered finish to set the topping, so you end up with juicy fruit beneath a lightly toasted, forkable crust rather than a hard, dry peak.
What makes this version work is its balance of texture and timing: firm apples sliced 1/4 inch keep their shape while softening through cooking, while the cold butter folded into oats and flour creates a coarse, moist crumble that toasts quickly if you briefly uncover at the end. A single teaspoon of lemon and a whisper of vanilla sharpen and round the profile without demanding extra ingredients, so it’s ideal for weeknights, small households, or anyone who wants the warmth of apple pie with minimal fuss.
Ingredients for Skillet Apple Crisp
- 2 medium Medium apples (firm variety like Honeycrisp or Granny Smith), peeled, cored, and sliced 1/4-inch
- 1 tbsp Granulated sugar
- 3 tbsp Packed light brown sugar (total)
- 1/2 tsp Ground cinnamon
- a pinch Kosher salt
- 1 tsp Fresh lemon juice
- 3 tbsp Unsalted butter (total)
- 1/2 tsp Vanilla extract
- 1/3 cup Old-fashioned rolled oats
- 1/4 cup All-purpose flour
How to Make Skillet Apple Crisp
Step 1: Prep and season the apples
Peel, core and slice the apples into 1/4-inch wedges. In a medium bowl toss the slices with the granulated sugar, 1 tablespoon brown sugar, cinnamon, salt, and lemon juice; set aside for 5 minutes to macerate and release juices.For this step
- 2 mediumMedium apples (firm variety like Honeycrisp or Granny Smith), peeled, cored, and sliced 1/4-inch
- 1/2 tspGround cinnamon
- a pinchKosher salt
- 1 tspFresh lemon juice
Step 2: Cook the apples in the skillet
Heat a 8–10-inch heavy skillet over medium and add 1 tablespoon of the butter. Add the seasoned apples and cook, stirring occasionally, until the apples are tender and the juices begin to thicken, about 6–8 minutes. Stir in the vanilla and 1 more tablespoon of brown sugar; reduce heat to low and spread apples evenly in the pan.For this step
- 1/2 tspVanilla extract
Step 3: Make the oat crumble topping
In a small bowl combine the rolled oats, flour, and the remaining 1 tablespoon brown sugar with a pinch of salt. Add the remaining 2 tablespoons cold butter cut into small pieces and use a fork or your fingertips to work it into the dry ingredients until coarse crumbs form.For this step
- 1/3 cupOld-fashioned rolled oats
- 1/4 cupAll-purpose flour
Step 4: Top apples and finish on the stovetop
Evenly sprinkle the crumble over the cooked apples and gently press to form a loose crust. Cover the skillet, reduce heat to low, and cook until the topping is set and the filling is bubbling at the edges, about 6–8 minutes. For a slightly toasted top, uncover and increase heat to medium for 1–2 minutes while watching closely to avoid burning.Step 5: Rest and serve warm
Remove the skillet from the heat and let the crisp rest 2–3 minutes to set. Serve warm straight from the pan with vanilla ice cream or plain yogurt, if desired.


- Peel, core and slice the apples into 1/4-inch wedges. In a medium bowl toss the slices with the granulated sugar, 1 tablespoon brown sugar, cinnamon, salt, and lemon juice; set aside for 5 minutes to macerate and release juices.
- Heat a 8–10-inch heavy skillet over medium and add 1 tablespoon of the butter. Add the seasoned apples and cook, stirring occasionally, until the apples are tender and the juices begin to thicken, about 6–8 minutes. Stir in the vanilla and 1 more tablespoon of brown sugar; reduce heat to low and spread apples evenly in the pan.
- In a small bowl combine the rolled oats, flour, and the remaining 1 tablespoon brown sugar with a pinch of salt. Add the remaining 2 tablespoons cold butter cut into small pieces and use a fork or your fingertips to work it into the dry ingredients until coarse crumbs form.
- Evenly sprinkle the crumble over the cooked apples and gently press to form a loose crust. Cover the skillet, reduce heat to low, and cook until the topping is set and the filling is bubbling at the edges, about 6–8 minutes. For a slightly toasted top, uncover and increase heat to medium for 1–2 minutes while watching closely to avoid burning.
- Remove the skillet from the heat and let the crisp rest 2–3 minutes to set. Serve warm straight from the pan with vanilla ice cream or plain yogurt, if desired.
Skillet Apple Crisp Tips
Pick firm apples
Use crisp varieties like Honeycrisp or Granny Smith; they hold their shape and provide a good sweet-tart contrast when cooked for 6–8 minutes.
Let apples macerate
Five minutes draws out juices and helps the cinnamon and sugar adhere; if your apples are especially dry, extend to 10 minutes for a more saucy filling.
Keep butter cold
Cut the topping butter into small cold cubes and work quickly with a fork or fingertips to make coarse crumbs—this prevents a greasy, paste-like topping.
Control your heat
Start on medium to encourage caramelization, then drop to low under the lid to finish; use a gentle uncovered blast at the end to toast the top, watching closely to avoid burning.
Manage excess liquid
If the apples release too much juice, remove them with a slotted spoon, boil the liquid briefly to concentrate, then return it to the pan so the topping doesn’t go soggy.
Skillet Apple Crisp Variations and Substitutions
Vegan coconut version
Swap cold vegan butter or solid coconut oil for the butter and use coconut sugar in place of brown sugar for a dairy‑free crisp with a subtle coconut note.
Nutty oat crumble
Fold 2 tablespoons chopped toasted pecans or walnuts into the crumble for crunch and an aromatic counterpoint to the apples.
Spiced pear-apple mix
Replace one apple with a firm Bosc pear and add 1/8 teaspoon ground cardamom for a fragrant, slightly floral variation.
Boozy caramel warmth
Stir a tablespoon of bourbon or dark rum into the apples as they finish cooking to deepen the caramel notes without overpowering the cinnamon.
How to Store and Make Skillet Apple Crisp Ahead
Store leftovers in an airtight container in the refrigerator for up to 3 days; the topping will soften as it sits. To reheat, warm gently in a skillet over low heat (add a teaspoon of water if needed) or microwave individual portions briefly, then crisp the topping under a hot broiler or in a dry skillet for a minute to restore texture.
What to Serve With Skillet Apple Crisp
Serve straight from the skillet for a rustic presentation alongside a scoop of vanilla ice cream, a dollop of crème fraîche, or thick Greek yogurt to balance the sweetness. Pair with a hot espresso, chai tea, or a slightly sweet Riesling; if serving brunch-style, offer toasted nuts and flaky sea salt to sprinkle on top for contrast.
Skillet Apple Crisp FAQs
Can I use other apple varieties?
Yes—aim for firm, flavorful apples. Honeycrisp, Granny Smith, Jonagold, or Pink Lady are great choices because they hold texture and give a nice acid-sweet balance when cooked.
Why is my topping soggy?
Most likely excess steam trapped under the lid or too-wet crumble ingredients; briefly uncover and increase heat to evaporate moisture, or finish under a broiler for a minute while watching closely.
Can I make this for four people?
Yes—double the ingredients and use a 10–12‑inch skillet or two pans; cooking times may be a few minutes longer and ensure the fruit is spread in an even layer so it cooks through evenly.
Can I prepare components ahead?
You can make the crumble topping and refrigerate for up to 48 hours, or cook the apple filling a day ahead; reheat the apples in the skillet and sprinkle on the chilled crumble to finish.
My apples turned mushy—what went wrong?
Overcooking or using very soft apples will cause loss of structure; next time slice to 1/4 inch, reduce stirring, and stop cooking when apples are tender but still hold their shape.
About the author
Jake WoodsHello, I'm Jake. I started this recipe site with the idea that I hated recipe websites that overwhelm you with long stories and ads just to see plain content that's not helpful. My goal is to provide you with quality recipes, simple ideas and a fun cooking experience. There's lots of fun things to cook, and I think as you browse the site you'll find that TopShelf.Recipes is the place for quality recipes on the web.
See all recipes by Jake Woods →Ratings & Reviews
Did you make this recipe?
Be the first to share your experience.
Nutrition Facts
Per serving: 1 serving (265g)
Nutrition values are estimated from USDA ingredient data and may vary based on preparation, brands, and portion sizes. Values are provided for informational purposes only.
Keep Reading
Guides & articles for this recipe

Healthy Eating
Gluten-Free Weeknight Grilling Plan
A 7-day gluten-free weeknight grilling plan with quick, family-friendly recipes, prep-ahead timelines, and a printable shopping list that spotlights late-summer produce and pantry staples. Includes clear cross-contamination safety tips and simple swaps to keep dinners fast and crowd-pleasing.

Healthy Eating
Low-Fat Grill Swaps for Big Flavor
A practical guide to trimming fat from grilled meals without losing juiciness or char. Learn yogurt- and citrus-based marinades, lean protein picks, searing and indirect-heat tricks, plus 5 quick low-fat marinades and a simple weeknight plan.

Recipes
DIY Edible Monster Eyes Candy
Make safe, fun edible monster eyes for cupcakes, cookies, and candy trays. Step-by-step recipes show baking-soda balls, chocolate and fondant eyes, wafer-print options, plus assembly, storage, and kid-friendly safety tips.
More from Stovetop
View all Stovetop recipes →
Rotisserie Chicken and Wild Rice Soup

One-Pot Beef Bolognese

Classic Marinara Sauce from Scratch

Xiao Long Bao Soup Dumplings

Labor Day Grilled Lobster Rolls with Charred Scallion Brown Butter & Lemon‑Herb Aioli

Stovetop Dutch-Oven Herb-Crusted Beef Roast with Pan Gravy

Dubai Tacos

Italian-Style Pot Roast with Tomatoes Olives and Fresh Herbs

Hainanese Chicken Rice
Ask me anything about this recipe — substitutions, scaling, techniques, timing.
Powered by AI · 6 questions per 5 minutes, 30 per day