Tilapia Piccata with Lemon Caper Pan Sauce (Skillet)
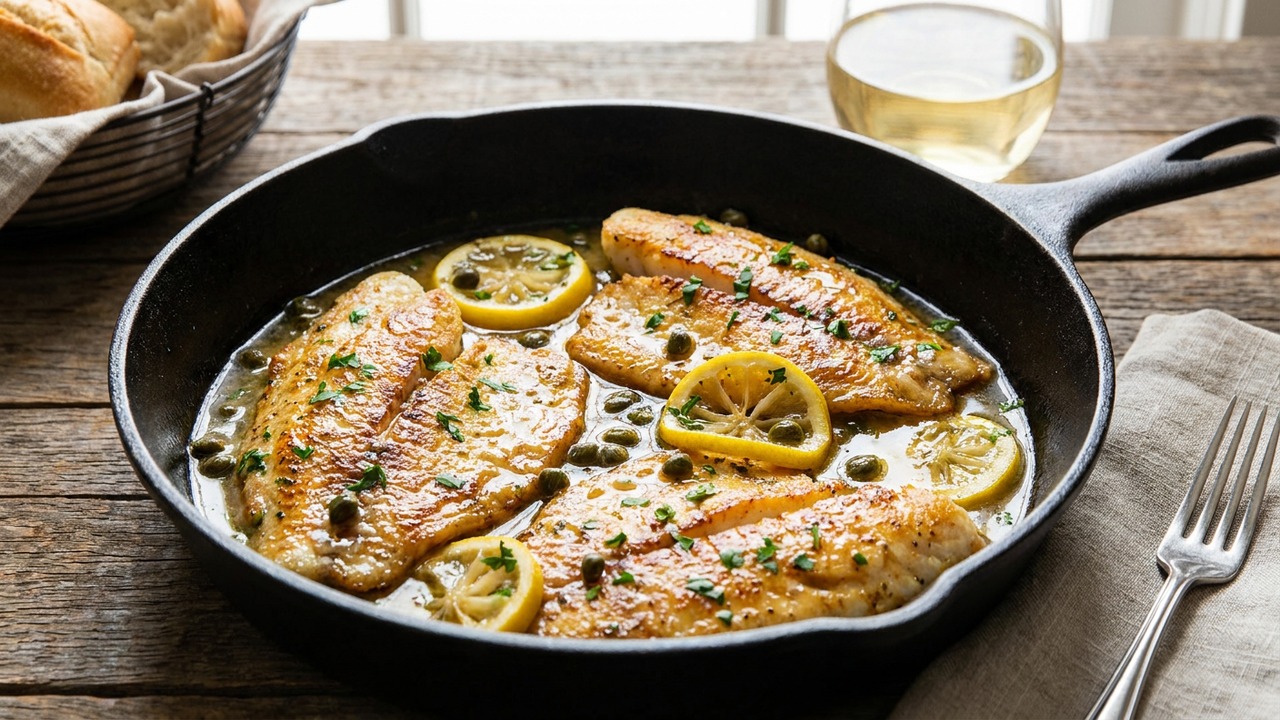
A bright, elegant weeknight or date-night skillet dish: lightly dredged tilapia fillets pan-seared until golden, then finished with a tangy lemon-caper pan sauce. Ready in about 25 minutes, it’s an easy way to get restaurant-worthy flavor at home.
Ingredient Spotlight
Capers
Capers are the pickled unopened flower buds of the caper bush, common in Mediterranean and Middle Eastern cuisines. They have a small, briny, salty, and slightly lemony flavor that adds bright, savory pops to sauces and fish dishes. You’ll most often find them jarred in brine (or sometimes packed in salt) in the condiment or pickles aisle of supermarkets and specialty stores. Good substitutes include chopped green olives or cornichons, or a mix of lemon zest plus a pinch of salt if you need the bright, tangy element.
Ingredient Spotlight
Dry white wine
Dry white wine is an alcoholic fermented grape wine with little residual sugar, frequently used in French, Italian, and other European cooking to deglaze pans and add acidity and aromatic complexity. It contributes a bright, fruity-acid balance and subtle yeasty or floral notes to sauces without sweetness. Purchase inexpensive dry varieties like Sauvignon Blanc, Pinot Grigio, or unoaked Chardonnay at liquor stores or supermarkets. If you prefer not to use alcohol, substitute low-sodium chicken or vegetable broth with a splash of lemon juice or white wine vinegar (about 3:1 broth to vinegar), or use dry vermouth for a similar flavor profile.
Jake Woods's note
"This tilapia piccata gives you the classic lemon-caper sauce without the long cook time of veal or chicken—perfect for a fast but special weeknight meal. Look for firm, evenly sized fillets so they sear quickly and evenly."
About This Recipe
Tilapia Piccata is all about contrast: a whisper-thin golden crust gives way to delicate, flaky white fish, while a bright lemon‑caper pan sauce brings immediate lift and savory snap. This skillet version keeps things simple—lightly dredging the fillets in flour to encourage color, searing quickly so the flesh stays tender, then using the browned fond to build an acidic, buttery sauce in minutes. The result looks and tastes restaurant‑caliber but comes together in roughly the time it takes to cook pasta.
What makes this recipe sing at home is attention to temperature and timing: a hot pan for color, minimal handling so the fillets don’t fall apart, and finishing the sauce with cold butter and fresh lemon so the emulsion glows without becoming greasy. Dry white wine and capers add depth and salt without masking the fish, while parsley adds the last bright note. It’s perfect for weeknights when you want something light and fast, but also elegant enough for a quiet date night.
Ingredients for Tilapia Piccata with Lemon Caper Pan Sauce (Skillet)
- 4 fillets Tilapia fillets
- 1 1/4 tsp (1 tsp salt + 1/4 tsp pepper) Kosher salt & freshly ground black pepper (combined)
- 1/2 cup All-purpose flour (for dredging)
- 2 tbsp Extra-virgin olive oil
- 2 tbsp Unsalted butter
- 2 cloves Garlic, minced
- 1/3 cup Dry white wine
- 2 tbsp Capers, drained
- 2 tbsp Fresh lemon juice (about 1 lemon)
- 2 tbsp Fresh parsley, chopped
How to Make Tilapia Piccata with Lemon Caper Pan Sauce (Skillet)
Step 1: Season and dredge the fillets
Pat the tilapia fillets dry with paper towels and season both sides with the kosher salt and black pepper. Place the flour in a shallow dish and lightly dredge each fillet, shaking off excess; set the fillets on a plate while you heat the pan.For this step
- 4 filletsTilapia fillets
- 1 1/4 tsp (1 tsp salt + 1/4 tsp pepper)Kosher salt & freshly ground black pepper (combined)
- 1/2 cupAll-purpose flour (for dredging)
Step 2: Pan-sear the tilapia
Heat a large skillet over medium-high heat and add the olive oil and 1 tablespoon butter. When the oil is shimmering, add the fillets (work in batches if needed) and cook 2–3 minutes per side, until golden brown and cooked through; transfer to a plate and tent loosely with foil.For this step
- 2 tbspExtra-virgin olive oil
Step 3: Make the lemon-caper pan sauce
Reduce heat to medium, add the remaining 1 tablespoon butter, then add the minced garlic and sauté 30 seconds until fragrant. Pour in the white wine to deglaze the pan, scraping any browned bits, then stir in the capers and lemon juice; simmer gently 1–2 minutes to reduce slightly and meld flavors.For this step
- 2 clovesGarlic, minced
- 1/3 cupDry white wine
- 2 tbspCapers, drained
- 2 tbspFresh lemon juice (about 1 lemon)
Step 4: Finish the sauce and reheat the fish
Taste the sauce and adjust seasoning with a pinch of salt and pepper if needed. Return the tilapia to the skillet spooning sauce over each fillet and cook 1 minute just to heat through and glaze the fish.Step 5: Plate and garnish
Transfer fillets to plates, spoon remaining pan sauce over top, and sprinkle with chopped fresh parsley. Serve immediately with simple sides like sautéed greens, rice, or roasted potatoes.For this step
- 2 tbspFresh parsley, chopped


- Pat the tilapia fillets dry with paper towels and season both sides with the kosher salt and black pepper. Place the flour in a shallow dish and lightly dredge each fillet, shaking off excess; set the fillets on a plate while you heat the pan.
- Heat a large skillet over medium-high heat and add the olive oil and 1 tablespoon butter. When the oil is shimmering, add the fillets (work in batches if needed) and cook 2–3 minutes per side, until golden brown and cooked through; transfer to a plate and tent loosely with foil.
- Reduce heat to medium, add the remaining 1 tablespoon butter, then add the minced garlic and sauté 30 seconds until fragrant. Pour in the white wine to deglaze the pan, scraping any browned bits, then stir in the capers and lemon juice; simmer gently 1–2 minutes to reduce slightly and meld flavors.
- Taste the sauce and adjust seasoning with a pinch of salt and pepper if needed. Return the tilapia to the skillet spooning sauce over each fillet and cook 1 minute just to heat through and glaze the fish.
- Transfer fillets to plates, spoon remaining pan sauce over top, and sprinkle with chopped fresh parsley. Serve immediately with simple sides like sautéed greens, rice, or roasted potatoes.
Tilapia Piccata with Lemon Caper Pan Sauce (Skillet) Tips
Dry Fillets Thoroughly
Pat the tilapia completely dry before dredging so the flour adheres and you get an even, golden crust rather than steaming the fish.
Hot Pan, Quick Sear
Preheat the skillet until the oil shimmers; cook 2–3 minutes per side and resist flipping until a clear golden edge forms to prevent sticking and tearing.
Don’t Overcrowd the Pan
Work in batches if needed—crowding drops the pan temperature and results in soggy, unevenly cooked fillets.
Finish With Cold Butter
Stir in cold butter off the heat (or on very low heat) to slightly emulsify the sauce and give it a glossy, rounded mouthfeel.
Use the Fond
Scrape the browned bits after searing before adding wine; that fond is the backbone of the sauce and concentrates flavor quickly.
Tilapia Piccata with Lemon Caper Pan Sauce (Skillet) Variations and Substitutions
Gluten‑Free Dredge
Swap the all‑purpose flour for rice flour or a 1:1 gluten‑free blend; the crust will be just as crisp and light.
Dairy‑Free Option
Use extra olive oil instead of butter for searing and finish the sauce with a tablespoon of olive oil whisked in off the heat to add richness.
Capers & Herb Twist
Add a tablespoon of chopped dill or tarragon with the parsley for a fragrant, slightly anise‑y note that pairs well with delicate tilapia.
Swap Proteins
Use the same method for thin sole, flounder, or large shrimp—adjust cooking time so shrimp turn opaque and fish remains flaky but not dry.
How to Store and Make Tilapia Piccata with Lemon Caper Pan Sauce (Skillet) Ahead
Store leftover tilapia and sauce together in an airtight container in the refrigerator for up to 48 hours; the flour crust will soften but the flavors hold. For best texture, keep the sauce separate when possible. Reheat gently in a skillet over low heat with a splash of water or white wine to loosen the sauce—avoid microwaving, which can make the fish rubbery.
What to Serve With Tilapia Piccata with Lemon Caper Pan Sauce (Skillet)
Serve with simple, neutral starches that soak up the sauce—herbed basmati rice, lemony quinoa, or buttery new potatoes are ideal. Add sautéed garlic spinach, broccolini, or green beans dressed with olive oil and lemon to echo the sauce’s brightness. Pair with a crisp white wine like Sauvignon Blanc, Vermentino, or a dry Riesling for a light, complementary finish.
Tilapia Piccata with Lemon Caper Pan Sauce (Skillet) FAQs
Can I use frozen tilapia for this recipe?
Yes—thaw completely and pat very dry before seasoning and dredging to avoid excess moisture that prevents browning.
What can I substitute for white wine?
Use low‑sodium chicken broth plus 1 teaspoon white wine vinegar or a splash of vermouth; the goal is acidity and deglazing power rather than alcohol content.
How do I know the fish is done?
Tilapia is done when it flakes easily with a fork and is opaque all the way through; typically 2–3 minutes per side in a hot pan for thin fillets.
Can I make the sauce ahead of time?
You can make the sauce up to a day ahead and refrigerate, but reheat gently and whisk in a little cold butter or oil off the heat to restore gloss before spooning over the fish.
Is the flour dredge necessary?
The light flour coating promotes browning and gives a slightly silky texture to the exterior, and it helps the sauce cling—if you prefer to skip it, expect a paler appearance and slipperier surface.
My fish stuck to the pan—what happened?
Either the pan wasn’t hot enough, there was too much moisture on the fillets, or you flipped too early; next time dry the fish well, wait for the oil to shimmer, and let a golden edge form before flipping.
About the author
Jake WoodsHello, I'm Jake. I started this recipe site with the idea that I hated recipe websites that overwhelm you with long stories and ads just to see plain content that's not helpful. My goal is to provide you with quality recipes, simple ideas and a fun cooking experience. There's lots of fun things to cook, and I think as you browse the site you'll find that TopShelf.Recipes is the place for quality recipes on the web.
See all recipes by Jake Woods →Ratings & Reviews
Did you make this recipe?
Be the first to share your experience.
Nutrition Facts
Per serving: 1 fillet
Nutrition values are estimated from USDA ingredient data and may vary based on preparation, brands, and portion sizes. Values are provided for informational purposes only.
Keep Reading
Guides & articles for this recipe

Healthy Eating
Gluten-Free Weeknight Grilling Plan
A 7-day gluten-free weeknight grilling plan with quick, family-friendly recipes, prep-ahead timelines, and a printable shopping list that spotlights late-summer produce and pantry staples. Includes clear cross-contamination safety tips and simple swaps to keep dinners fast and crowd-pleasing.

Healthy Eating
Low-Fat Grill Swaps for Big Flavor
A practical guide to trimming fat from grilled meals without losing juiciness or char. Learn yogurt- and citrus-based marinades, lean protein picks, searing and indirect-heat tricks, plus 5 quick low-fat marinades and a simple weeknight plan.

Recipes
DIY Edible Monster Eyes Candy
Make safe, fun edible monster eyes for cupcakes, cookies, and candy trays. Step-by-step recipes show baking-soda balls, chocolate and fondant eyes, wafer-print options, plus assembly, storage, and kid-friendly safety tips.
More from Stovetop
View all Stovetop recipes →
One-Pot Beef Bolognese

Stovetop Dutch-Oven Herb-Crusted Beef Roast with Pan Gravy

Dubai Tacos

Italian-Style Pot Roast with Tomatoes Olives and Fresh Herbs

Labor Day Grilled Lobster Rolls with Charred Scallion Brown Butter & Lemon‑Herb Aioli

Hainanese Chicken Rice

Pad Krapow Pork

Twice-Fried Restaurant Style Crispy Sweet Potato Fries (Stovetop Deep Fry)

Xiao Long Bao Soup Dumplings
Ask me anything about this recipe — substitutions, scaling, techniques, timing.
Powered by AI · 6 questions per 5 minutes, 30 per day