Keller Fried Chicken
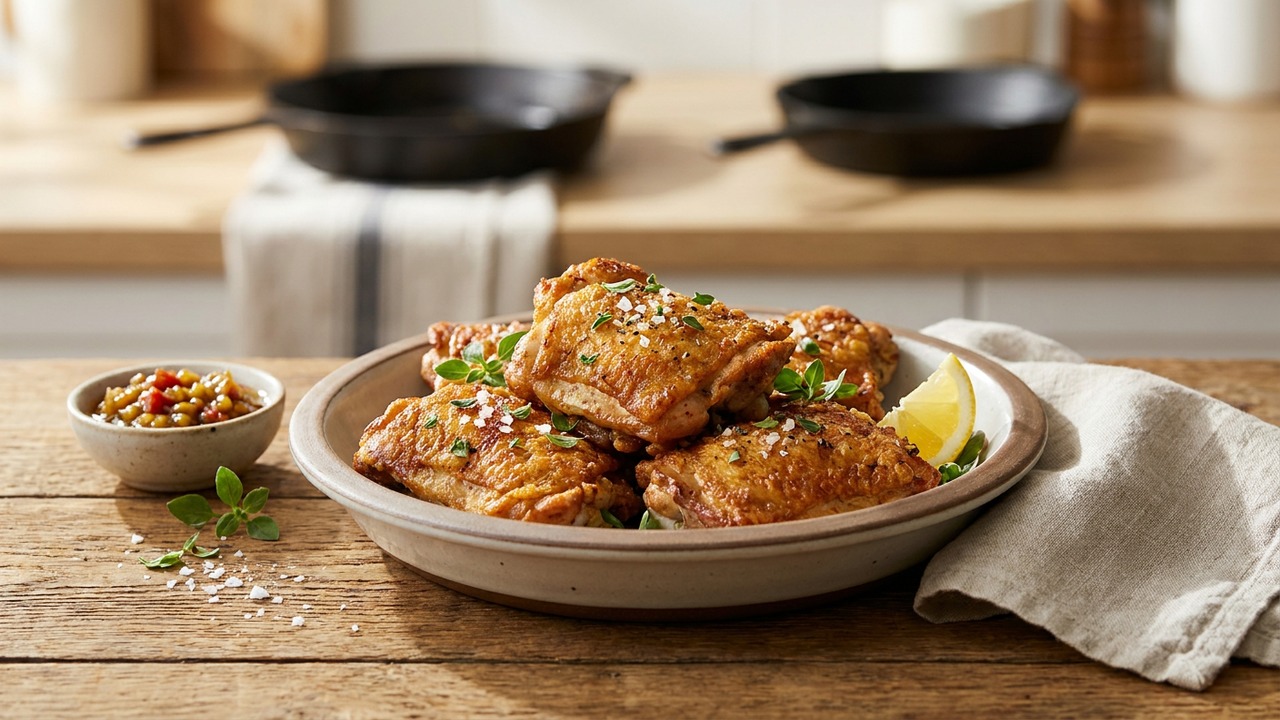
A restaurant-style, stovetop fried chicken inspired by Thomas Keller’s emphasis on technique: a short brine for seasoning, a crisp flour-cornstarch dredge, and careful pan-frying with butter and oil for deep, even browning. This method yields juicy dark meat and ultra-crisp skin without a deep fryer.
Jake Woods's note
"This recipe shines for a comforting weekend dinner or an elevated picnic chicken. Home cooks will appreciate the clear, manageable steps that produce reliably crisp skin and juicy meat without specialized equipment."
About This Recipe
This is a home-friendly take on the kind of methodical, technique-forward fried chicken you might find in a fine-dining kitchen: a short wet brine to season the meat, a flour–cornstarch dredge for an impossibly crisp crust, and a controlled pan fry finished by spooning hot butter and oil over the skin for deep, even browning. The short brine (1½–2 hours) seasons through without turning the skin flabby; cornstarch in the coating gives a glassy, shatter-ready crunch that plain flour alone can’t match. Cooking in a heavy skillet keeps the surface contact even, while the butter rounds out flavor and accelerates Maillard color without letting the fat burn, thanks to the stabilizing neutral oil.
This recipe is for cooks who want restaurant results without a deep-fryer — it asks for patience and attention to heat but rewards you with juicy dark meat and skin that sings when you bite it. The small steps that matter here are easy to miss: pat the chicken bone-dry, let the coating rest so it adheres, don’t crowd the pan, and rest the cooked pieces on a wire rack so the crust stays crisp. Once you get the rhythm of brine, dredge, and steady heat, this method becomes a dependable way to make show-stopping fried chicken at home.
Ingredients for Keller Fried Chicken
- 3 lb Bone-in, skin-on chicken pieces (mix thighs and drumsticks), about 3 lb
- 6 cups Cold water (for brine)
- 3 tbsp Kosher salt (for brine)
- 2 tbsp Granulated sugar (for brine)
- 2 cups All-purpose flour (dredge)
- 1/2 cup Cornstarch (adds crispness)
- 2 tsp Freshly ground black pepper
- 1 tbsp Sweet paprika
- 1/2 cup Neutral oil (canola or peanut) for frying
- 4 tbsp Unsalted butter
How to Make Keller Fried Chicken
Step 1: Short brine to season
In a large bowl or container combine the cold water, kosher salt, and sugar, stirring until dissolved. Submerge the chicken pieces in the brine, cover, and refrigerate 1.5–2 hours (no longer for best texture). After brining, remove chicken, rinse lightly if desired, and pat thoroughly dry with paper towels.For this step
- 3 lbBone-in, skin-on chicken pieces (mix thighs and drumsticks), about
- 6 cupsCold water (for brine)
- 3 tbspKosher salt (for brine)
- 2 tbspGranulated sugar (for brine)
Step 2: Make the seasoned dredge and coat
In a shallow dish whisk together the flour, cornstarch, black pepper, and paprika. Season lightly with a pinch of kosher salt if you like (the brine already seasons the meat). Dredge each piece, pressing to adhere and shaking off excess; place on a wire rack and let rest 10–15 minutes so the coating sets.For this step
- 2 cupsAll-purpose flour (dredge)
- 1/2 cupCornstarch (adds crispness)
- 2 tspFreshly ground black pepper
- 1 tbspSweet paprika
Step 3: Heat the pan and fat
Use a large heavy skillet (cast iron or stainless) and add the oil; warm over medium until shimmering but not smoking. Add the butter and let it melt and foam—this combination gives flavor and helps brown the crust while the oil stabilizes frying temperature.For this step
- 1/2 cupNeutral oil (canola or peanut) for frying
- 4 tbspUnsalted butter
Step 4: Pan-fry to a deep golden crust
Arrange chicken pieces skin side down in a single layer without crowding; cook undisturbed over medium for 8–12 minutes until the skin is deep golden brown. Flip each piece, reduce heat to medium-low, and continue cooking, spooning the butter-oil mixture over the chicken occasionally, until an instant-read thermometer inserted into the thickest part reads 165°F (74°C), about 12–18 more minutes depending on piece size.Step 5: Rest and serve
Transfer the cooked chicken to a wire rack set over a sheet pan and let rest 8–10 minutes to relax the juices and keep the coating crisp. Taste for seasoning and serve warm.


- In a large bowl or container combine the cold water, kosher salt, and sugar, stirring until dissolved. Submerge the chicken pieces in the brine, cover, and refrigerate 1.5–2 hours (no longer for best texture). After brining, remove chicken, rinse lightly if desired, and pat thoroughly dry with paper towels.
- In a shallow dish whisk together the flour, cornstarch, black pepper, and paprika. Season lightly with a pinch of kosher salt if you like (the brine already seasons the meat). Dredge each piece, pressing to adhere and shaking off excess; place on a wire rack and let rest 10–15 minutes so the coating sets.
- Use a large heavy skillet (cast iron or stainless) and add the oil; warm over medium until shimmering but not smoking. Add the butter and let it melt and foam—this combination gives flavor and helps brown the crust while the oil stabilizes frying temperature.
- Arrange chicken pieces skin side down in a single layer without crowding; cook undisturbed over medium for 8–12 minutes until the skin is deep golden brown. Flip each piece, reduce heat to medium-low, and continue cooking, spooning the butter-oil mixture over the chicken occasionally, until an instant-read thermometer inserted into the thickest part reads 165°F (74°C), about 12–18 more minutes depending on piece size.
- Transfer the cooked chicken to a wire rack set over a sheet pan and let rest 8–10 minutes to relax the juices and keep the coating crisp. Taste for seasoning and serve warm.
Keller Fried Chicken Tips
Pat the skin bone-dry
Thorough drying after brining is essential; any surface moisture will steam the coating and prevent a crisp crust, so use plenty of paper towels.
Let the dredge set
After coating, rest pieces on a wire rack for 10–15 minutes so the flour mixture adheres — this reduces loss of the crust in the pan.
Control pan temperature
Start on medium to render fat and brown, then lower to medium-low after flipping so the interior reaches 165°F without burning the crust.
Use oil + butter
The neutral oil raises the smoke point while butter adds flavor; combine them so you get color from butter without smoking or bitterness.
Finish on a rack
Drain cooked pieces on a wire rack over a sheet pan; letting them sit on paper towels will trap steam and soften the crust.
Keller Fried Chicken Variations and Substitutions
Buttermilk brine
Replace the water, salt, and sugar brine with 2 cups buttermilk plus 2 cups water and 1 tablespoon kosher salt for a tangy, tender result and slightly different crust adhesion.
Smoky-spiced crust
Add 1 teaspoon smoked paprika, ½ teaspoon cayenne, and 1 teaspoon garlic powder to the dredge for a bolder, smokier profile that pairs well with honey or hot sauce.
Gluten-free dredge
Use a 2:1 ratio of rice flour to cornstarch (or 100% rice flour for drier climates) to preserve crispness for guests avoiding gluten.
Oven-finish for thick pieces
If pieces are very large, brown skin-side down, then transfer the skillet to a 375°F oven to finish until 165°F to avoid over-browning the crust while cooking through.
How to Store and Make Keller Fried Chicken Ahead
Store leftover chicken in an airtight container in the refrigerator for up to 3–4 days. To re-crisp the crust, reheat on a wire rack in a 400°F oven or a 350°F air fryer for 8–10 minutes rather than microwaving, which makes the coating soggy. Cooked pieces can be chilled on a rack and frozen for up to 2 months; thaw overnight in the fridge and re-crisp in the oven.
What to Serve With Keller Fried Chicken
Serve this fried chicken on a wire rack over a platter with pickles, buttermilk biscuits, and a bright slaw to cut the richness; a drizzle of hot honey or a side of tangy vinegar-based BBQ sauce complements the salty, buttery crust. For drinks, a crisp lager, an off-dry Riesling, or classic sweet tea will balance the fat and highlight the chicken’s savory notes.
Keller Fried Chicken FAQs
Can I use chicken breasts with this method?
You can, but breasts are leaner and can dry out; consider butterflying or leaving them bone-in and slightly thicker, and reduce post-flip cooking time while ensuring internal temperature reaches 165°F.
Do I need to rinse the chicken after brining?
Rinsing is optional; a light rinse removes excess surface salt but isn’t necessary if you plan to pat the chicken very dry and don't add extra salt to the dredge.
Why add cornstarch to the flour?
Cornstarch has less protein than wheat flour and fries glassy and brittle, producing a lighter, crunchier crust and helping the coating shatter cleanly when bitten.
My butter browned too fast — how do I prevent burning?
Use the oil-to-butter combination as directed and keep the heat at medium for browning then drop to medium-low after flipping; the oil raises the overall smoke point and prevents the butter from blackening.
How do I know when the chicken is done without a thermometer?
If you don’t have a thermometer, cut into the thickest part near the bone to ensure juices run clear and there’s no pink; however, an instant-read thermometer is the safest way to reach 165°F.
Why did my crust separate from the skin?
Separation usually happens when the coating was too wet, the chicken wasn’t dry enough, or the oil was too hot causing rapid shrinkage; dry well, let the coating set, and moderate your heat for even cooking.
About the author
Jake WoodsHello, I'm Jake. I started this recipe site with the idea that I hated recipe websites that overwhelm you with long stories and ads just to see plain content that's not helpful. My goal is to provide you with quality recipes, simple ideas and a fun cooking experience. There's lots of fun things to cook, and I think as you browse the site you'll find that TopShelf.Recipes is the place for quality recipes on the web.
See all recipes by Jake Woods →Ratings & Reviews
Did you make this recipe?
Be the first to share your experience.
Nutrition Facts
Per serving: 1 serving
Nutrition values are estimated from USDA ingredient data and may vary based on preparation, brands, and portion sizes. Values are provided for informational purposes only.
Keep Reading
Guides & articles for this recipe

Healthy Eating
Gluten-Free Weeknight Grilling Plan
A 7-day gluten-free weeknight grilling plan with quick, family-friendly recipes, prep-ahead timelines, and a printable shopping list that spotlights late-summer produce and pantry staples. Includes clear cross-contamination safety tips and simple swaps to keep dinners fast and crowd-pleasing.

Healthy Eating
Low-Fat Grill Swaps for Big Flavor
A practical guide to trimming fat from grilled meals without losing juiciness or char. Learn yogurt- and citrus-based marinades, lean protein picks, searing and indirect-heat tricks, plus 5 quick low-fat marinades and a simple weeknight plan.

Recipes
DIY Edible Monster Eyes Candy
Make safe, fun edible monster eyes for cupcakes, cookies, and candy trays. Step-by-step recipes show baking-soda balls, chocolate and fondant eyes, wafer-print options, plus assembly, storage, and kid-friendly safety tips.
More from Stovetop
View all Stovetop recipes →
Labor Day Grilled Lobster Rolls with Charred Scallion Brown Butter & Lemon‑Herb Aioli

One-Pot Beef Bolognese

Stovetop Dutch-Oven Herb-Crusted Beef Roast with Pan Gravy

Dubai Tacos

Italian-Style Pot Roast with Tomatoes Olives and Fresh Herbs

Hainanese Chicken Rice

Pad Krapow Pork

Twice-Fried Restaurant Style Crispy Sweet Potato Fries (Stovetop Deep Fry)

Xiao Long Bao Soup Dumplings
Ask me anything about this recipe — substitutions, scaling, techniques, timing.
Powered by AI · 6 questions per 5 minutes, 30 per day