Focaccia Genovese
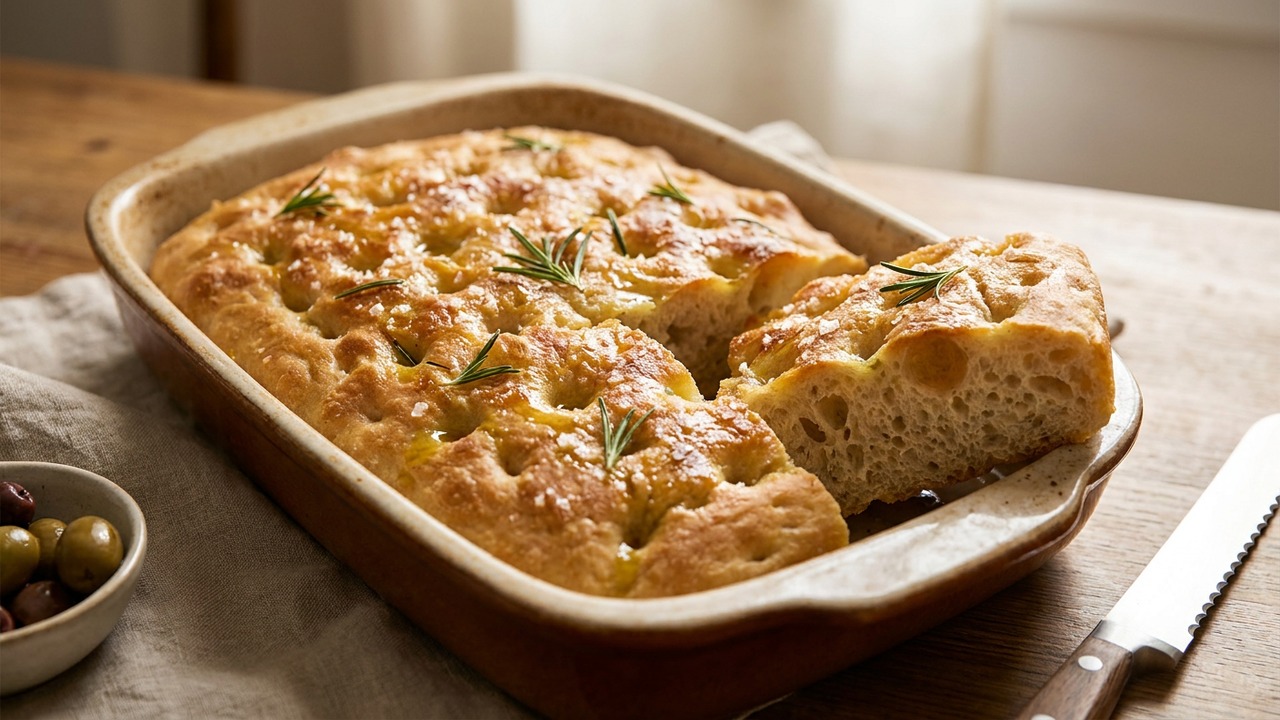
A classic Genoese focaccia with an airy, olive-oil–rich crumb and signature dimples. This authentic method emphasizes high hydration, gentle handling, and plenty of extra-virgin olive oil for a crisp golden crust and tender interior.
Jake Woods's note
"This focaccia shines as an elegant snack, sandwich base, or side for soups and salads; the long, gentle rises and generous oil make the crumb incredibly open and flavorful. Home bakers will love how few ingredients produce a restaurant-quality, olive oil–forward loaf."
About This Recipe
Focaccia Genovese is the everyday bread of Liguria: olive-oil–slick, bronzed at the edges, and scented with rosemary and coarse salt. This version leans into what makes the original shine — a very wet dough, a generous oil quotient incorporated both into the dough and on top, and that familiar choreography of dimpling before baking. The result is a deeply flavored yet airy crumb with a tender, almost pillowy interior and a thin, crisp crust that breaks into glossy, savory shards when pulled apart.
If you bake regularly but haven’t tried a high-hydration focaccia, this recipe is forgiving and instructive. The short, gentle knead and periodic stretch-and-folds build structure without tearing the gluten you worked to form, and the option to retard the dough overnight rewards patience with complex, slightly tangy notes. Use a well-oiled rimmed pan to get those caramelized edges and don’t skimp on finishing oil and flaky salt — they’re not garnish so much as an essential layer of flavor. This is a dish for casual sharing: tear, drizzle, and dunk into soups, salads, or a bright tomato salsa.
Ingredients for Focaccia Genovese
- 4 1/4 cups Bread flour (or strong white flour)
- 1 1.7 cups Warm water (95–105°F / 35–40°C)
- 2 tsp Active dry yeast
- 1 tsp Granulated sugar (or honey)
- 2 tsp Fine sea salt (for dough)
- 5/8 cup Extra-virgin olive oil (divided: dough + pan + finish)
- 1 tbsp Fresh rosemary, chopped
- 1 tbsp Coarse sea salt or flaky salt (for finishing)
How to Make Focaccia Genovese
Step 1: Bloom yeast and combine flour with water
Dissolve the active dry yeast and sugar in the warm water and let sit until foamy, about 5–10 minutes. In a large bowl add the flour, then pour in the yeast mixture and stir with a spatula until a shaggy, sticky dough forms. Avoid adding extra flour; high hydration is essential for the characteristic open crumb.For this step
- 4 1/4 cupsBread flour (or strong white flour)
- 1 1.7 cupsWarm water (95–105°F / 35–40°C)
- 2 tspActive dry yeast
- 1 tspGranulated sugar (or honey)
Step 2: Incorporate salt and olive oil
Sprinkle the fine sea salt over the dough and add about two-thirds of the olive oil. Use a wet hand or dough scraper to fold and press the oil into the dough, or perform a short, gentle knead for 2–3 minutes until cohesive and glossy. The dough should remain tacky and soft — this oil-first method gives the focaccia its rich texture.For this step
- 2 tspFine sea salt (for dough)
Step 3: Bulk fermentation with folds
Cover the bowl and let the dough rise at room temperature for 90–120 minutes, performing 2 sets of gentle stretch-and-folds every 30–45 minutes to build strength without aggressive kneading. Between folds the dough will relax and rise, growing noticeably airy and elastic. A warm draft-free spot (75–80°F / 24–27°C) gives best results.Step 4: Prepare pan, transfer dough, and dimple
Generously oil a 9x13-inch (or similar) rimmed baking pan with about a tablespoon of the remaining oil and transfer the dough into the pan. With heavily oiled fingertips, gently stretch and coax the dough to fill the pan, then press deep dimples across the surface with your fingertips to create the classic focaccia texture. Drizzle the remaining olive oil over the top and sprinkle with chopped rosemary and coarse salt.For this step
- 1 tbspFresh rosemary, chopped
- 1 tbspCoarse sea salt or flaky salt (for finishing)
Step 5: Final rise (or retarding option)
Cover the pan and let the dough proof for 30–45 minutes at room temperature until noticeably puffy, or for a more developed flavor refrigerate overnight (8–12 hours) and bring back to room temp before baking. The surface should feel airy and slightly jiggly when ready.Step 6: Bake until golden and finish with olive oil
Preheat the oven to 450°F (230°C). Bake the focaccia in the middle rack for 20–25 minutes, rotating once if needed, until deep golden brown and crisp at the edges. Remove from the oven, let cool briefly on a rack, then drizzle with a little extra-virgin olive oil before slicing and serving.


- Dissolve the active dry yeast and sugar in the warm water and let sit until foamy, about 5–10 minutes. In a large bowl add the flour, then pour in the yeast mixture and stir with a spatula until a shaggy, sticky dough forms. Avoid adding extra flour; high hydration is essential for the characteristic open crumb.
- Sprinkle the fine sea salt over the dough and add about two-thirds of the olive oil. Use a wet hand or dough scraper to fold and press the oil into the dough, or perform a short, gentle knead for 2–3 minutes until cohesive and glossy. The dough should remain tacky and soft — this oil-first method gives the focaccia its rich texture.
- Cover the bowl and let the dough rise at room temperature for 90–120 minutes, performing 2 sets of gentle stretch-and-folds every 30–45 minutes to build strength without aggressive kneading. Between folds the dough will relax and rise, growing noticeably airy and elastic. A warm draft-free spot (75–80°F / 24–27°C) gives best results.
- Generously oil a 9x13-inch (or similar) rimmed baking pan with about a tablespoon of the remaining oil and transfer the dough into the pan. With heavily oiled fingertips, gently stretch and coax the dough to fill the pan, then press deep dimples across the surface with your fingertips to create the classic focaccia texture. Drizzle the remaining olive oil over the top and sprinkle with chopped rosemary and coarse salt.
- Cover the pan and let the dough proof for 30–45 minutes at room temperature until noticeably puffy, or for a more developed flavor refrigerate overnight (8–12 hours) and bring back to room temp before baking. The surface should feel airy and slightly jiggly when ready.
- Preheat the oven to 450°F (230°C). Bake the focaccia in the middle rack for 20–25 minutes, rotating once if needed, until deep golden brown and crisp at the edges. Remove from the oven, let cool briefly on a rack, then drizzle with a little extra-virgin olive oil before slicing and serving.
Focaccia Genovese Tips
Embrace sticky dough
Resist the urge to add flour while mixing; the tackiness leads to the open crumb that defines Genoese focaccia.
Oil your hands liberally
Use well-oiled fingertips for shaping and dimpling to prevent tearing and to create those glossy oil wells that crisp in the oven.
Time your folds
Perform two gentle stretch-and-folds spaced 30–45 minutes apart during bulk rise to build strength without overworking the dough.
Use a rimmed pan
A rimmed baking pan helps trap the oil and encourages deep edge caramelization for the characteristic contrast of tender center and crisp rim.
Finish while hot
Drizzle a little good extra-virgin olive oil immediately after baking so it soaks into the surface and amps aroma and mouthfeel.
Focaccia Genovese Variations and Substitutions
Garlic and herb
Press thin slivers of garlic and a sprinkle of thyme into the dough with the rosemary before baking for a stronger savory profile; reduce coarse salt slightly to balance.
Tomato and olive
Top with halved cherry tomatoes and pitted olives in the dimples before baking for a Ligurian-leaning schiacciata that's rustic and colorful.
Whole-wheat blend
Replace up to 25% of the bread flour with whole-wheat for nuttiness; add a tablespoon more water if the dough feels stiffer to maintain hydration.
Overnight flavor boost
Retard the dough in the refrigerator for 8–12 hours after shaping for deeper aroma and a slightly tangier crumb, then return to room temp before baking.
How to Store and Make Focaccia Genovese Ahead
Store leftover focaccia wrapped loosely in a clean kitchen towel or in a paper-lined container at room temperature for up to two days to preserve crust texture; refrigeration will dry it out. For longer storage, slice and freeze in an airtight bag for up to one month, then reheat from frozen in a 375°F oven for 8–12 minutes. To refresh day-old focaccia, sprinkle lightly with water and warm in a skillet or oven until the surface re-crisps.
What to Serve With Focaccia Genovese
Serve warm torn pieces alongside a bowl of minestrone, a simple mixed salad, or as the base for open-faced sandwiches with prosciutto and fig jam. Pair with a bright, acidic white wine like Vermentino or a light-bodied red such as Dolcetto, and offer little bowls of extra-virgin olive oil and balsamic for dipping.
Focaccia Genovese FAQs
My dough is very sticky—did I do something wrong?
No; high hydration is intentional for this focaccia. Stickiness is normal—oil your hands for handling and avoid adding extra flour, which will tighten the crumb.
How can I tell if the dough is properly proofed before baking?
Look for a noticeably puffy, airy surface and a slight jiggle when you move the pan; the dimples should hold their shape but the dough will feel soft and billowy.
Why use coarse salt on top?
Coarse or flaky salt provides bursts of saline crunch that contrast the soft crumb and highlight the olive oil; fine salt would disappear and make the topping too salty overall.
Can I use instant yeast instead of active dry?
Yes—use about 25% less instant yeast and mix it directly into the flour; the rise timing may be slightly faster, so watch the dough rather than the clock.
I get a soggy bottom sometimes—how to avoid that?
Make sure the pan is hot from preheating the oven (place the oiled pan in while the oven heats for extra crisping) and don’t overload with oil; bake on the middle rack and allow a brief rest on a rack after baking so steam escapes.
About the author
Jake WoodsHello, I'm Jake. I started this recipe site with the idea that I hated recipe websites that overwhelm you with long stories and ads just to see plain content that's not helpful. My goal is to provide you with quality recipes, simple ideas and a fun cooking experience. There's lots of fun things to cook, and I think as you browse the site you'll find that TopShelf.Recipes is the place for quality recipes on the web.
See all recipes by Jake Woods →Ratings & Reviews
Did you make this recipe?
Be the first to share your experience.
Nutrition Facts
Per serving: 1 serving
Nutrition values are estimated from USDA ingredient data and may vary based on preparation, brands, and portion sizes. Values are provided for informational purposes only.
Keep Reading
Guides & articles for this recipe

Healthy Eating
Gluten-Free Weeknight Grilling Plan
A 7-day gluten-free weeknight grilling plan with quick, family-friendly recipes, prep-ahead timelines, and a printable shopping list that spotlights late-summer produce and pantry staples. Includes clear cross-contamination safety tips and simple swaps to keep dinners fast and crowd-pleasing.

Healthy Eating
Low-Fat Grill Swaps for Big Flavor
A practical guide to trimming fat from grilled meals without losing juiciness or char. Learn yogurt- and citrus-based marinades, lean protein picks, searing and indirect-heat tricks, plus 5 quick low-fat marinades and a simple weeknight plan.

Recipes
DIY Edible Monster Eyes Candy
Make safe, fun edible monster eyes for cupcakes, cookies, and candy trays. Step-by-step recipes show baking-soda balls, chocolate and fondant eyes, wafer-print options, plus assembly, storage, and kid-friendly safety tips.
More from Italian
View all Italian recipes →
Sicilian Sfincione Pizza

Neapolitan Pizza at Home

Cacio e Pepe Pasta

Sicilian Arancini Rice Balls

Stovetop Skillet Pizza

Zuppa di Pesce

Saltimbocca alla Romana

Classic Spaghetti Carbonara

Osso Buco alla Milanese
Ask me anything about this recipe — substitutions, scaling, techniques, timing.
Powered by AI · 6 questions per 5 minutes, 30 per day